
SvelteKit
Introduction: What is SvelteKit and Why is it Used
SvelteKit is a framework for rapidly developing robust and performant web apps using Svelte. It is similar to Next.js if you’re coming from React and similar to Nuxt if you’re coming from Vue.
But why do we use SvelteKit?
Because SvelteKit helps you build web apps while following modern best practices and providing solutions to common development challenges. It offers basic functionalities like a router to more advanced capabilities. Its extensive list of features includes build optimizations, offline support, preloading of pages, configurable rendering on the server via SSR (Server Side Rendering), in the browser through client-side rendering, or at build-time with prerendering.
1: Creating a Project
The easiest way to start building an SvelteKit app is to run npx sv create:
npx sv create my-app
cd my-app
npm install
npm run devThe first command will create a new project structure in the my-app directory, prompting you to set up some basic tools, like TypeScript. Refer to the integrations section for guidance on setting up additional tools. The subsequent commands will then install the necessary dependencies and start a server on localhost:5173.
There are two basic concepts in SvelteKit:
- Each page of your app is a Svelte component.
- You create pages by adding files to the
src/routesdirectory of your project. These will be server-rendered so that a user’s first visit to your app is as fast as possible, then a client-side app takes over.
We recommend using Visual Studio Code (aka VS Code) with the Svelte extension, but support also exists for numerous other editors.
2: Project Structure and Configuration Files
Project Files
- src
Thesrcdirectory contains the meat of your project. Everything exceptsrc/routesandsrc/app.htmlis optional.- lib contains your library code (utilities and components), which can be imported via the
$libalias, or packaged up for distribution usingsvelte-package.- server contains your server-only library code. It can be imported by using the
$lib/serveralias. SvelteKit will prevent you from importing these in client code.
- server contains your server-only library code. It can be imported by using the
- params contains any param matchers your app needs.
- routes contains the routes of your application. You can also colocate other components that are only used within a single route here.
- app.html is your page template — an HTML document containing the following placeholders:
%sveltekit.head%—<link>and<script>elements needed by the app, plus any<svelte:head>content.%sveltekit.body%— the markup for a rendered page. This should live inside a<div>or other element, rather than directly inside<body>, to prevent bugs caused by browser extensions injecting elements that are then destroyed by the hydration process. SvelteKit will warn you in development if this is not the case.%sveltekit.assets%— eitherpaths.assets, if specified, or a relative path topaths.base.%sveltekit.nonce%— a CSP nonce for manually included links and scripts, if used.%sveltekit.env.[NAME]%- this will be replaced at render time with the[NAME]environment variable, which must begin with thepublicPrefix(usuallyPUBLIC_). It will fallback to '' if not matched.
- error.html is the page that is rendered when everything else fails. It can contain the following placeholders:
%sveltekit.status%— the HTTP status.%sveltekit.error.message%— the error message.
- hooks.client.js contains your client hooks.
- hooks.server.js contains your server hooks.
- service-worker.js contains your service worker.
- lib contains your library code (utilities and components), which can be imported via the
(Whether the project contains .js or .ts files depends on whether you opt to use TypeScript when you create your project. You can switch between JavaScript and TypeScript in the documentation using the toggle at the bottom of this page.)
If you added Vitest when you set up your project, your unit tests will live in the src directory with a .test.js extension.
static
Any static assets that should be served as-is, likerobots.txtorfavicon.png, go in here.tests
If you added Playwright for browser testing when you set up your project, the tests will live in this directory.package.json
Yourpackage.jsonfile must include@sveltejs/kit,svelte, andviteas devDependencies. When you create a project withnpx sv create, you’ll also notice thatpackage.jsonincludes"type": "module". This means that.jsfiles are interpreted as native JavaScript modules withimportandexportkeywords. Legacy CommonJS files need a.cjsfile extension.svelte.config.js
This file contains your Svelte and SvelteKit configuration.tsconfig.json
This file (orjsconfig.json, if you prefer type-checked.jsfiles over.tsfiles) configures TypeScript, if you added type checking duringnpx sv create. Since SvelteKit relies on certain configuration being set a specific way, it generates its own.svelte-kit/tsconfig.jsonfile which your own config extends.vite.config.js
A SvelteKit project is really just a Vite project that uses the@sveltejs/kit/viteplugin, along with any other Vite configuration.
3: Testing if it Works
When you have created a SvelteKit project, the first thing that you should do is to install an extension called “Svelte for VS Code” in VS Code: 
If you have installed the extension, run the project in the browser:
- Type
npm run devin the terminal and press enter (if you are using Yarn or something else, replace npm). Now in the terminal, you see a link to your project in the browser: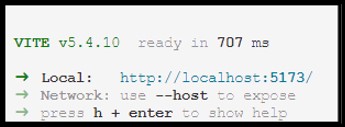 Open the link in your browser and you will see the following page:
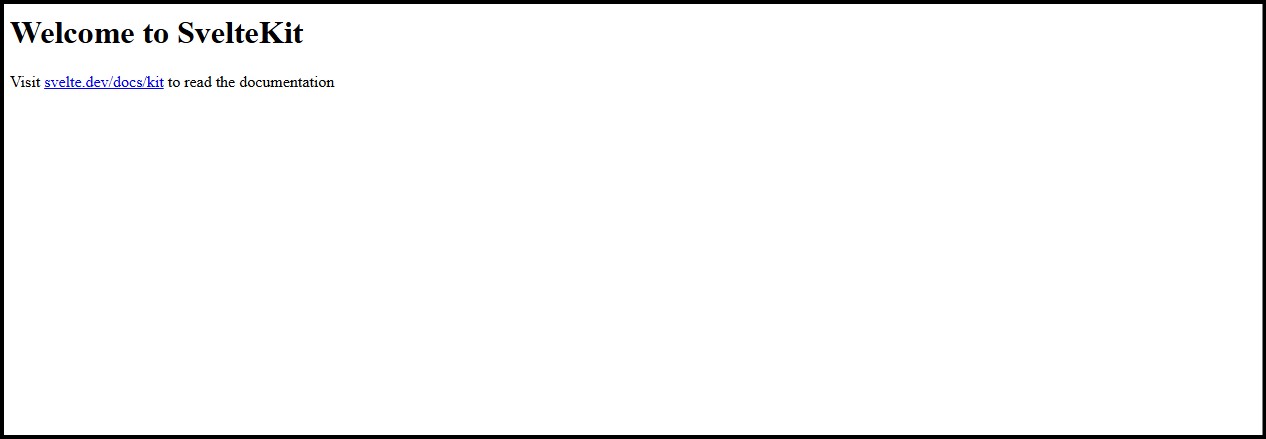
The text that you see at this moment in the browser is located in the src/routes/+page.svelte file.
If that’s the case, you’re doing well at the moment.
4: Making a Portfolio Site
Now let’s make a portfolio site about Belgium. First of all, add navigation to the layout that you use. In my case, it is the app.html layout in src/routes/app.html.
Code Example:
<nav>
    <ul>
        <li><a href="/">Home</a></li>
        <li><a href="#">item 2</a></li>
    </ul>
</nav>And in the browser it looks like this: 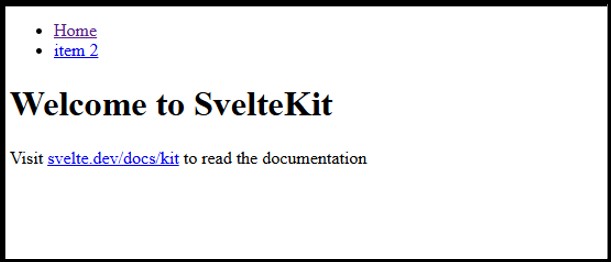
Now fill the home page with html texts. In this case it’s going to be interesting things about Belgium.