WordPress with Bedrock
In this tutorial, we’ll explore Bedrock, a powerful boilerplate designed to enhance WordPress development by introducing modern tools and best practices. Bedrock reimagines how WordPress projects are structured, offering developers a cleaner, more professional environment for building websites.
Table of contents
- WordPress with Bedrock
Introduction to WordPress with Bedrock
Bedrock is a WordPress boilerplate developed by Roots that provides a modern approach to structuring Wordpress projects. Using Bedrock allows developers to create a WordPress website with a more organized structure, leveraging tools that improve development efficiency and security.
Why should you use Bedrock Some key advantages include:
- Improved Folder Structure: Bedrock organizes WordPress files and dependencies more cleanly, separating application and public files.
- Dependency Management with Composer: Easily manage WordPress and plugin dependencies through Composer, ensuring consistent and versioned installations.
- Environment-Specific Configurations: Use environment-specific configuration files, allowing smooth transitions between development, staging, and production.
- Environment Variables with Dotenv: Store sensitive information (like database credentials) securely with Dotenv, protecting your project and enhancing configuration flexibility.
- Autoloader for mu-plugins: Enable regular plugins as mu-plugins, simplifying development while improving site performance.
- Enhanced Security: By separating the web root, using secure password hashing (wp-password-bcrypt), and minimizing publicly accessible files, Bedrock enhances the security of WordPress applications.
However a few requirements are present in order to use Bedrock:
- PHP -> 8.0 or higher
- Composer
But these will be brought up when going through the installation later on
Prerequisites
Before starting, you will have to install the following apps or dependency or your device:
Steps
Set Up Composer
- mac users:
- brew install composer
- windows users:
- download using the composer website
- mac users:
Set Up a New Site in Local
Open Local by Flywheel and set up a new site by following the on screen steps:
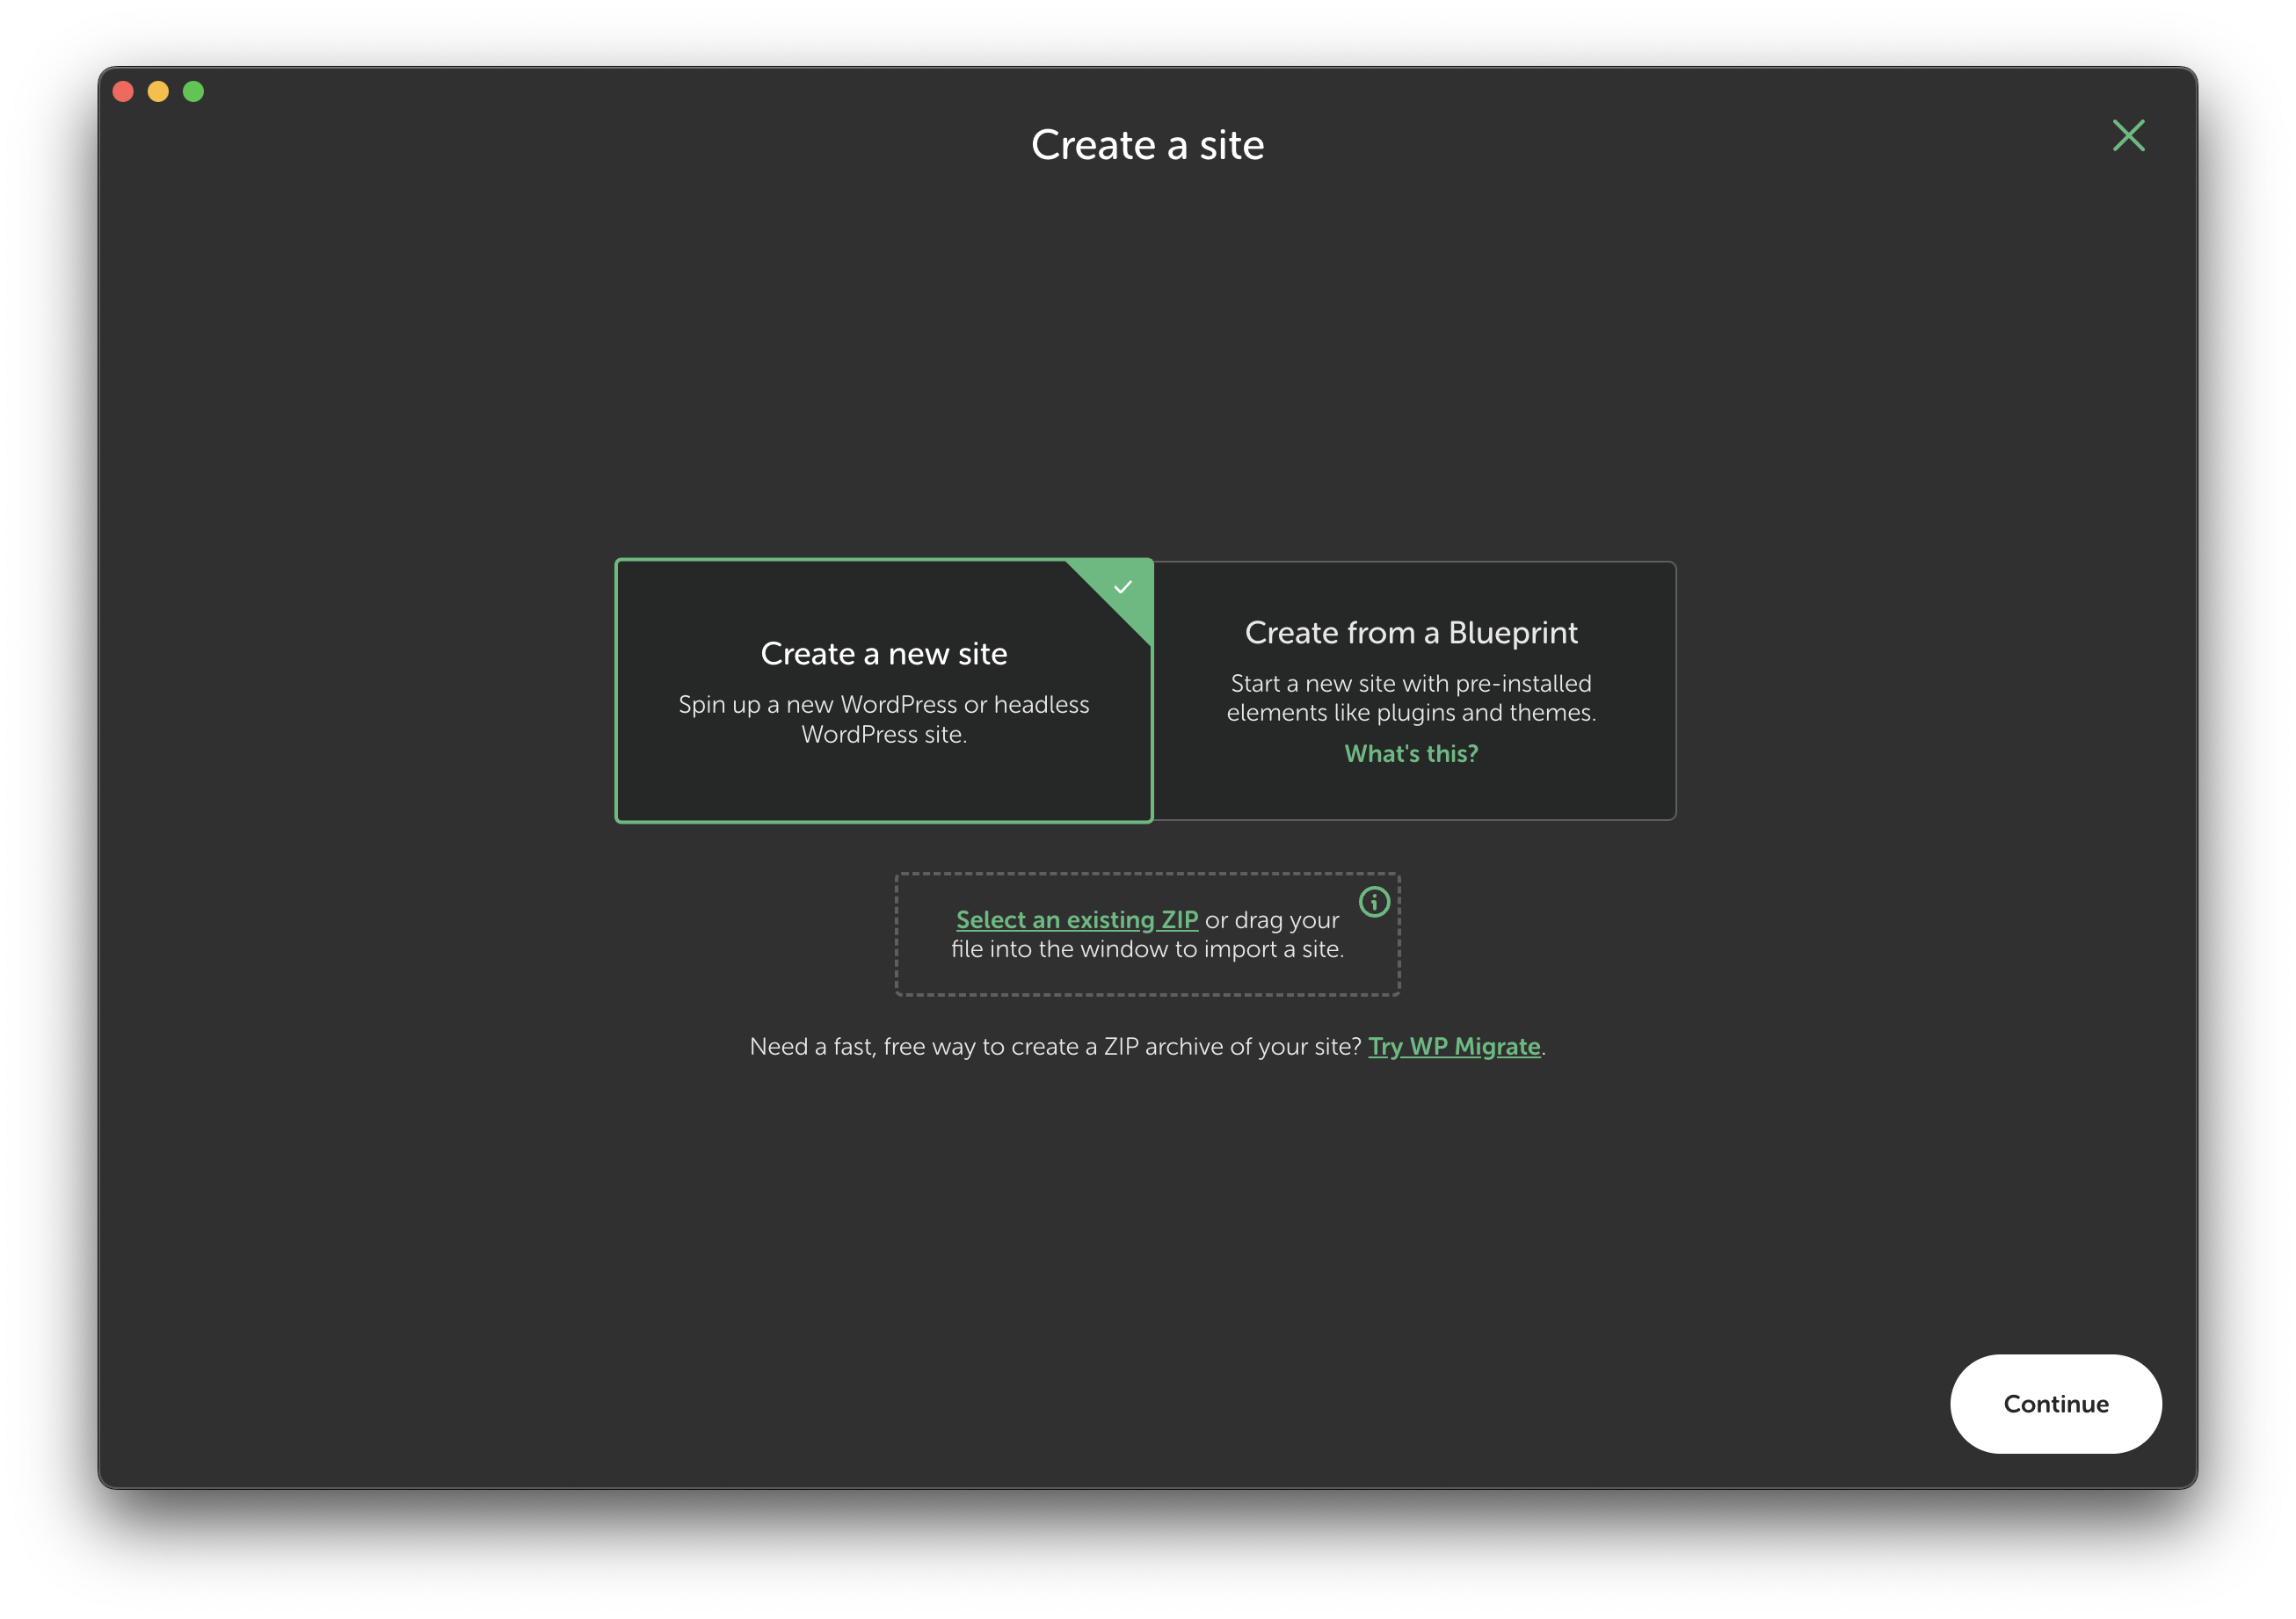
- Choose the create a new site option. The blueprint option allows you to start a site by utilizing pre-saved site settings such as themes and plugins.
- Next choose your site name
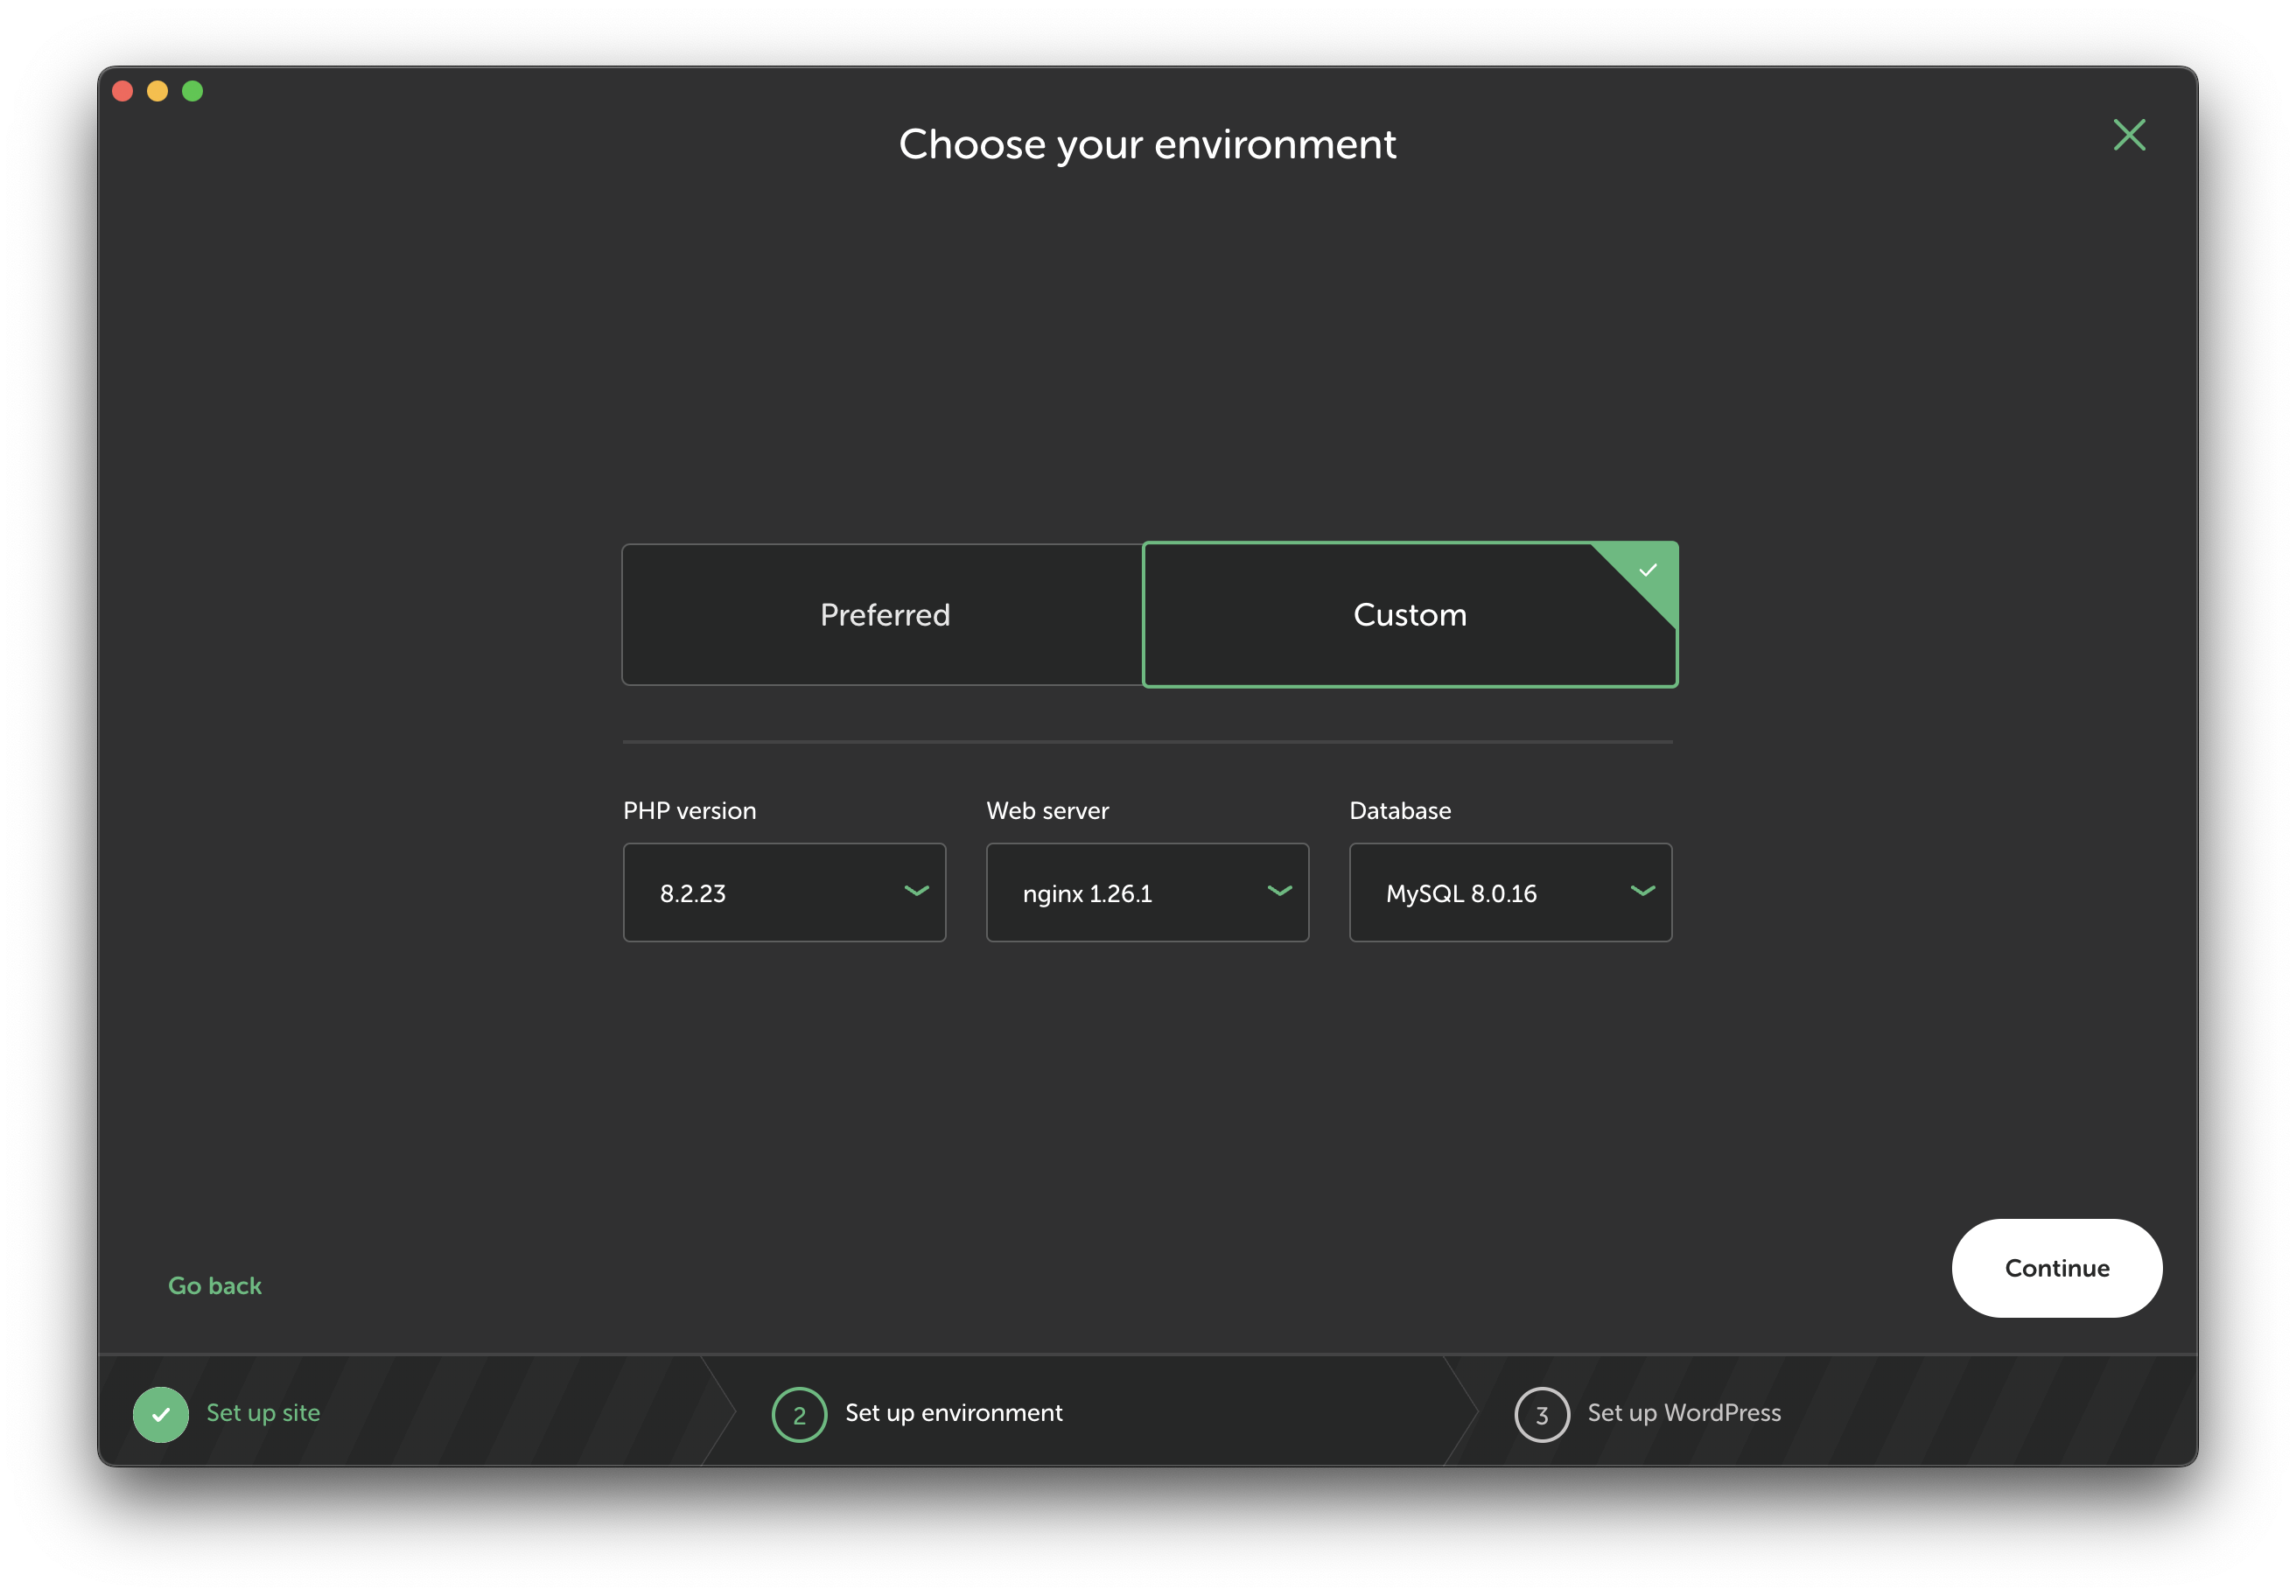
- Then you can choose your environment. Make sure you at least have the PHP: 8.2.23, Web server: nginx 1.26.1 and Database: MySQL 8.0.16 versions. These are the ones used in this tutorial. If you any other versions that selected by the preferred, choose the custom option and insert select the right versions
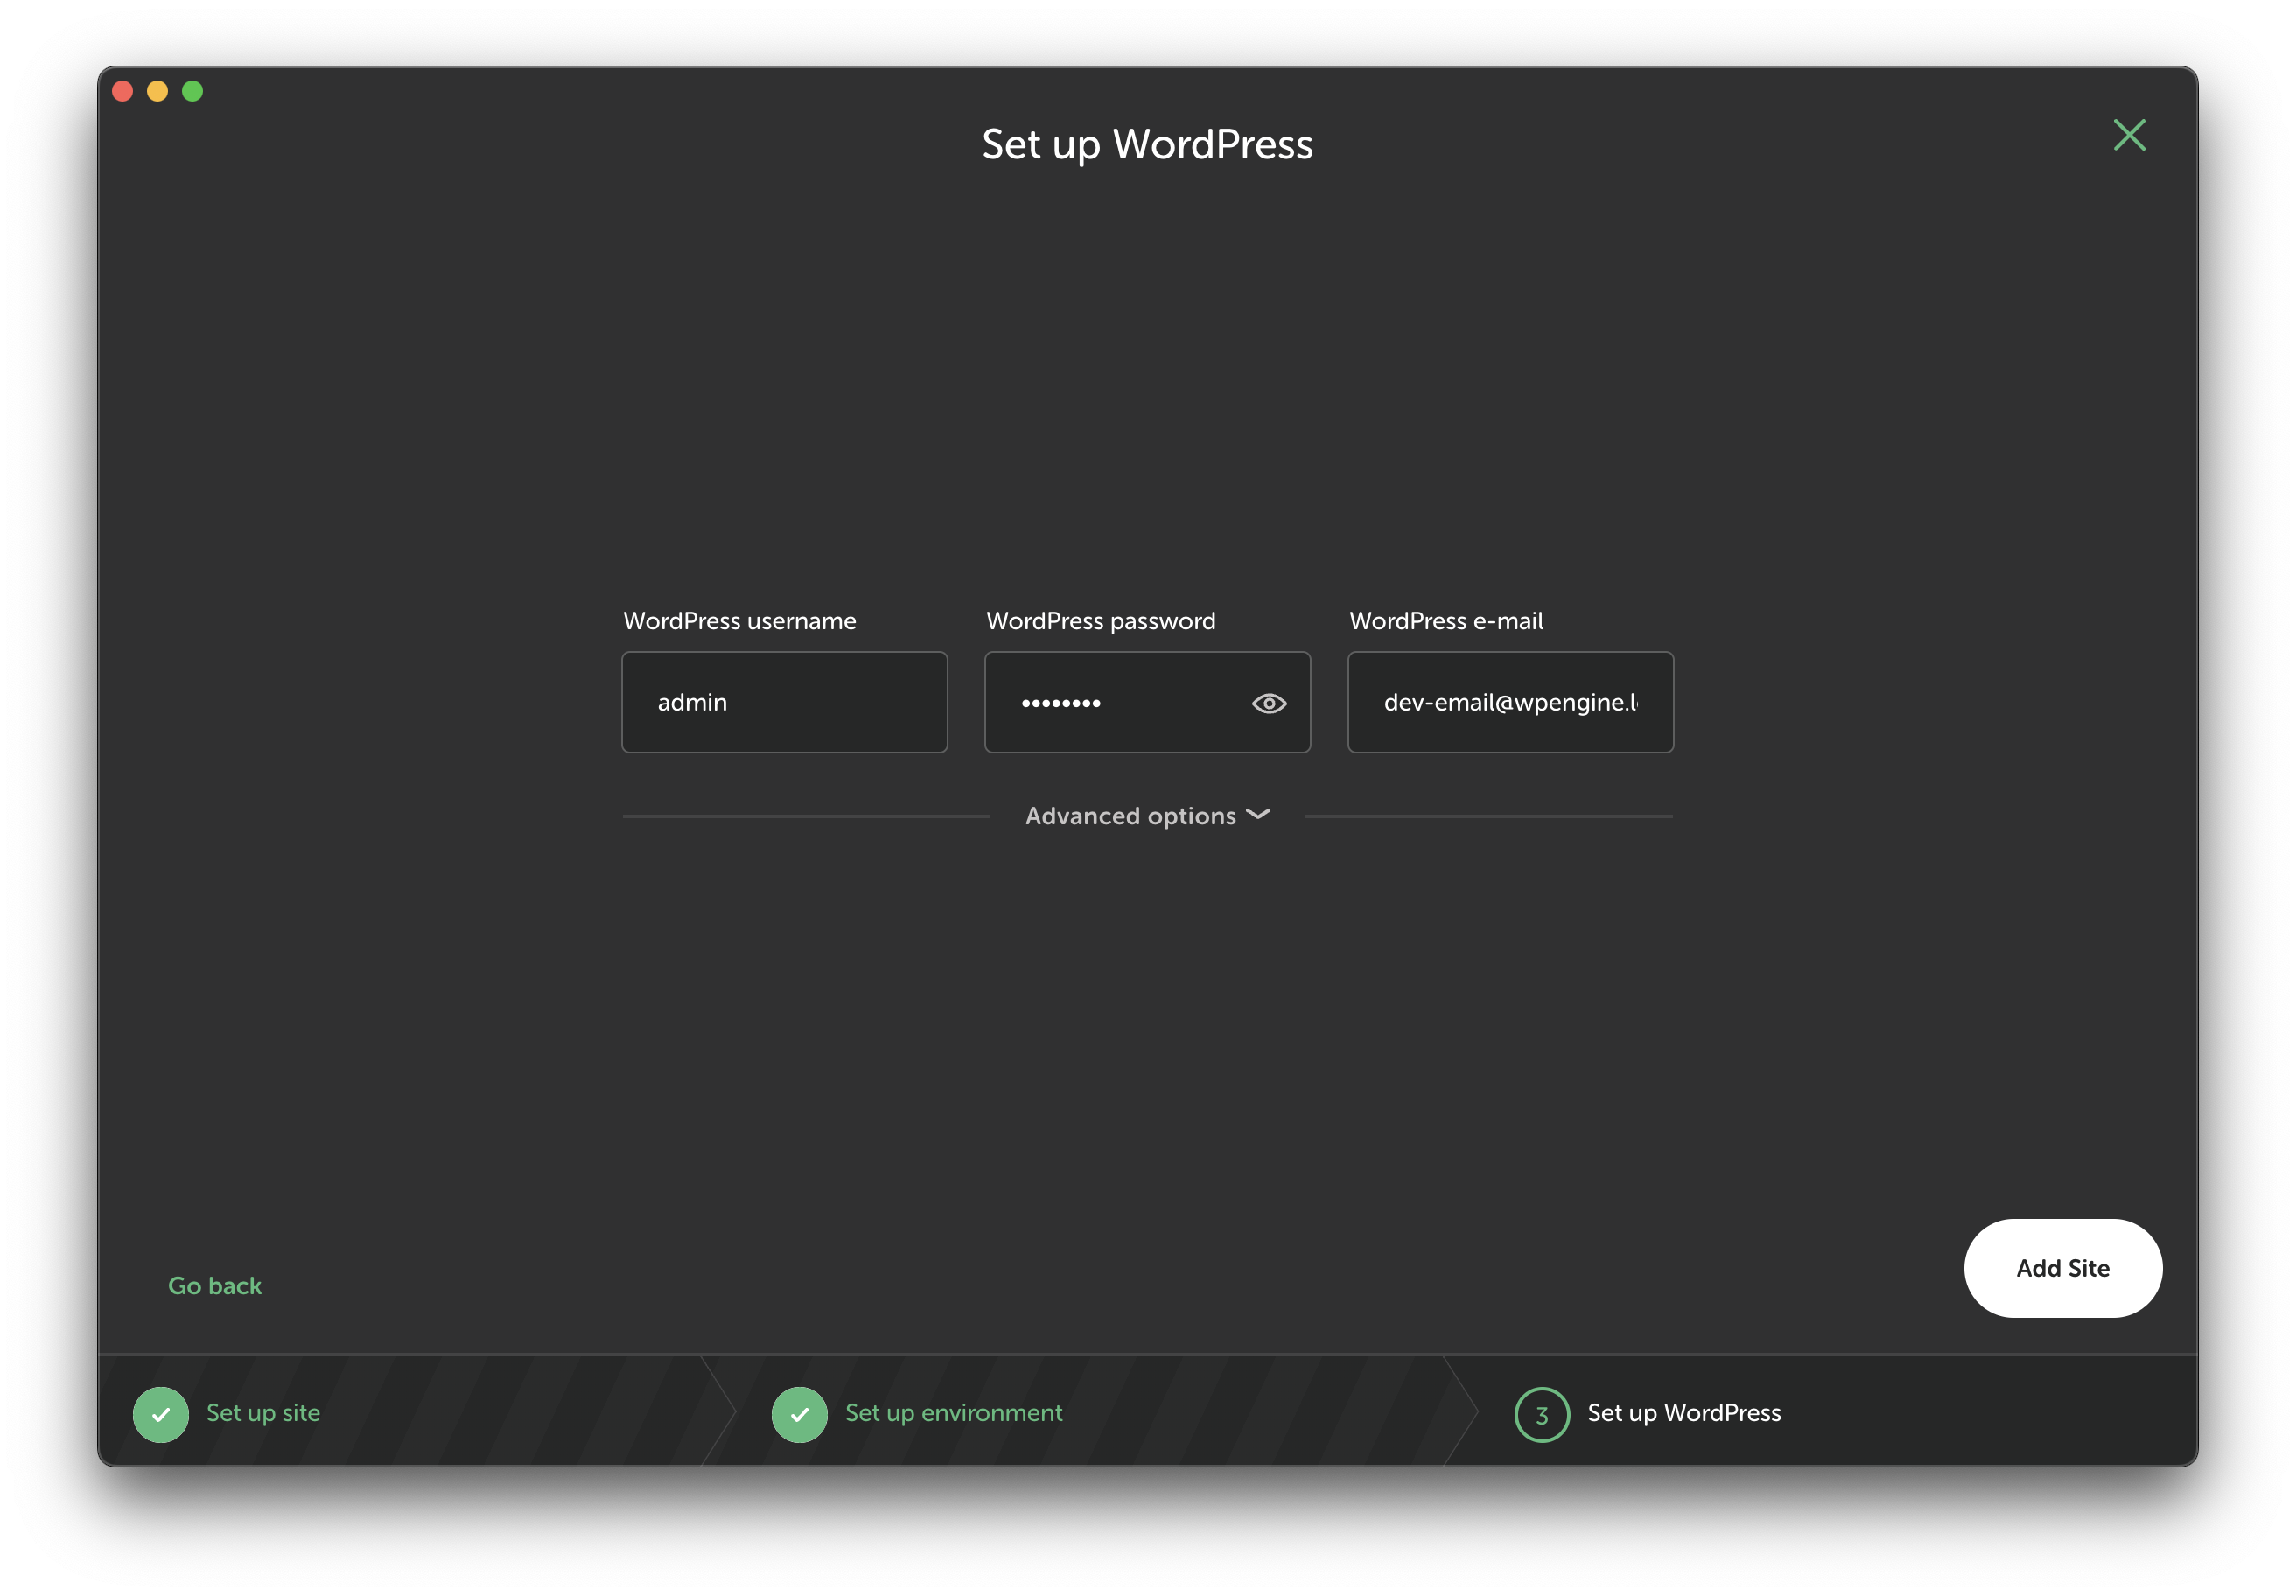
- Lastly set you WordPress panel login and email. Make sure you remember these, otherwise you will not be able to enter the WordPress dashboard
Once the site is created, open the terminal and navigate to the
appfolder.Note: You will need to create an account in order to use Local
Note: Using Local’s built-in terminal may place you inside thepublicfolder, so navigate up to theappfolder if needed.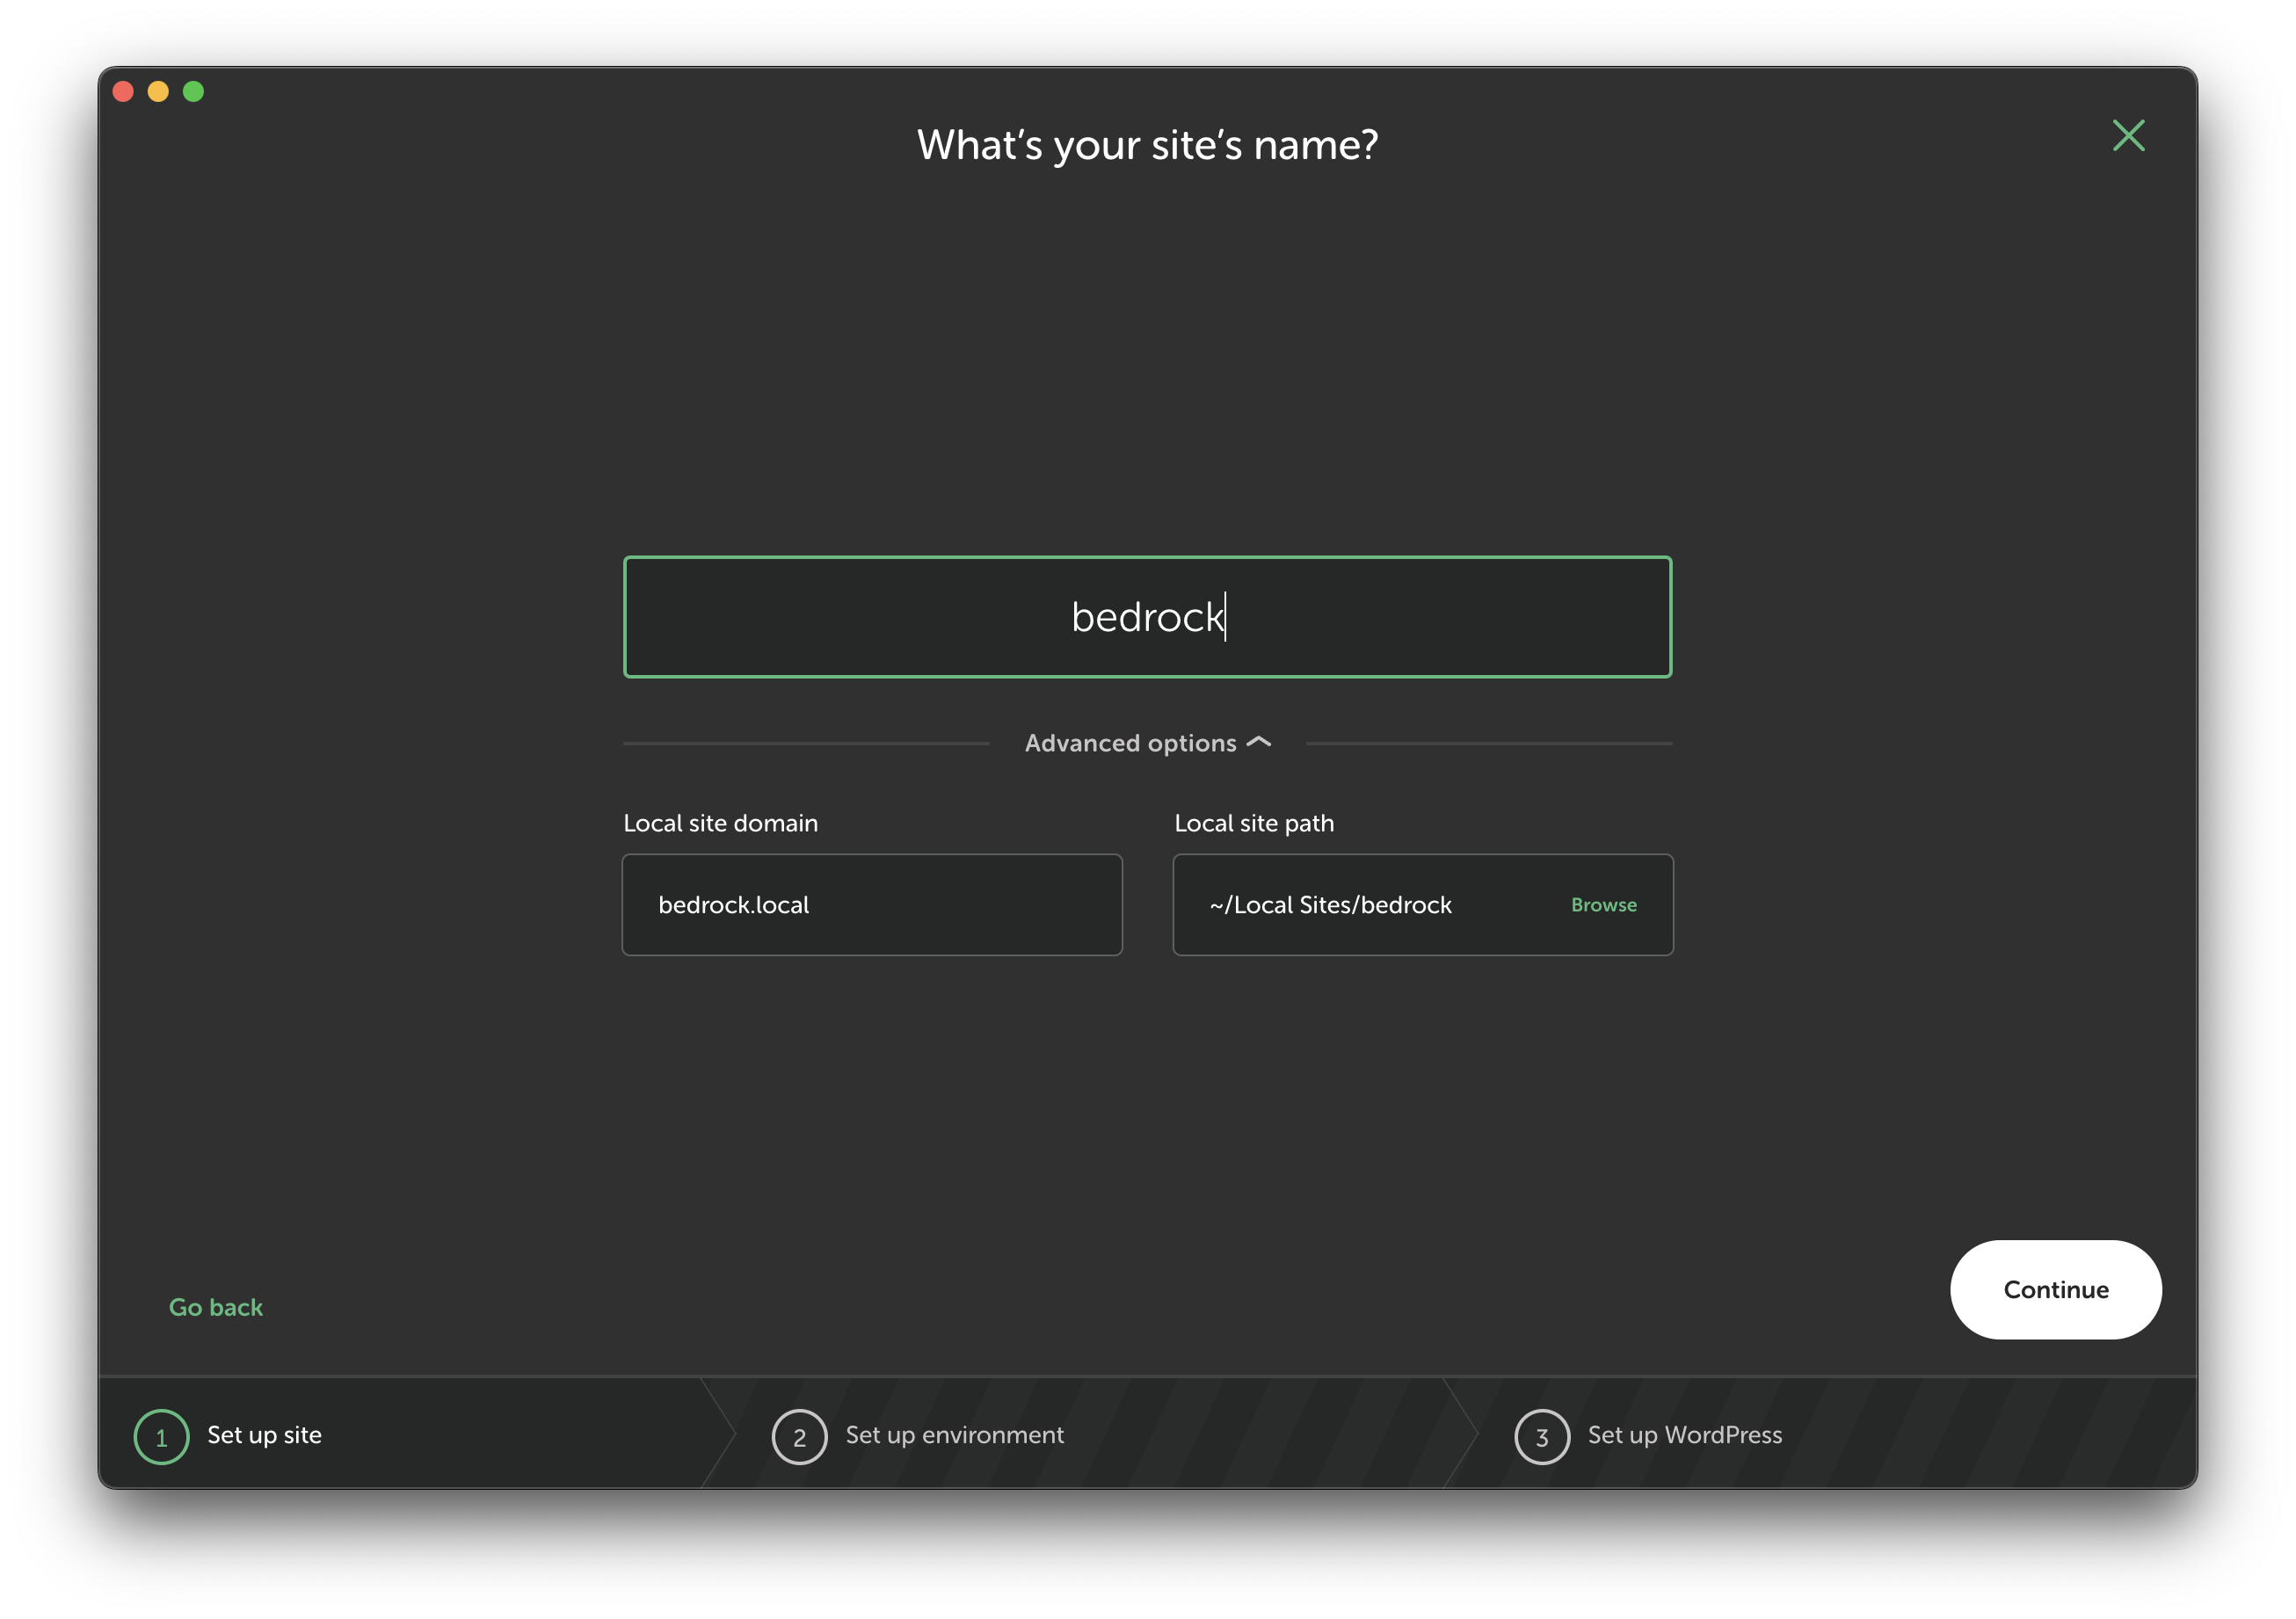
Install Bedrock
- Inside the
appfolder, run the following composer command to create a new Bedrock project:terminalcomposer create-project roots/bedrock - List the folders to confirm Bedrock has been created.
- Inside the
Remove the
publicFolder- Delete the
publicfolder to avoid conflicts with Bedrock's structure.
This should be the resulting directory . Before the deletion:
directoryLocal Sites ├── bedrock ├── app ├── bedrock ├── public ├── conf ├── logsAfter the deletion:
directoryLocal Sites ├── bedrock ├── app ├── bedrock ├── conf ├── logs- Move up one directory, and then open Bedrock in Visual Studio Code.
- Delete the
Configure Bedrock in Local
- In VS Code, navigate to
config, in the bedrock folder not on the app folder and thennginx. - Open the
site.config.hbsfile and search for the line that sets therootdirectory.Note: This should be at the beginning of the server object
nginx# Default root directory example root: {{root}} - Change the
rootvariable to point to thewebfolder within your Bedrock directory.Note: The route need to be the complete route you find in Finder or in File Explorer This change should result in somthing like this:
nginx# Default root directory example
root "/Users//Local Sites/bedrock/app/bedrock/web";
- Before proceeding, stop the site in Local.- In VS Code, navigate to
Update the
.envFileInside the
webfolder, locate the.env.examplefile, copy and rename it to.env.Open
.envand update the following values:envDB_NAME=local DB_USER=root DB_PASSWORD=root DB_HOST=localhostNote: DB_HOST is located below the optipnal database variables in comments Note: Optionally, you can define DATABASE_URL for using a DSN instead of using the variables above
Set the WP_ENV to development if this is not the case
Change
WP_HOME='http://example.com'to the variable site domain which was given when you named your project. For example:WP_HOME='http://bedrock.local'
Note: Keep the
/wpin the url- Change
WP_SITEURL="${WP_HOME}/wp"tohttp://yoursitedomain/wp
Run Your Site
- Start your site again in Local.
- Open your browser and enter your site’s domain or click the open site button in Local. If prompted, give permission to access the site.
Optional: Multisite
Bedrock is multisite network compatible. So if you plan to build a website with bedrock that has subdomains you will need the roots/multisite-url-fixer mu-plugin to make sure admin URLs function properly. This plugin is not needed on subdirectory installs but will work well with them. From your Bedrock directory use this command:
composer require roots/multisite-url-fixer
If all steps were followed correctly, you should now see your Bedrock-powered WordPress site up and running in your browser.
Project Structure Overview
Understanding Bedrock’s folder structure is essential for navigating and organizing your WordPress project. Bedrock differs from the traditional WordPress setup, which makes it easier to separate core WordPress files from application-specific code and assets.
Folder Structure
Below is a breakdown of the main folders inside of a Bedrock project:
   Local Sites
   ├── Bedrock
   app
    ├── bedrock
        └── config
        └── vendor
        └── web
    ├── conf
├── logsFolder Details
app: This directory is where you place application-specific code. It contains the
mu-pluginsfolder (for must-use plugins) and may also hold custom libraries, helper functions, or services you want to add to your project.mu-plugins: These are must-use plugins, meaning they automatically load without needing activation in the dashboard. Bedrock uses an autoloader here, making it possible to treat regular plugins as must-use plugins.
config: Contains configuration files that allow environment-specific settings. This folder includes
application.phpandenvironmentssubdirectory, which help you set environment-specific configurations (e.g., for development, staging, or production). This structure enhances security and flexibility, enabling smooth transitions between environments.application.php: Contains main application configuration and settings.environments: Holds separate config files (e.g.,development.php,production.php) that overrideapplication.phpbased on the environment.
vendor: This is where Composer stores all installed dependencies, including WordPress core files. Since Bedrock relies on Composer for dependency management, it places WordPress itself in
vendorrather than the root directory.web: Acts as the document root and contains public files accessible to web users.
wp: This subfolder houses the core WordPress files.app/uploads: Stores all media and uploads.index.php: Entry point for WordPress, configured to load from thewpdirectory..htaccess: Configured for permalinks and security settings.
Benefits of This Structure
By structuring WordPress in this way, Bedrock provides:
- Separation of Concerns: Distinguishes application files, configurations, and public assets, creating a more organized environment.
- Improved Security: By keeping core WordPress files outside of the document root, Bedrock minimizes the risk of unauthorized access.
- Scalability and Maintenance: Clear separation and configuration make scaling and updating easier, especially in multi-environment setups.
This structure might feel different at first, but it allows for more control and modularity, giving developers the flexibility needed for advanced WordPress development.
Wordpress
In Local by Flywheel, locate your site in the list and click the WP Admin button on the right. This will open the login page for your WordPress site in your default browser. To access your WordPress dashboard, you’ll need to enter the username and password you chose during the initial site setup in Local.
Once logged in, you’ll be taken directly to the WordPress dashboard, where you can begin managing and customizing your site.
Creating and Managing Themes and Plugins
With Bedrock, managing themes and plugins is different from the traditional WordPress approach. Bedrock uses Composer to manage WordPress core files, plugins, and even themes, providing a version-controlled and organized way to handle dependencies.
Installing Themes
Installing a theme with bedrock can be done in three different ways:
Adding a Theme with Composer:
To install a theme via Composer, run the following command from your project root:
bashcomposer require wpackagist-theme/<theme-name>For example, to install the popular "Astra" theme:
bashcomposer require wpackagist-theme/astraComposer will download the theme to
web/app/themes, the designated themes folder in Bedrock.
Custom Themes:
- You can also add custom themes directly to the
web/app/themesfolder by manually creating a theme folder. This folder needs to be named after your theme. - Activate the theme from the WordPress dashboard under Appearance > Themes.
- You can also add custom themes directly to the
In custom theme folders, you should start with a:
style.css: main stylesheet, where you define your theme metadataindex.php: main template filefunctions.php: theme functions- optional: other template files such as
header.php,footer.php, ...
- Installing a Theme from the WordPress library Navigate to Appearance > Themes. Here you will see the default Twenty Twenty-Five theme. To install a new theme click the Add New Theme button. From here you can select any theme from the library
Installing Plugins
Using Composer for Plugins:
- Just like themes, plugins can be installed using Composer. Bedrock works well with WPackagist, a Composer repository that mirrors the official WordPress Plugin Directory.
- Run the following command to install a plugin:bashFor example, to install "Yoast SEO":
composer require wpackagist-plugin/<plugin-name>bashcomposer require wpackagist-plugin/wordpress-seo
Must-Use Plugins (mu-plugins):
- Bedrock allows for must-use plugins by placing them in the
app/mu-pluginsfolder. These plugins automatically load and don’t require activation in the WordPress dashboard. - Autoloader: Bedrock includes an autoloader for
mu-plugins, allowing you to use regular plugins as must-use plugins.- To add a plugin as an mu-plugin, first install it via Composer in the
mu-pluginsfolder:bashcomposer require wpackagist-plugin/<plugin-name> - Alternatively, add custom code or libraries as autoloaded mu-plugins by placing them in
app/mu-plugins.
- To add a plugin as an mu-plugin, first install it via Composer in the
- Bedrock allows for must-use plugins by placing them in the
Managing Dependencies with Composer
Composer simplifies managing plugin and theme dependencies, ensuring you have a record of each package’s version. This approach keeps your site stable and makes it easier to update themes and plugins.
Updating Themes and Plugins
To update all packages (themes, plugins, and WordPress core), run:
bashcomposer updateTo update a specific package, you need to specify the package name:
bashcomposer update wpackagist-plugin/<plugin-name>
Summary
With Composer and Bedrock:
- Themes and plugins are easily installed, updated, and version-controlled.
- mu-plugins allow for must-use plugins, which can improve performance and load without user activation.
- Managing all dependencies from composer.json ensures consistency across environments, giving you a streamlined and professional setup.
Using Composer to manage themes and plugins may take some getting used to, but it ultimately makes maintaining and updating your WordPress site more efficient and reliable.
Building a Simple WordPress Site
When you first open your site in a browser, you will see a default theme.
1. Setting Up the Theme
Choose a Theme:
- Navigate to Appearance > Themes to customize your chosen theme or add a new one.
Note: Adding a new theme through the admin panel will automatically update your code editor.
- For a quick start, you can use a popular theme like Astra or GeneratePress, or create your own custom theme.
- To install a theme with Composer, run:bash
composer require wpackagist-theme/astra - Alternatively, for a custom theme, create a new folder in
web/app/themeswith your theme name (e.g.,my-theme), then add the required files likestyle.cssandindex.php.
For this tutorial, we will be using Oigny Lite.
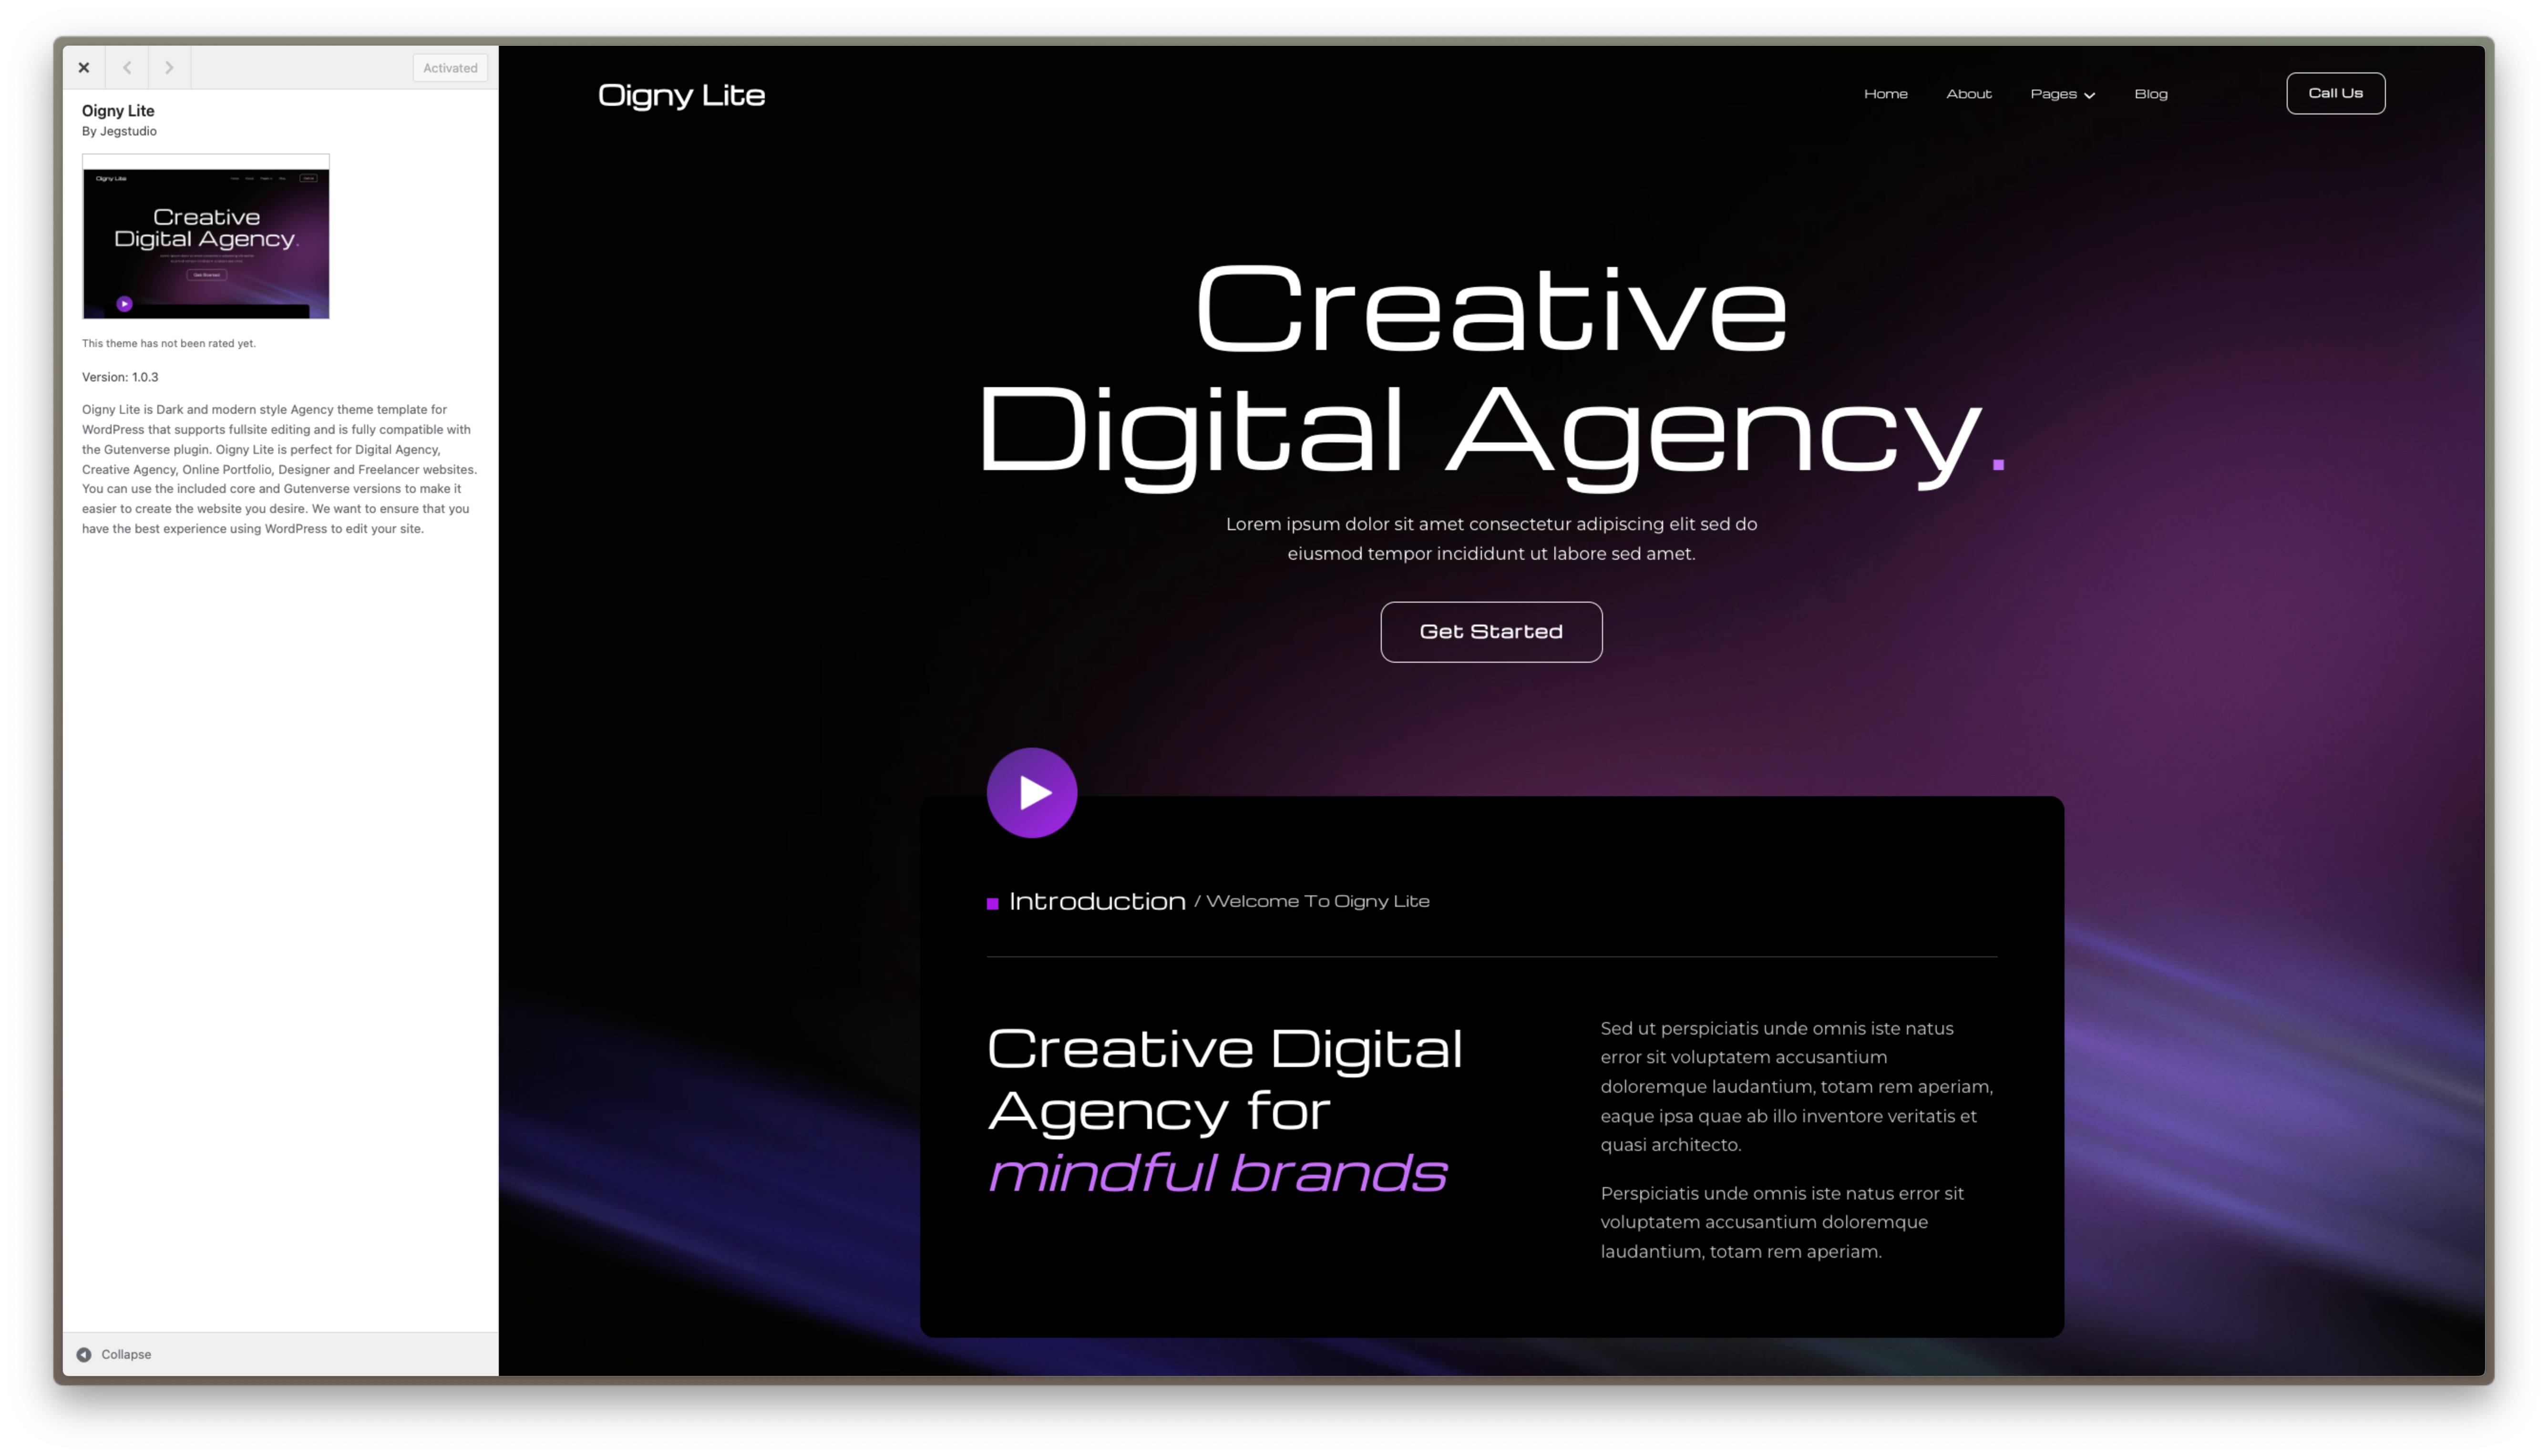
Activate the Theme:
- Go to Appearance > Themes in the WordPress dashboard.
- Locate and activate your chosen theme.
Customizing the Theme:
- To customize the appearance, go to Appearance > Customize.
- Modify settings like the site title, tagline, colors, and layout to give your site a unique look.
2. Adding Essential Plugins
Install Plugins:
- Install essential plugins like contact forms, SEO tools, and caching plugins.
- Use WPackagist to install plugins with Composer:bash
composer require wpackagist-plugin/wordpress-seo composer require wpackagist-plugin/contact-form-7 - Manage and activate installed plugins from Plugins > Installed Plugins.
For this tutorial, we will install WPForms Lite (a contact form plugin), Elementor and Yoast SEO.
Note: All plugins are installed but not activated. Click Activate to use them.
Note: When activating Elementor, it may prompt you to create an account. You can skip this and the subsequent steps until you can choose between a black canvas and a template.Activate and Configure Plugins: After you install a plugin, you still need to activate them. This can be done by navigating to the installed plugins page. Once there, search for the plugin you installed and click on activate.
Note: It is possible that you need to do a configuration. This will be the case for the Yoast Seo
3. Creating Basic Pages and Content
In this tutorial, we will create a website for Bedrock itself using Elementor and the standard WordPress editor.
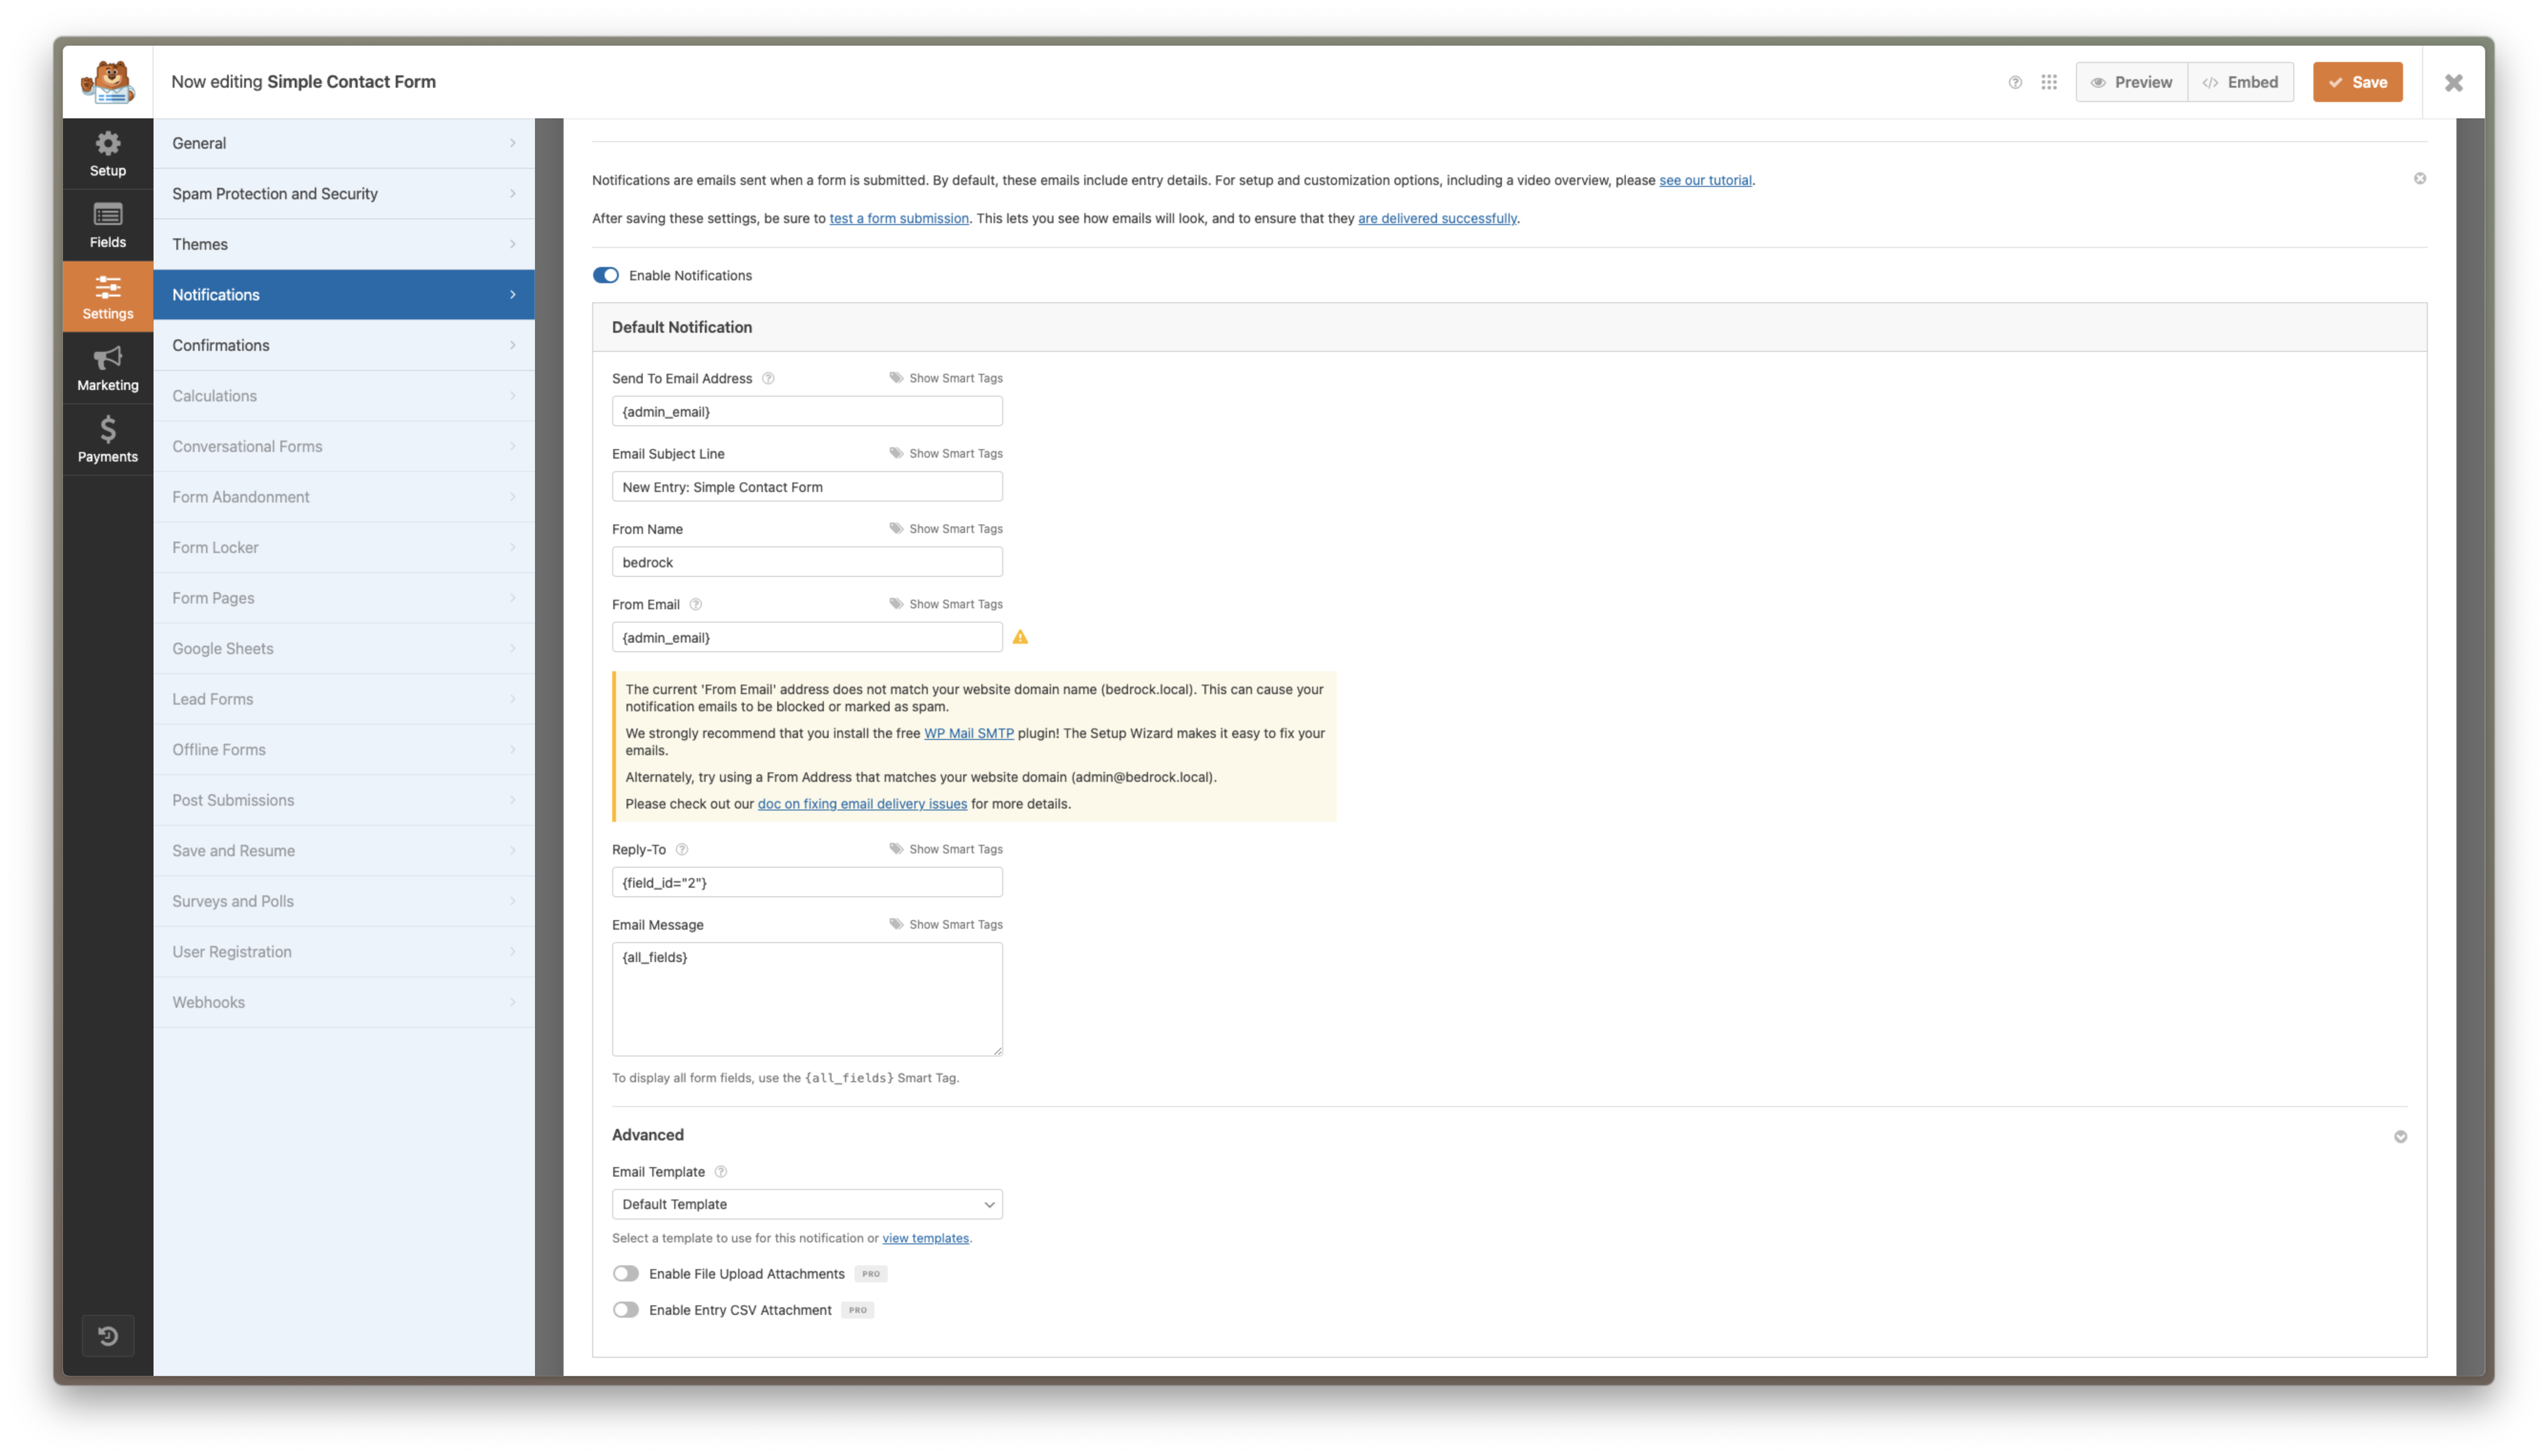
Set up WPForms:
- Go to the WPForms panel and select Add New. Enter your form name and choose a template.
- Submissions will go to the default email address set during your WordPress account creation. If you need to change it, do so here.
- You can also add a subject, name, and sender email. To send a confirmation to the submitter, add a Reply-To field and a message.
Set Up Essential Pages:
- Go to Pages > Add New and create the following pages:
- Home: This will be your main page.
Note: The homepage you see when visiting your domain is not an existing page from the Pages menu; it is a default homepage that comes with every theme. You can edit it by going to Appearance > Customize.
- Contact: A page where visitors can reach you (add a contact form using WPForms).
- In Elementor, click Add Element on the top left, find WPForms under Basic, drag it onto the page, and adjust as needed.
- About: A page with some general about info.
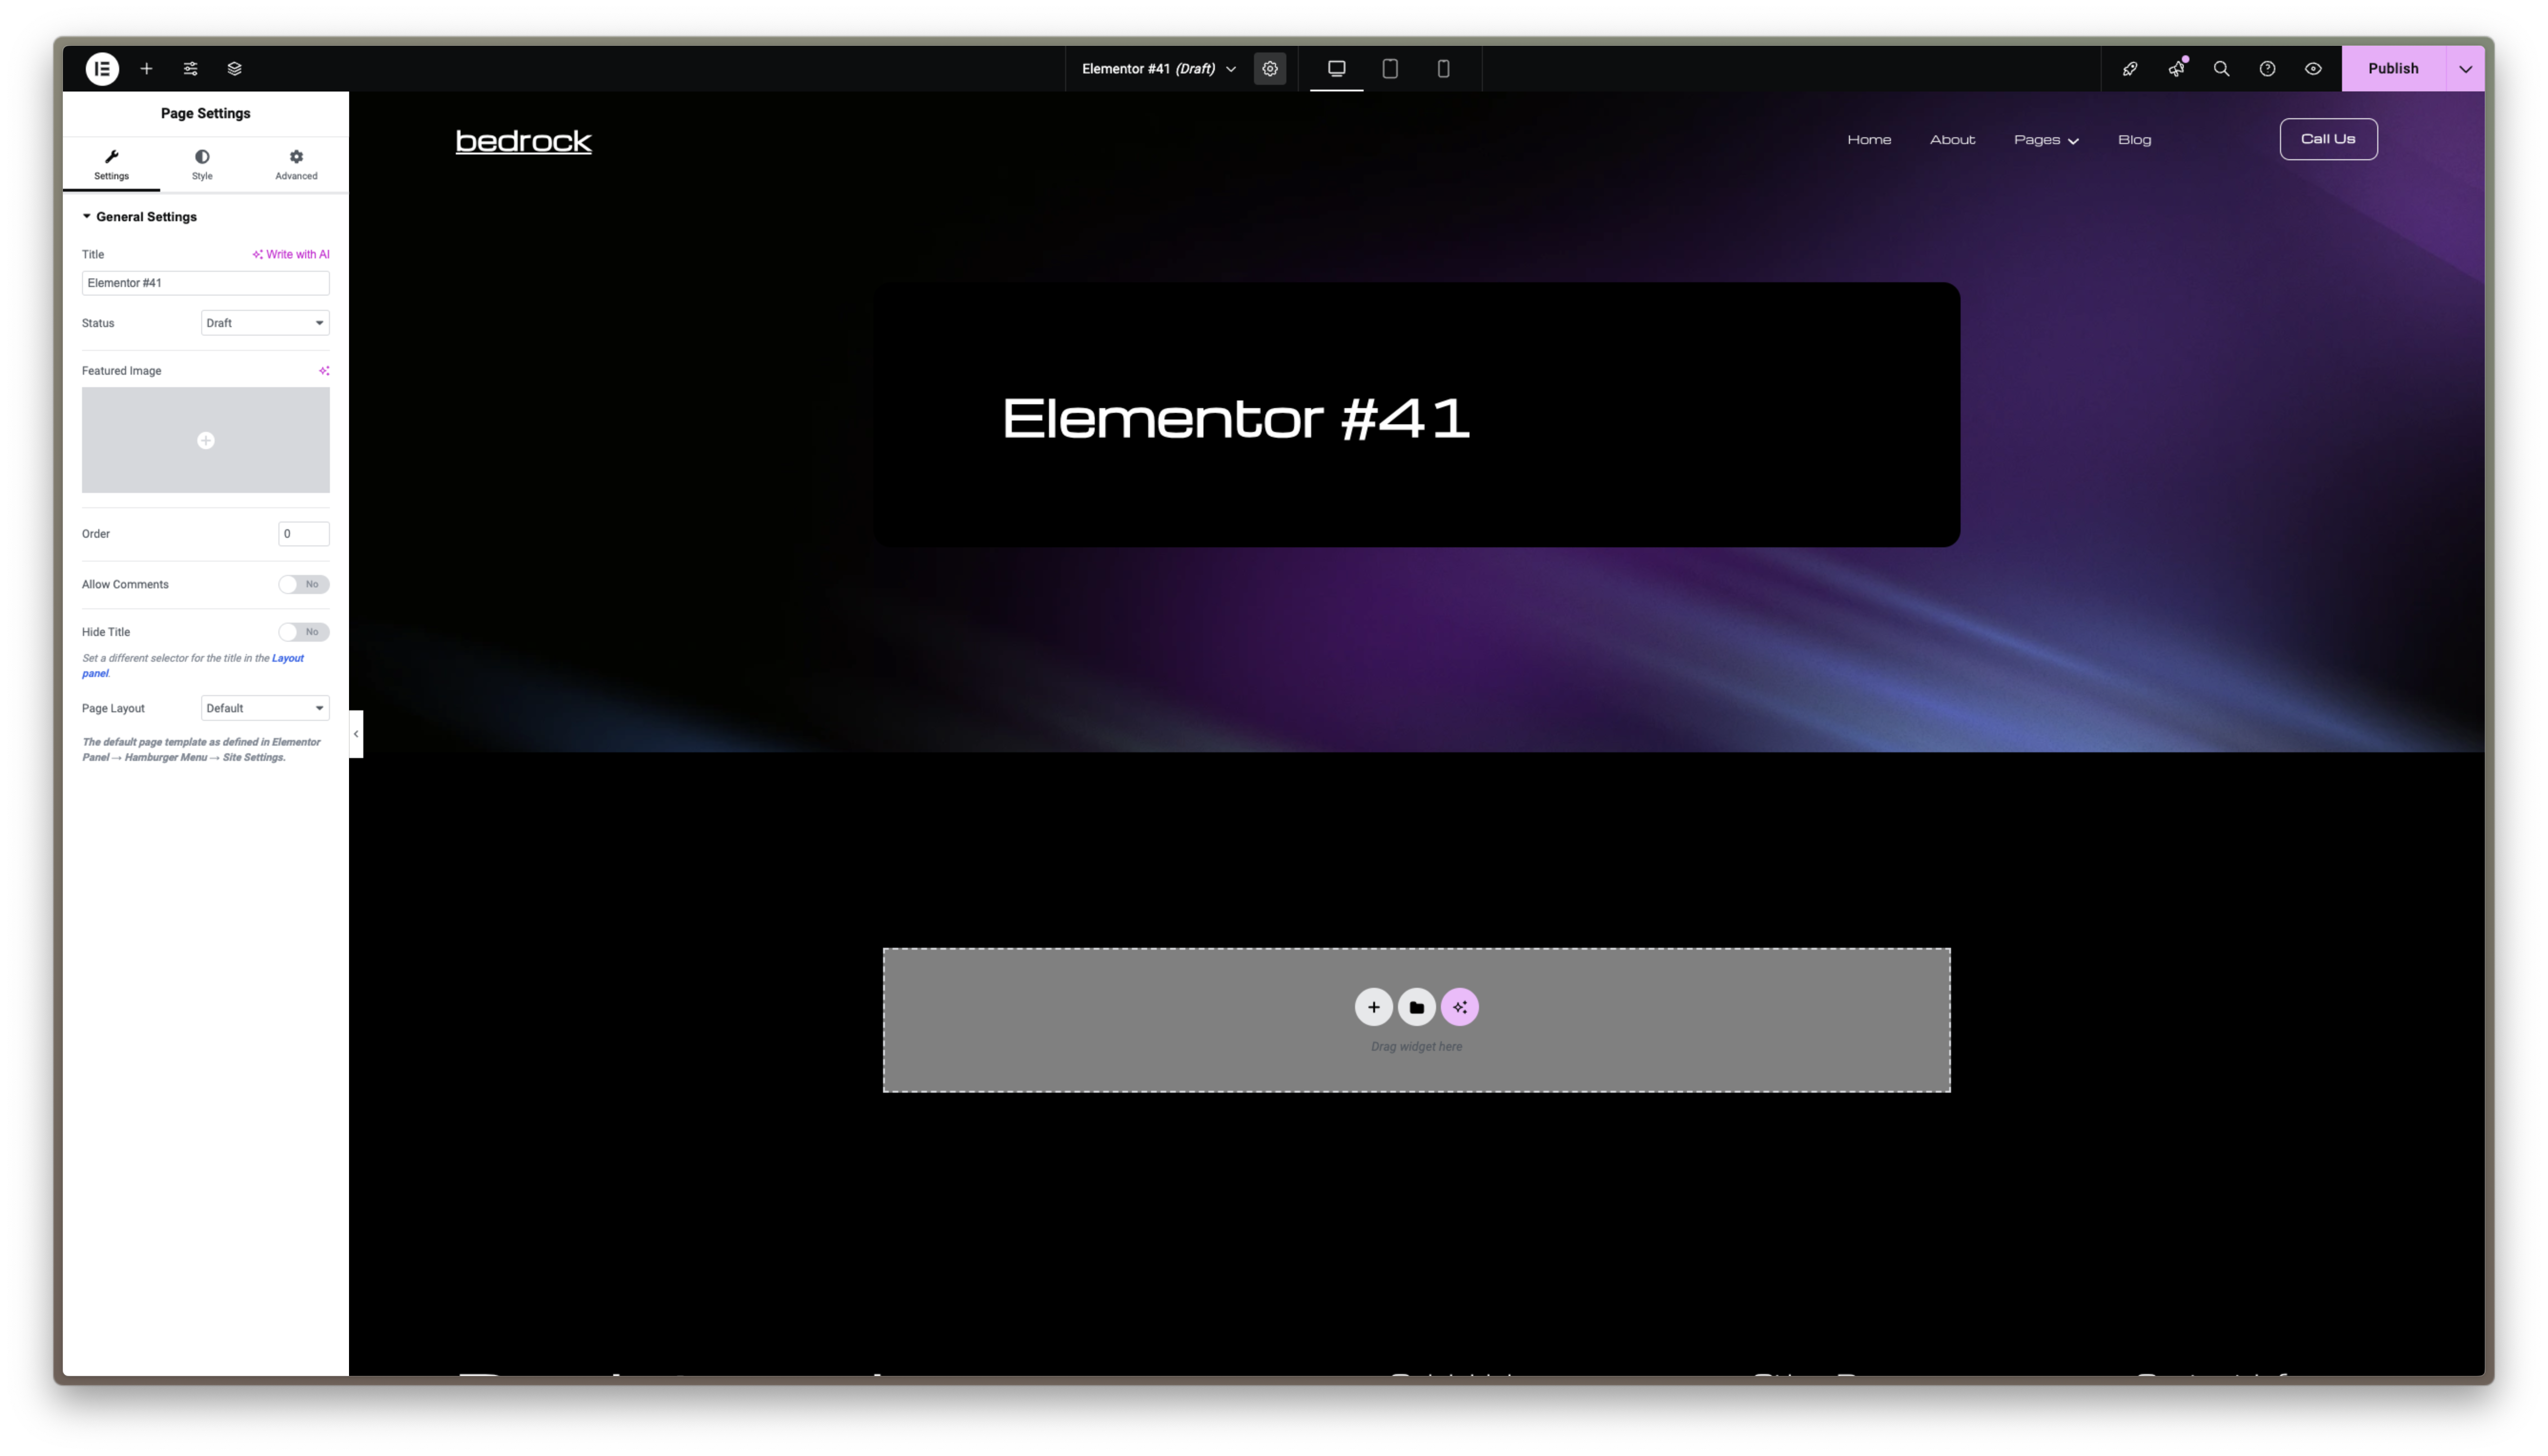
- Using Elementor is almost the same as using standard WordPress elements. The main difference is that you can drag and drop your elements, style them and if used with an pro account even use AI to create content and style it
- When creating a new page with Elementor, you will see a layout labeled Elementor #(number). Change the layout by clicking the settings button at the top of the page, in between the device icons and the page name. You can select the desired page layout at the bottom.
Note: Some of the functionality of Elementor is locked behind a paywal. But you can use the most of the elements, only pro elements such as a search are locked. However these can be bypassed by using other plugins
- Home: This will be your main page.
- Go to Pages > Add New and create the following pages:
Optional: Set a Static Homepage:
- Go to Settings > Reading.
- Under Your homepage displays, select A static page and set the homepage to the Home page you created.
Note: This option allows you to select a page other than the default homepage of the theme.

Add Menu Navigation:
- Go to Appearance > Themes page.
- Click on the customize button of your chosen theme
- Create a new menu and add your pages (Home, About, Contact).
- Assign the menu to the primary location to enable site navigation.
4. Final Touches
Adjust Permalinks:
- Go to Settings > Permalinks.
- Set a custom structure or use Post name for clean URLs, then save your changes.
Configure Site Settings:
- Review settings under Settings > General to confirm your site title, tagline, and timezone.
- Configure additional settings for comments, media, and privacy.
Test Your Site:
- Navigate to your site’s homepage to see how it looks.
- Test your plugins (e.g., contact form) to ensure everything functions properly.
Summary
By following these steps, you have set up a simple WordPress site with a functional theme, essential plugins, and key pages. From here, you can further customize your site by modifying theme templates, adding more plugins, and expanding your content.
Common Issues and Troubleshooting Tips
When working with WordPress and Bedrock, especially during setup or deployment, you may encounter some common issues. This section provides troubleshooting tips for solving frequent problems so you can keep your Bedrock project running smoothly.
1. Database Connection Errors
Database connection errors often appear if the .env file is not configured correctly.
- Solution: Open your
.envfile in thewebdirectory and verify the database settings:envDB_NAME=local DB_USER=root DB_PASSWORD=root DB_HOST=localhostNote This can be different for each project. Be sure you check your database section in Local for the right info
Tip: Ensure that your local database server is running, and verify the database credentials in your.envfile match those configured in Local by Flywheel or your development environment.
2. Composer Dependency Conflicts
Dependency conflicts or version mismatches can occur when updating themes or plugins.
- Solution: Run
composer diagnoseto check for potential conflicts.
Tip: If there’s an issue with a specific package, try removing it from
composer.jsonand reinstalling it usingcomposer require <package-name>. Always runcomposer updateafter making changes to dependencies.
3. Missing .env or Configuration Issues
If the .env file is missing or not properly set up, the site might not load correctly.
- Solution: Copy the
.env.examplefile, rename it to.env, and update it with the correct values for your environment.
Note If you need to do this, do not forget your database connection
Tip: Use the correct URL format forWP_HOMEandWP_SITEURL. For example:
WP_HOME='http://bedrock.local'
WP_SITEURL="http://bedrock.local/wp"4. File Permissions Issues
Bedrock’s folder structure can sometimes cause file permission errors, especially on servers.
- Solution: Set file permissions on your server. For example, use the following:bash
find . -type d -exec chmod 755 {} \;
find . -type f -exec chmod 644 {} \;
Tip: Ensure the
web/app/uploadsfolder is writable so users can upload files through the WordPress dashboard.
5. Plugins Not Appearing or Loading
Some plugins may not show up in the dashboard if they’re not installed correctly.
- Solution: If you’ve installed plugins using Composer, ensure they’re added in the
composer.jsonfile and located in theweb/app/pluginsdirectory.
Tip: To install a plugin, use the WPackagist repository:
composer require wpackagist-plugin/<plugin-name>6. Permalink Issues
Permalinks may not work correctly after the initial setup.
- Solution: In the WordPress dashboard, go to Settings > Permalinks and simply re-save the permalinks. This refreshes the
.htaccessrules.
Tip: If issues persist, verify that your
.htaccessfile is present in thewebfolder and has the correct rewrite rules for Bedrock.
7. HTTPS or SSL Issues
Secure connections can sometimes cause redirect loops or SSL errors.
Solution: Update your
.envfile to usehttpsinWP_HOMEandWP_SITEURL:
WP_HOME='http://bedrock.local'
WP_SITEURL="http://bedrock.local/wp"- Tip: Make sure your server supports SSL, and set up SSL through Local by Flywheel or your hosting provider.
Most common issues with Bedrock can be resolved by double-checking configuration files, managing dependencies with Composer, and ensuring correct permissions. Bedrock’s structure may take some adjustment, especially for WordPress veterans. But with these troubleshooting tips, you’ll be prepared to address common challenges quickly and keep your development smooth.
Conclusion
WordPress with Bedrock provides developers with a robust foundation for building modern, secure, and scalable websites. By utilizing Bedrock's organized folder structure, Composer-based dependency management, and enhanced configuration options, you can streamline your development process and maintain better control over your projects. While it may require some adjustments compared to traditional WordPress workflows, the long-term benefits in terms of efficiency, security, and maintainability make it a worthwhile choice for developers aiming to elevate their WordPress development. Whether you are building a small site or a complex, multi-environment project, Bedrock equips you with the tools to succeed.