Rebuilding My Portfolio with Statamic
In this tutorial, I’ll walk you through how to a portfolio using Statamic CMS. We’ll cover the setup process, key features, and best practices.
Introduction
Statamic is a powerful flat-file CMS built on Laravel, designed to offer developers flexibility and ease of use without the complexity of traditional database-driven CMS platforms. Unlike many CMSs, Statamic stores content in flat files, which makes it lightweight, fast, and version-control friendly. This approach allows you to edit content directly in files or through a sleek control panel interface, making it ideal for both developers and content managers.
Statamic’s main features include:
- Collections and Entries: These allow you to organize and manage content flexibly, enabling you to create anything from blogs and portfolios to full-fledged websites.
- Blueprints and Fields: Blueprint templates and customizable fields make it easy to define and structure different types of content, allowing for tailored and specific data input.
- Antlers Template Engine: Statamic’s unique Antlers template language provides straightforward syntax and powerful templating features for dynamic content rendering, reducing the need for complex logic within templates.
- Control Panel: The user-friendly control panel lets you manage content, upload assets, and set up custom fields without touching code, but developers can also dive into code for full customization.
- Flexible Taxonomy: Organize your content with tags, categories, and other taxonomies for greater structure and discoverability.
For creating a dynamic, CMS-powered portfolio, Statamic stands out because it combines the best of both static and CMS worlds. It enables you to build a visually rich portfolio site with minimal setup, giving you all the tools to manage, update, and expand your portfolio as your projects grow—all while keeping things fast and secure. Whether you’re used to static site generators or looking for more CMS capabilities, Statamic offers the versatility to bridge that gap seamlessly.
Installation
To get started, you'll need to install Statamic and its assets. Here's how:
Set up your local environment (using Composer): Make sure you have Composer installed. Navigate to your project directory and run:
zshcomposer create-project statamic/statamic portfolio-benoit-biragumazshcd portfolio-benoit-biragumaRun the local server (using PHP): After installation, you can run a local server with PHP. Use the following command:
zshphp please serveDon’t forget to use npm to install dependencies for the Vite dev server: To ensure that all necessary JavaScript packages are installed, run:
zshnpm installRun the Vite server: To start the Vite development server, execute:
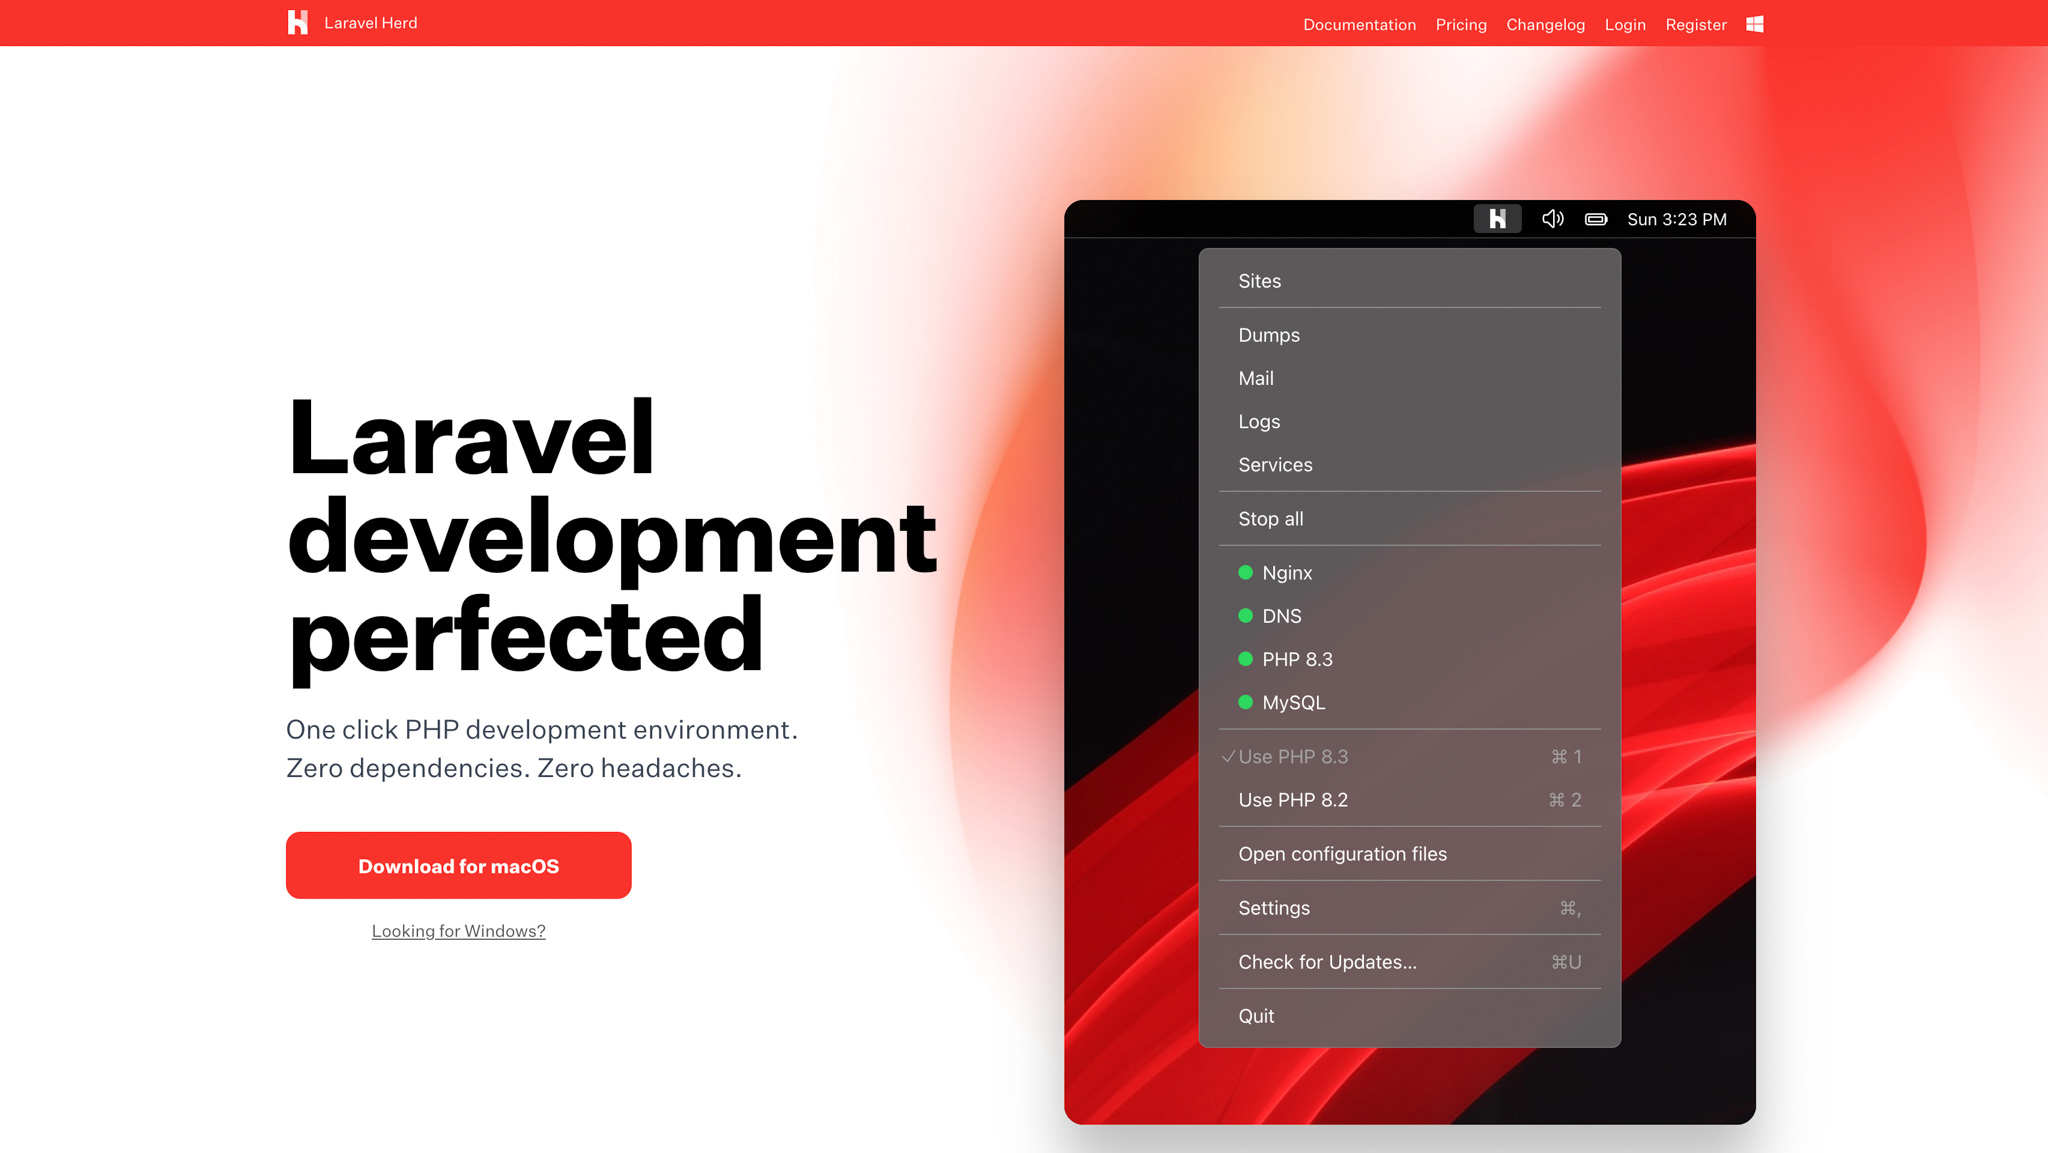
zshnpm run devUsing Laravel Herd (Optional): You can use Laravel Herd, which combines Composer, PHP, and NPM in one easy-to-use tool. This is particularly beneficial for managing dependencies and running your local server seamlessly.
Explore the folder structure: Familiarize yourself with the folder structure. Key folders include
content,resources, andconfig. Each serves a specific purpose in managing your website's content and configurations.Edit the
site.cssin theresources/css: Prepare your styling for the portfolio, you can download thesite.cssfile here.Download the fonts: To change the default font to match your portfolio, download your preferred fonts and place them in the
resourcesfolder. You can find your fonts here.
Please note that we are going to keep it simple and use old-school HTML and plain CSS. While Tailwind CSS would be the better choice, to save time, I will utilize the CSS already made from my real portfolio.
Step by Step Tutorial
STEP 1: Signing Into the Control Panel
To access the Statamic control panel, you need to create a super user account. This is crucial because only a super user can log in to the control panel.
Create a Super User:
Run the following command to create a super user. Make sure to designate the user as a super user to gain access:
zshphp please make:user
Access the Control Panel:
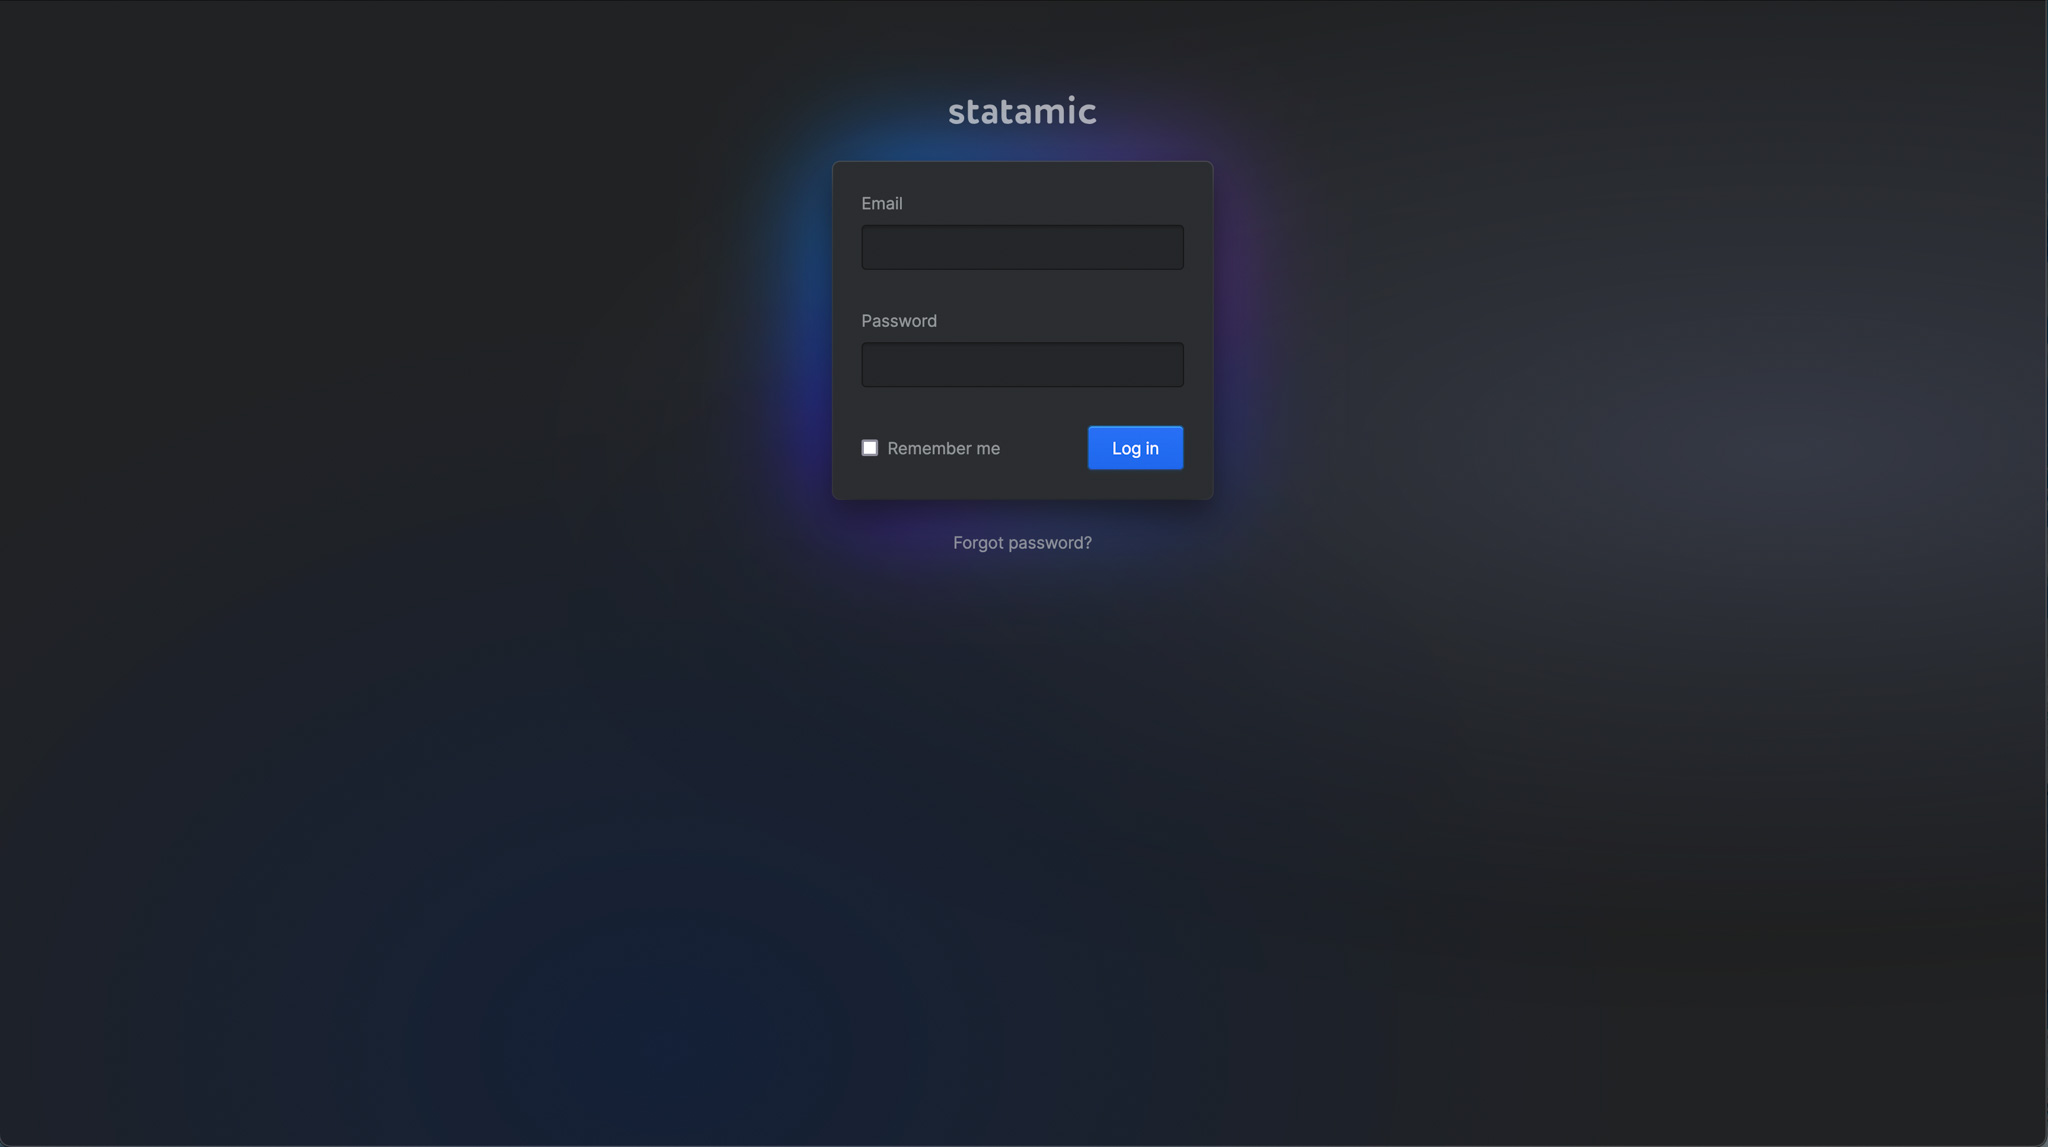
Once the super user is created, you can log into the Statamic control panel surf to http://127.0.0.1:8000/cp. (Note that the port: 8000 matches with the one made when the server was started with
php please serve, it could be different for you). The control panel offers a user-friendly interface that allows you to manage your content easily. Here are some of the key features you can access:- Content Management: Easily add, edit, and delete content like pages, collections, and entries.
- Asset Management: Upload and organize your media files, such as images and documents.
- User Management: Manage user roles and permissions for team members who might need access to the control panel.
- Settings Configuration: Adjust various site settings, including site metadata and routing.
While the control panel is more user-friendly than working directly in code editors like Visual Studio Code, both options are available, allowing flexibility depending on your workflow.
STEP 2: Make a Home Page
In my portfolio, you'll notice several pages: Home, About, Web Dev Projects, and Design Projects. For clarity in this tutorial, we will only rebuild part of the Home page, the full Web Dev Projects page, and a detail page for a project.
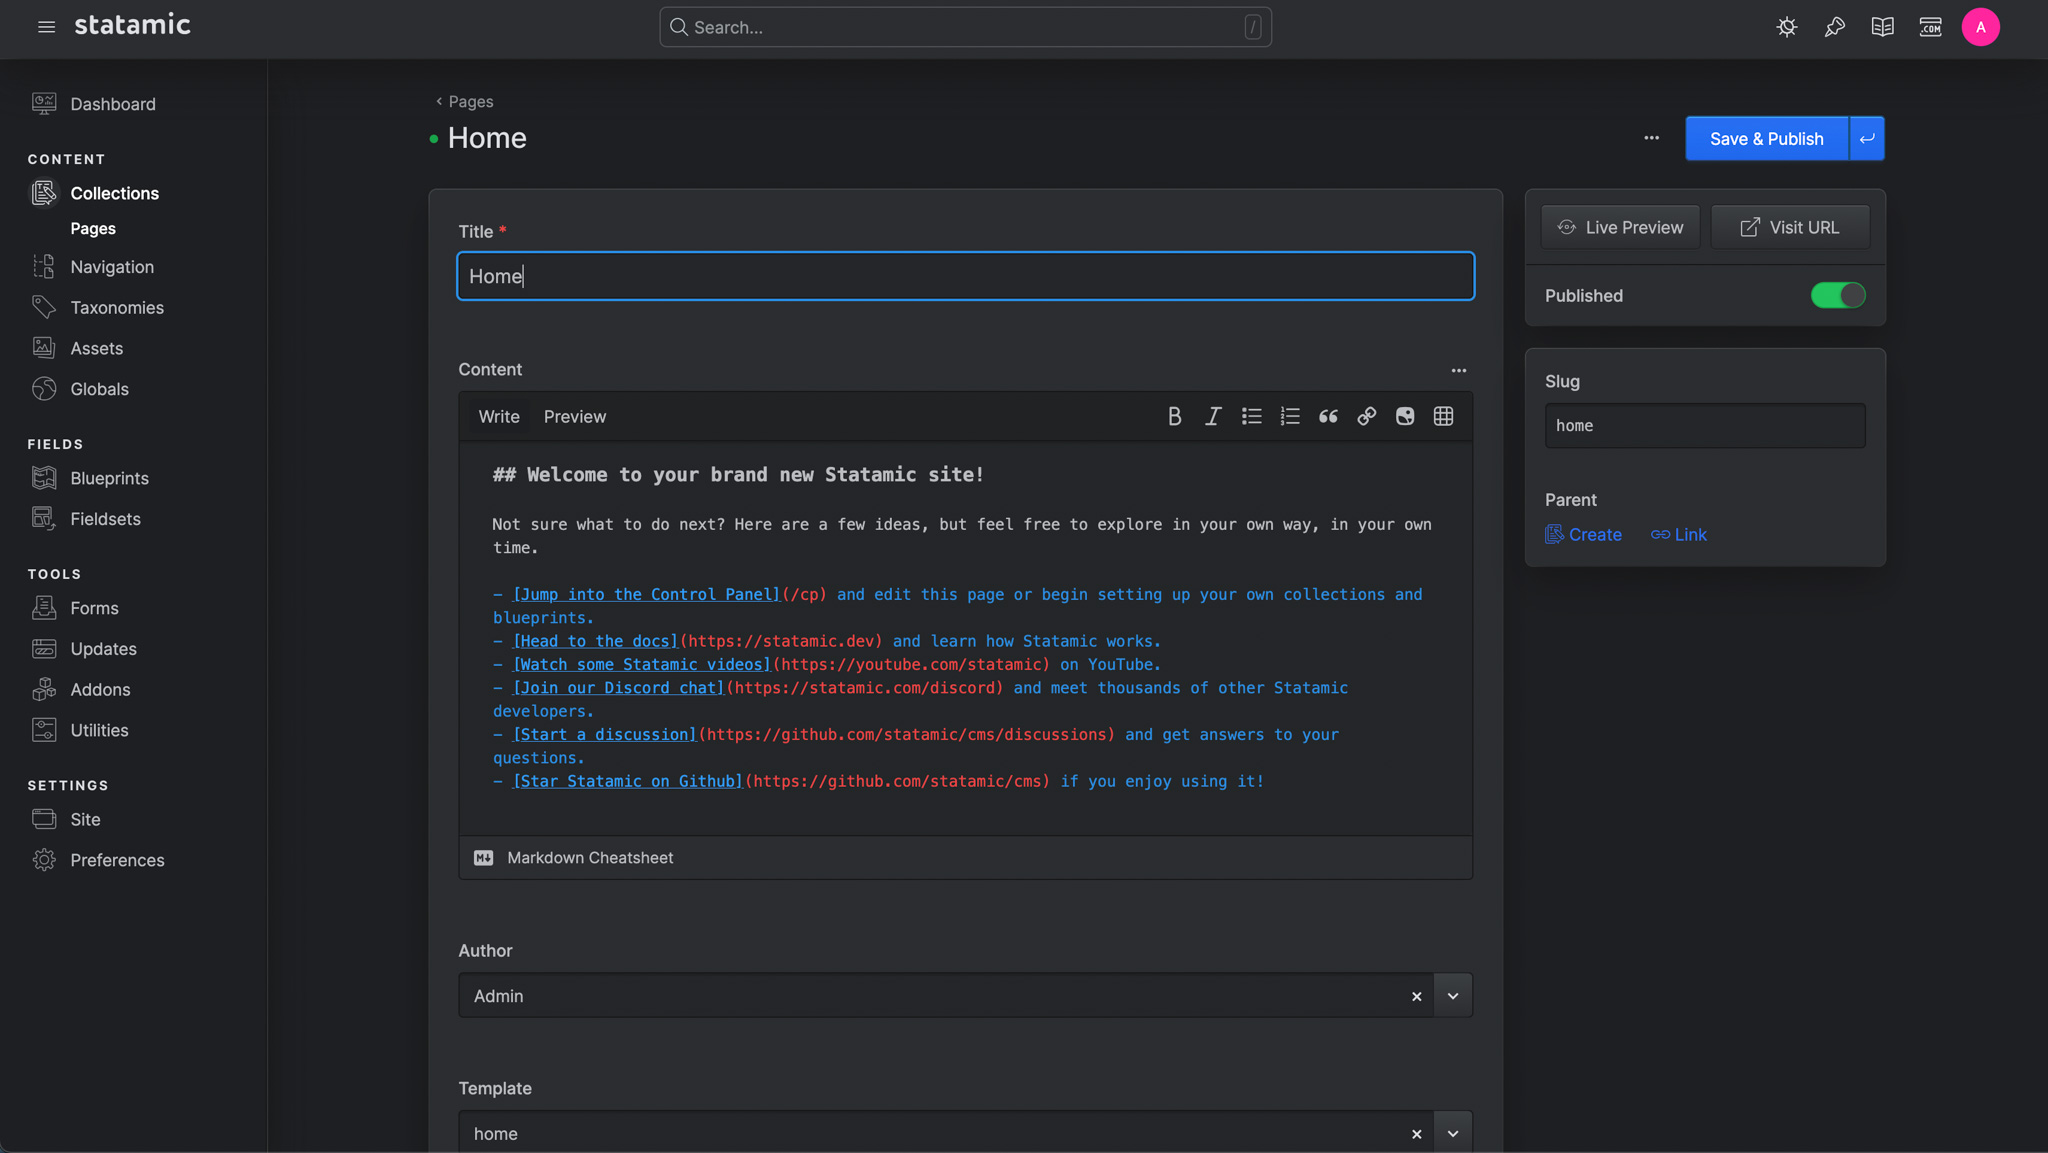
Check the Pages Collection: Navigate to the collections in your Statamic control panel. You'll see a Pages collection with a Home entry ready for use. Here are a few options available for this entry:
- Title: The name of the page, which appears in the browser tab and as a heading on the page.
- Content: The main body text for the page, where you can add detailed information.
- Author: The person responsible for the content, useful for multi-author setups.
- Template: The template file associated with this entry, determining how the content is displayed.
This is a good start, but it’s not quite what we want for our portfolio.
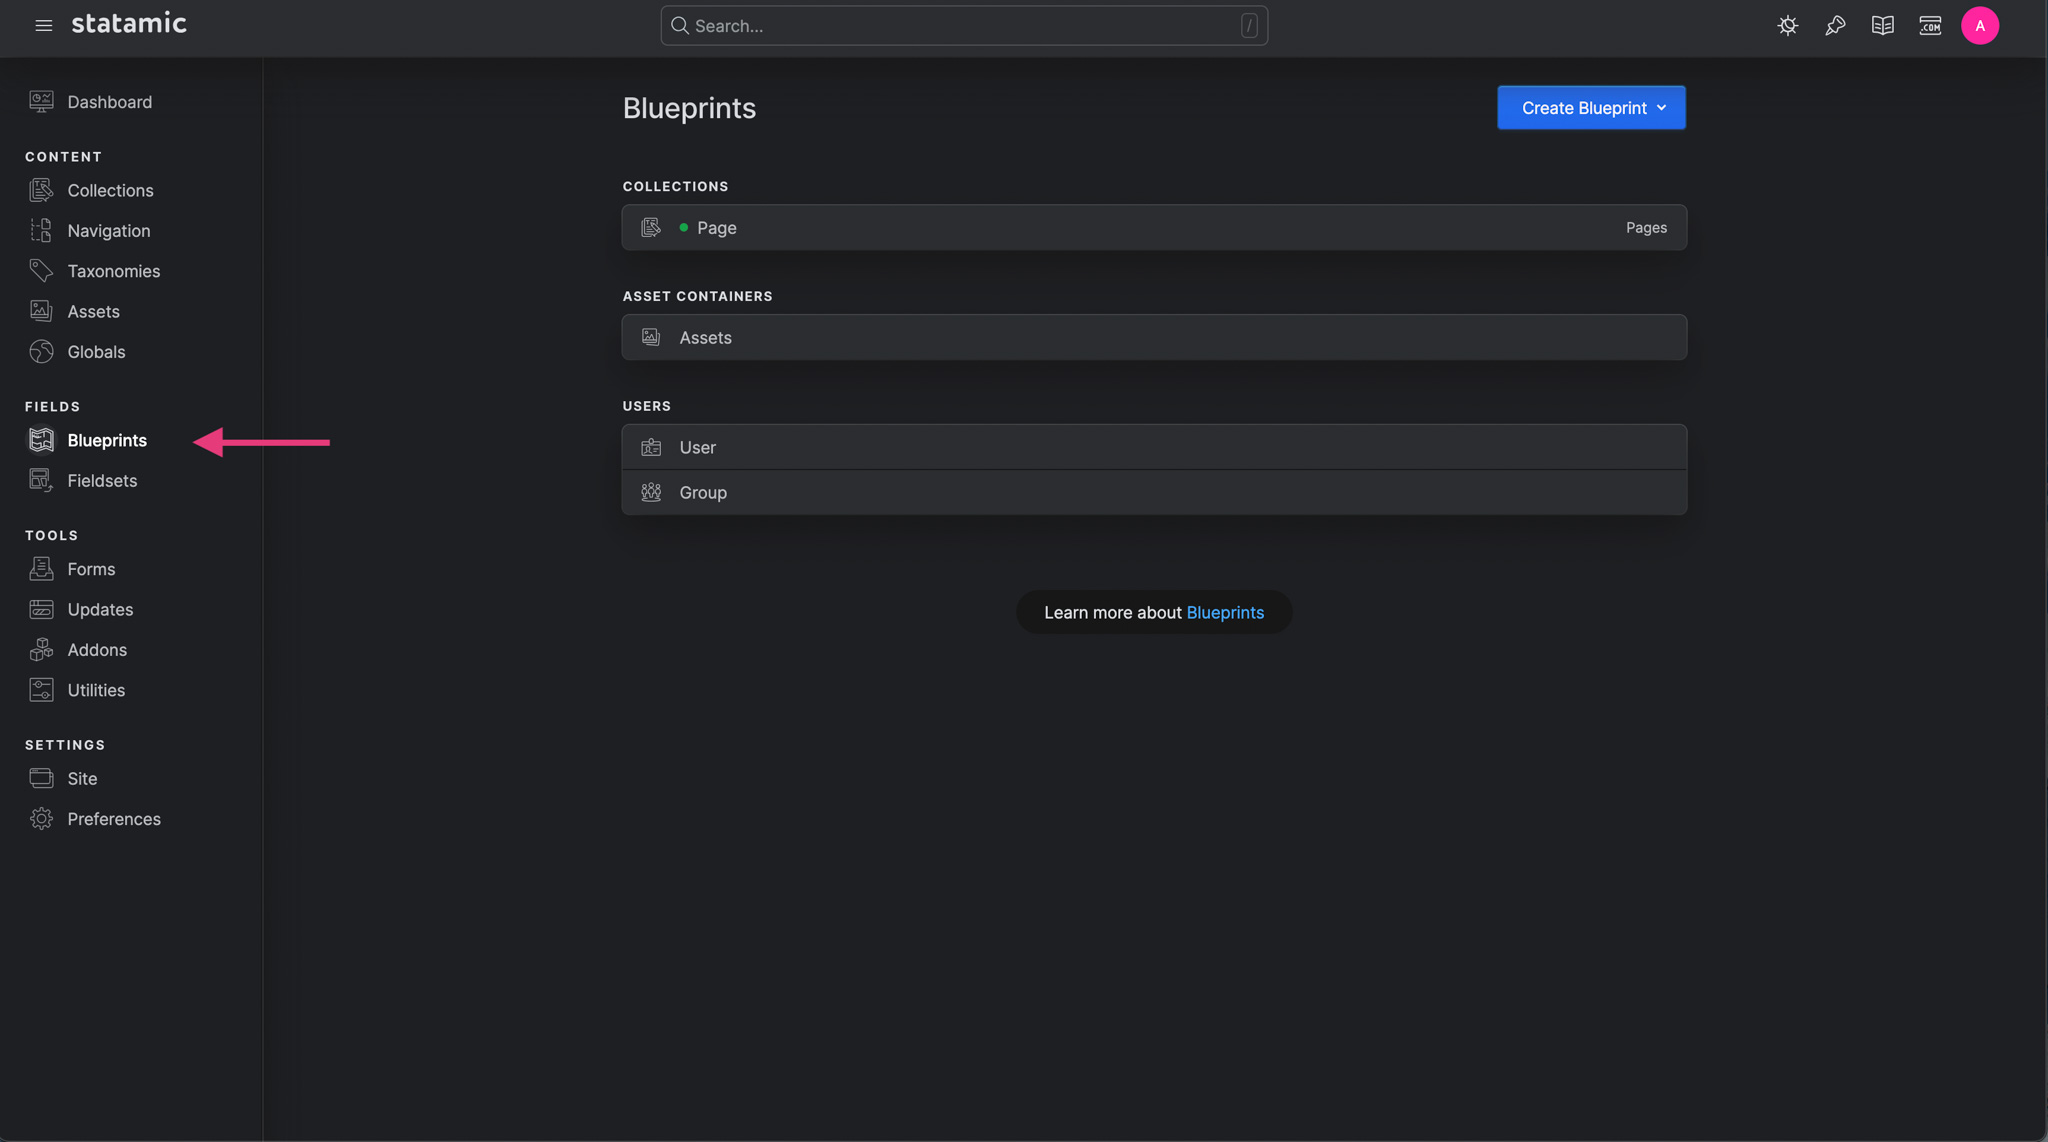
Create a New Entry: If we were to create an entry right now, we would only have the standard options available. However, we need more flexibility for our page. Let's head to Blueprints under Fields and select the Page Blueprint.
Here, you have the option to add some fields. For the hero section on benoitbiraguma.be, we need the following fields:
- Hero Title (Text): The title for the hero section.
- Hero Image (Asset): The image for the hero section.
- Hero SVG (Asset): The floating SVG icon for the hero section.
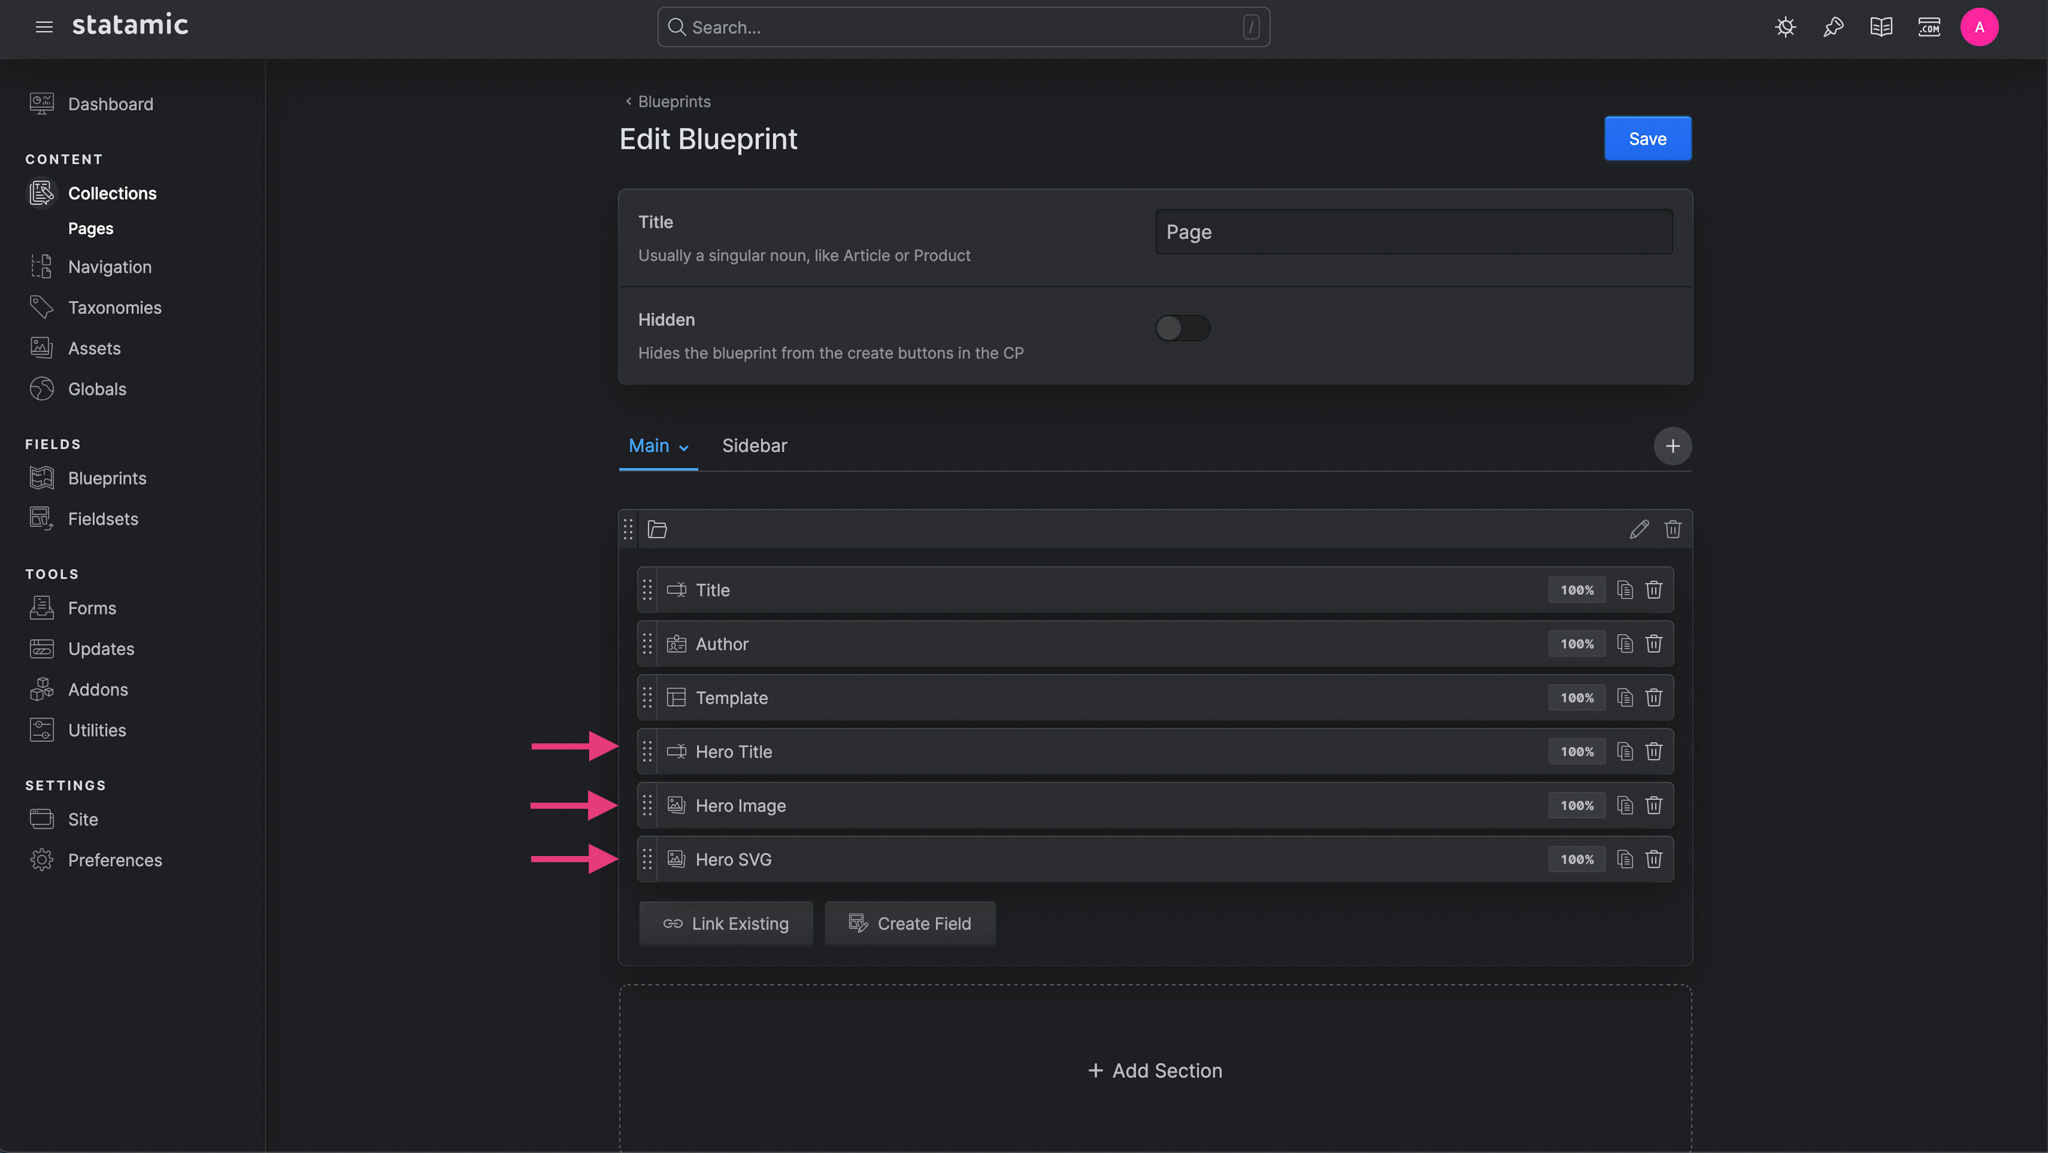
We don’t actually need the content field anymore, so let's delete it to keep the blueprint clean.
Edit the Home Page: Now, let's edit the Home page. Type the same title as on my portfolio, add the hero image, and include the floating icon.
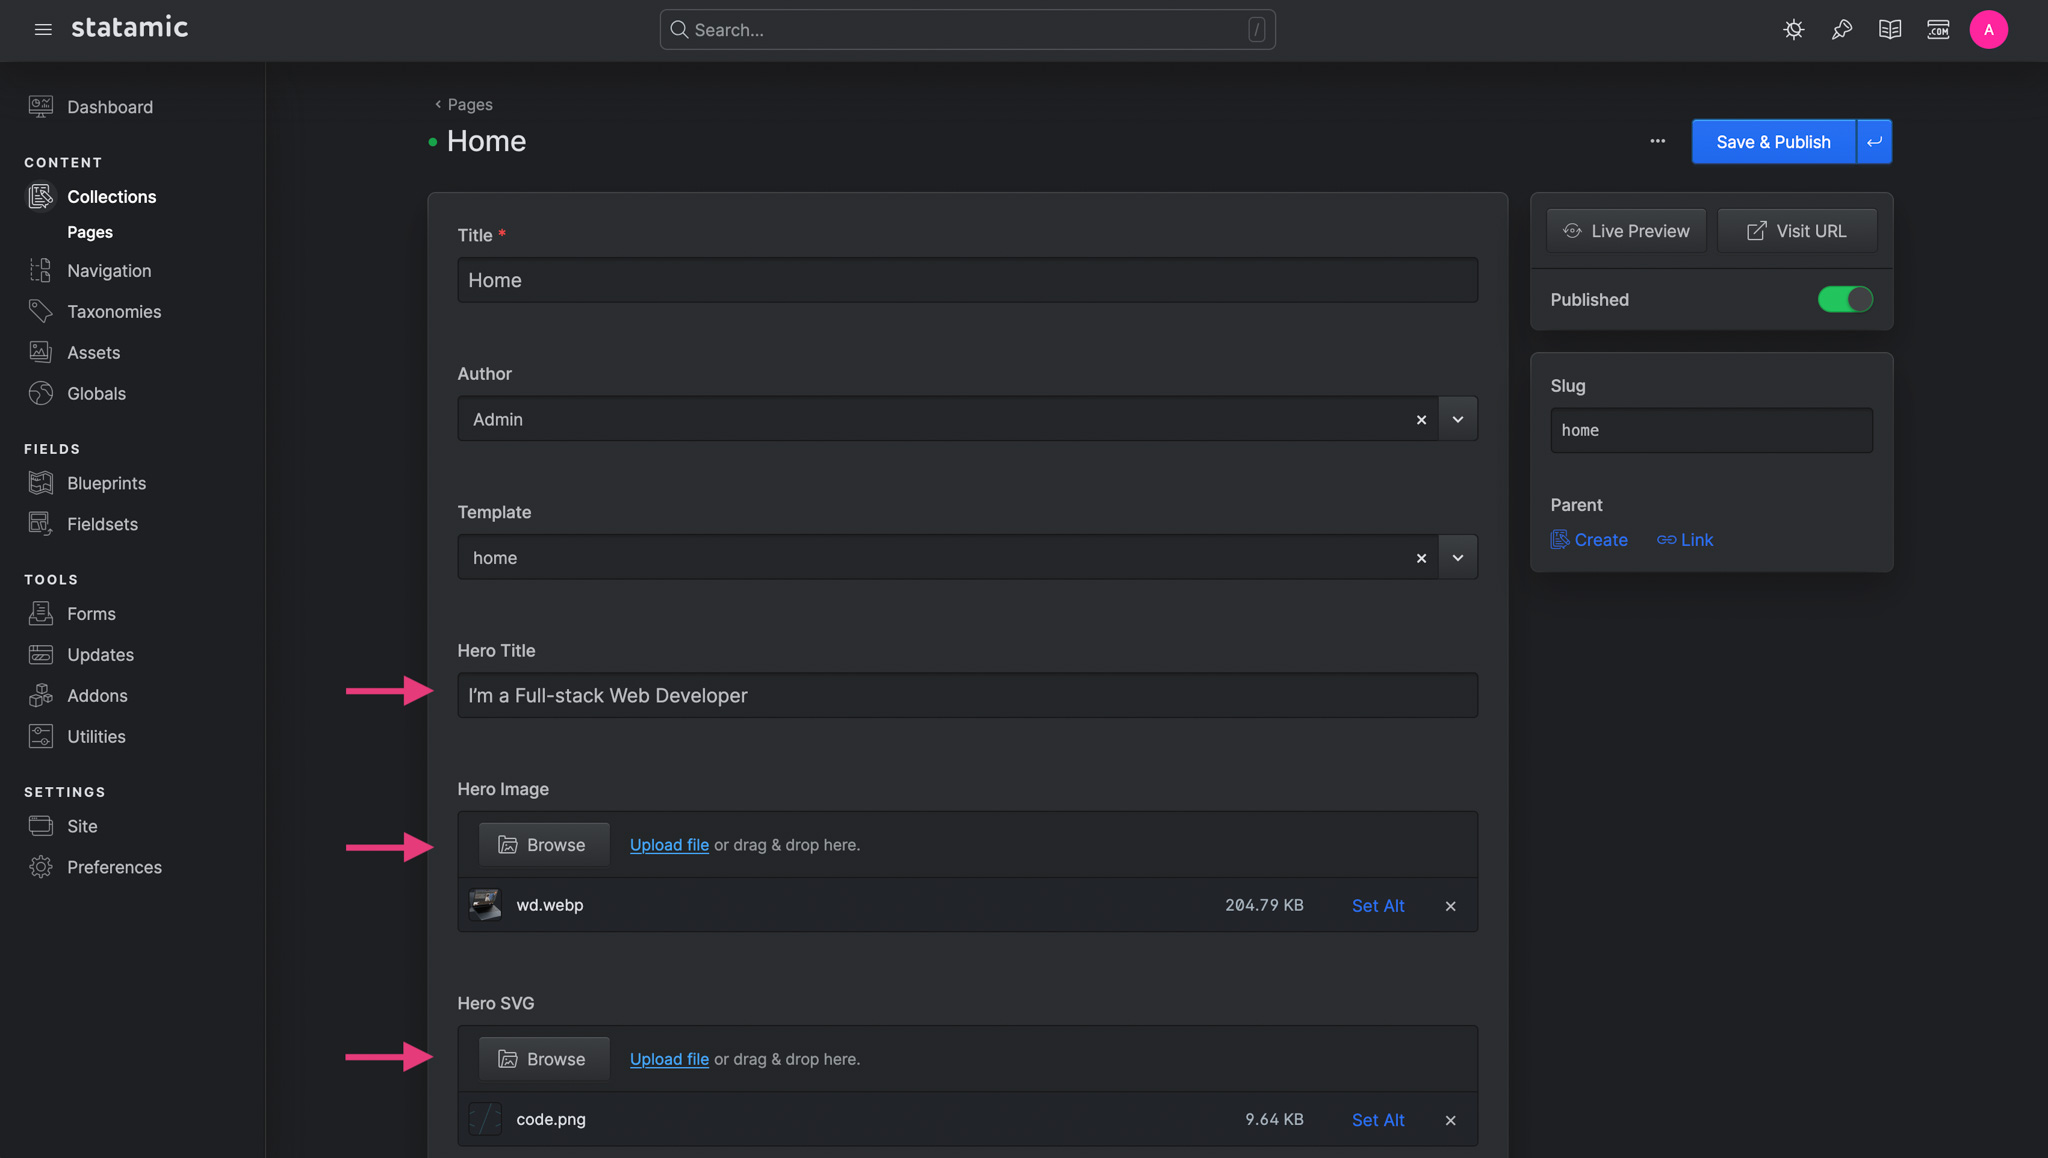
After you've added these, click Save & Publish. Note that the entry is using the home template (visible in the template field). Now that we have some content, let's reveal it in the browser.
Update the Home Template: In your code editor, open the file
resources/views/home.antlers.html. This is the home template. The "name" of a template corresponds to the filename up until the file extension. Any view ending in.antlers.htmlwill be parsed with Statamic's Antlers template parser. This parser allows you to include dynamic content within your templates using special tags.Delete all the placeholder HTML from the template and replace it with the following markup:
html<section class="hero hero--dev"> <div class="code-animation"> {{ hero_icon }} <img src="{{ url }}" alt="{{ alt }}" class="code"> {{ /hero_icon }} </div> <div> <header> <nav class="header__inner"> <a href="/">Bénoît Biraguma</a> <a href="/#">About</a> </nav> </header> <div class="hero__content"> <h1 class="dev__title">{{ hero_title }}</h1> <a class="hero__button hero__button--dev" href="projects"><span>dev projects</span></a> </div> </div> <footer> <nav class="footer__inner"> <a href="https://www.linkedin.com/in/beno%C3%AEt-biraguma-48422a194/" target="_blank">Let's connect</a> </nav> </footer> <div class="hero__image wd-image"> {{ hero_image }} <img src="{{ url }}" alt="{{ alt }}"> {{ /hero_image }} </div> </section>View Your Changes: Refresh the site in your browser, and you should see your content displayed beautifully. Each of those double curly tags represents a variable. When you navigate to a URL that matches an entry's route rule, all of that entry's field data is automatically available in the defined template.

STEP 3: Customize the Layout
You probably noticed that there is some styling going on. That's coming from the layout. Your layout file contains any markup you want to be present no matter what page you’re on. It's usually the best place to put your <head> meta markup, persistent site navigation, site footer, and other global elements (similar to the base.njk file in 11ty, remember?). Let's customize it.
Update the Layout File:
Open
resources/views/layout.antlers.htmlin your code editor and replace its content with the following:html<!doctype html> <html lang="{{ site:short_locale }}"> <head> <meta charset="utf-8"> <meta http-equiv="X-UA-Compatible" content="IE=edge"> <meta name="viewport" content="width=device-width, initial-scale=1"> <title>{{ title ?? site:name }}</title> {{ vite src="resources/js/site.js|resources/css/site.css" }} </head> <body class="dark"> <div class="body__inner"> {{ template_content }} </div> </body> </html>That should get rid of the white lines you still had left and right.
Portfolio To-Do List:
Now, it’s time to really build the portfolio. Here’s our to-do list:
- Create a Projects collection with the following fields:
- Title
- Summary
- Content
- Live (URL to the live project)
- Repo (GitHub repository link)
- Recording (Link to any video or media showcasing the project)
- Thumbnail (Image representing the project)
- Create a Projects Index Page (located at
/projects). - Create a Project Detail Page (located at
/projects/rfc-doggen).
- Create a Projects collection with the following fields:
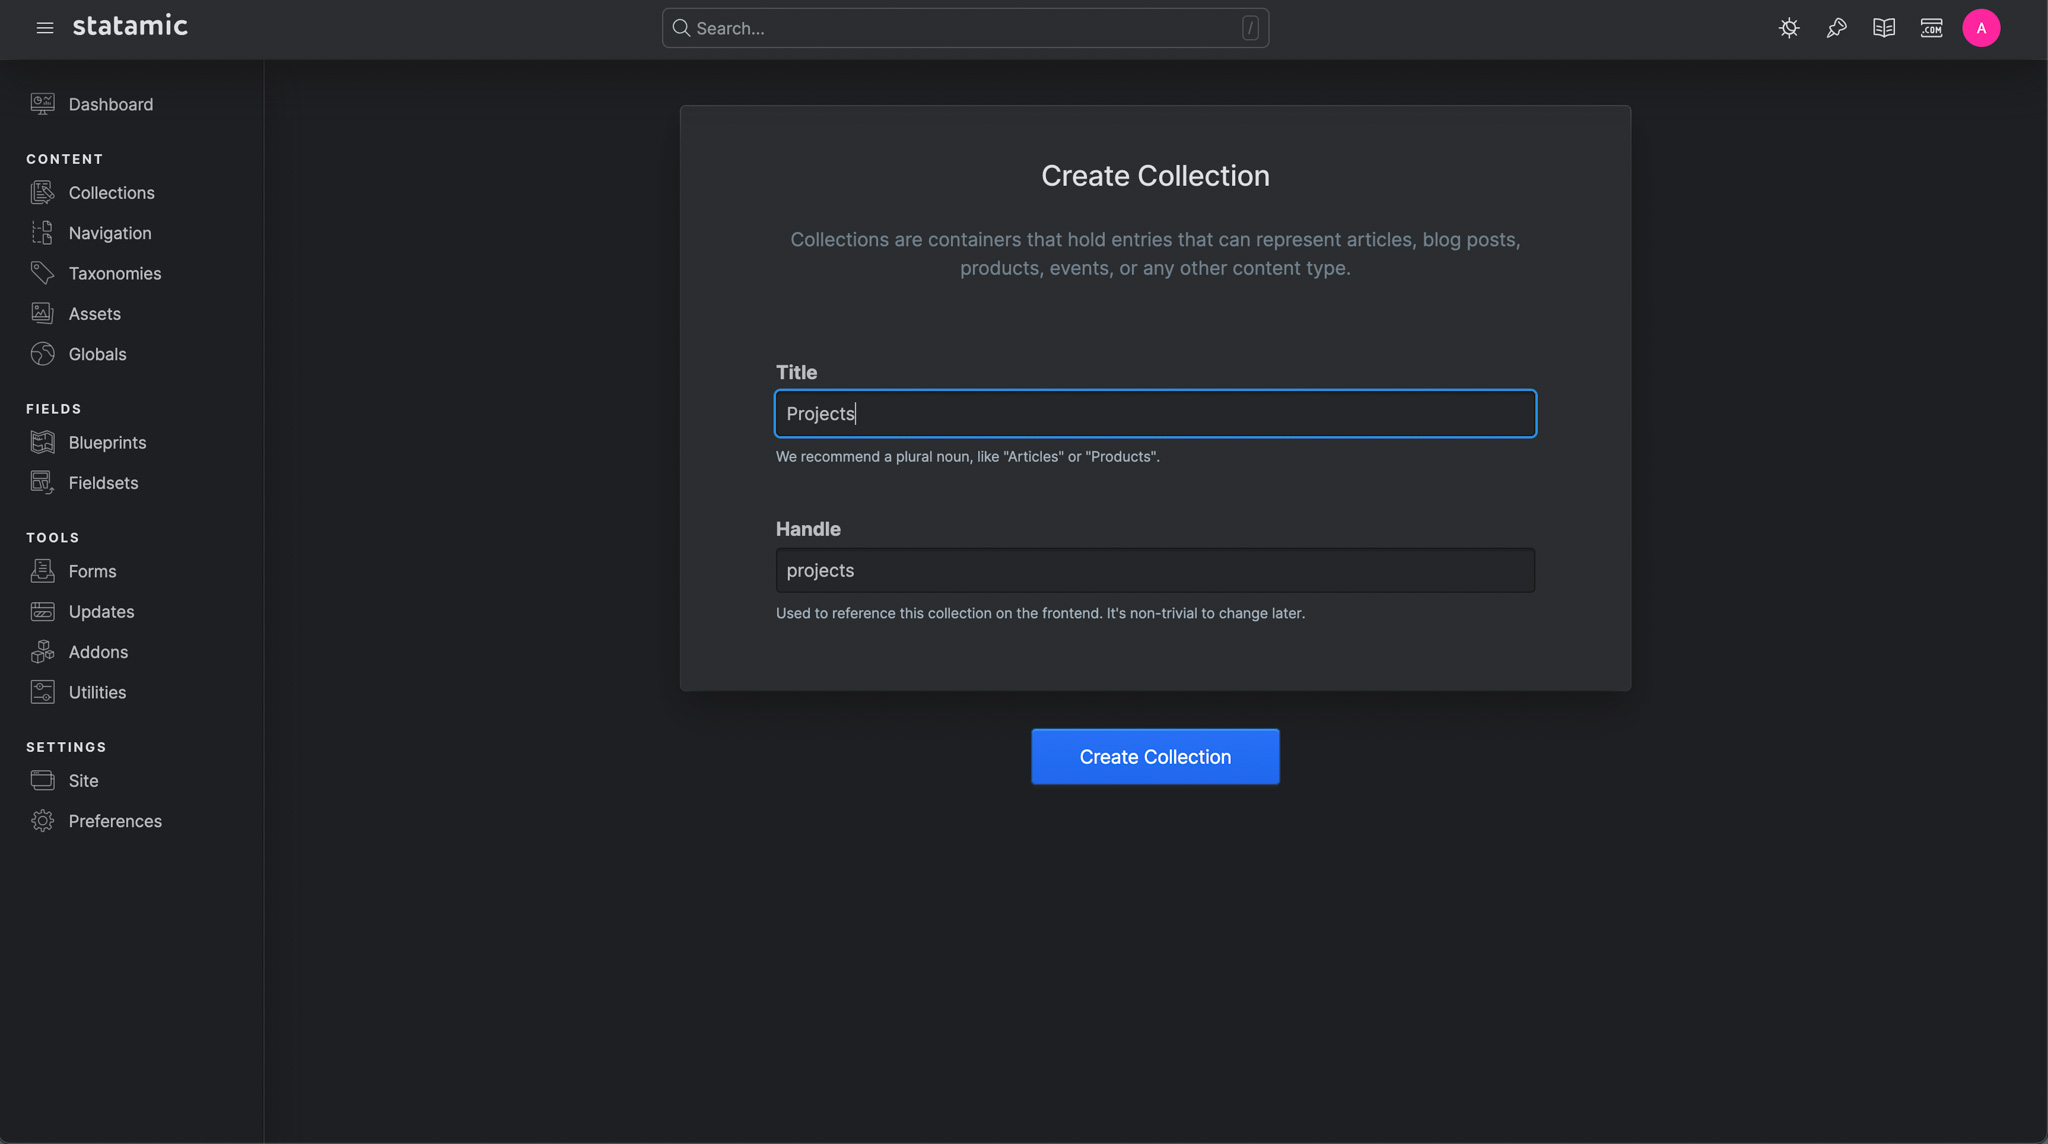
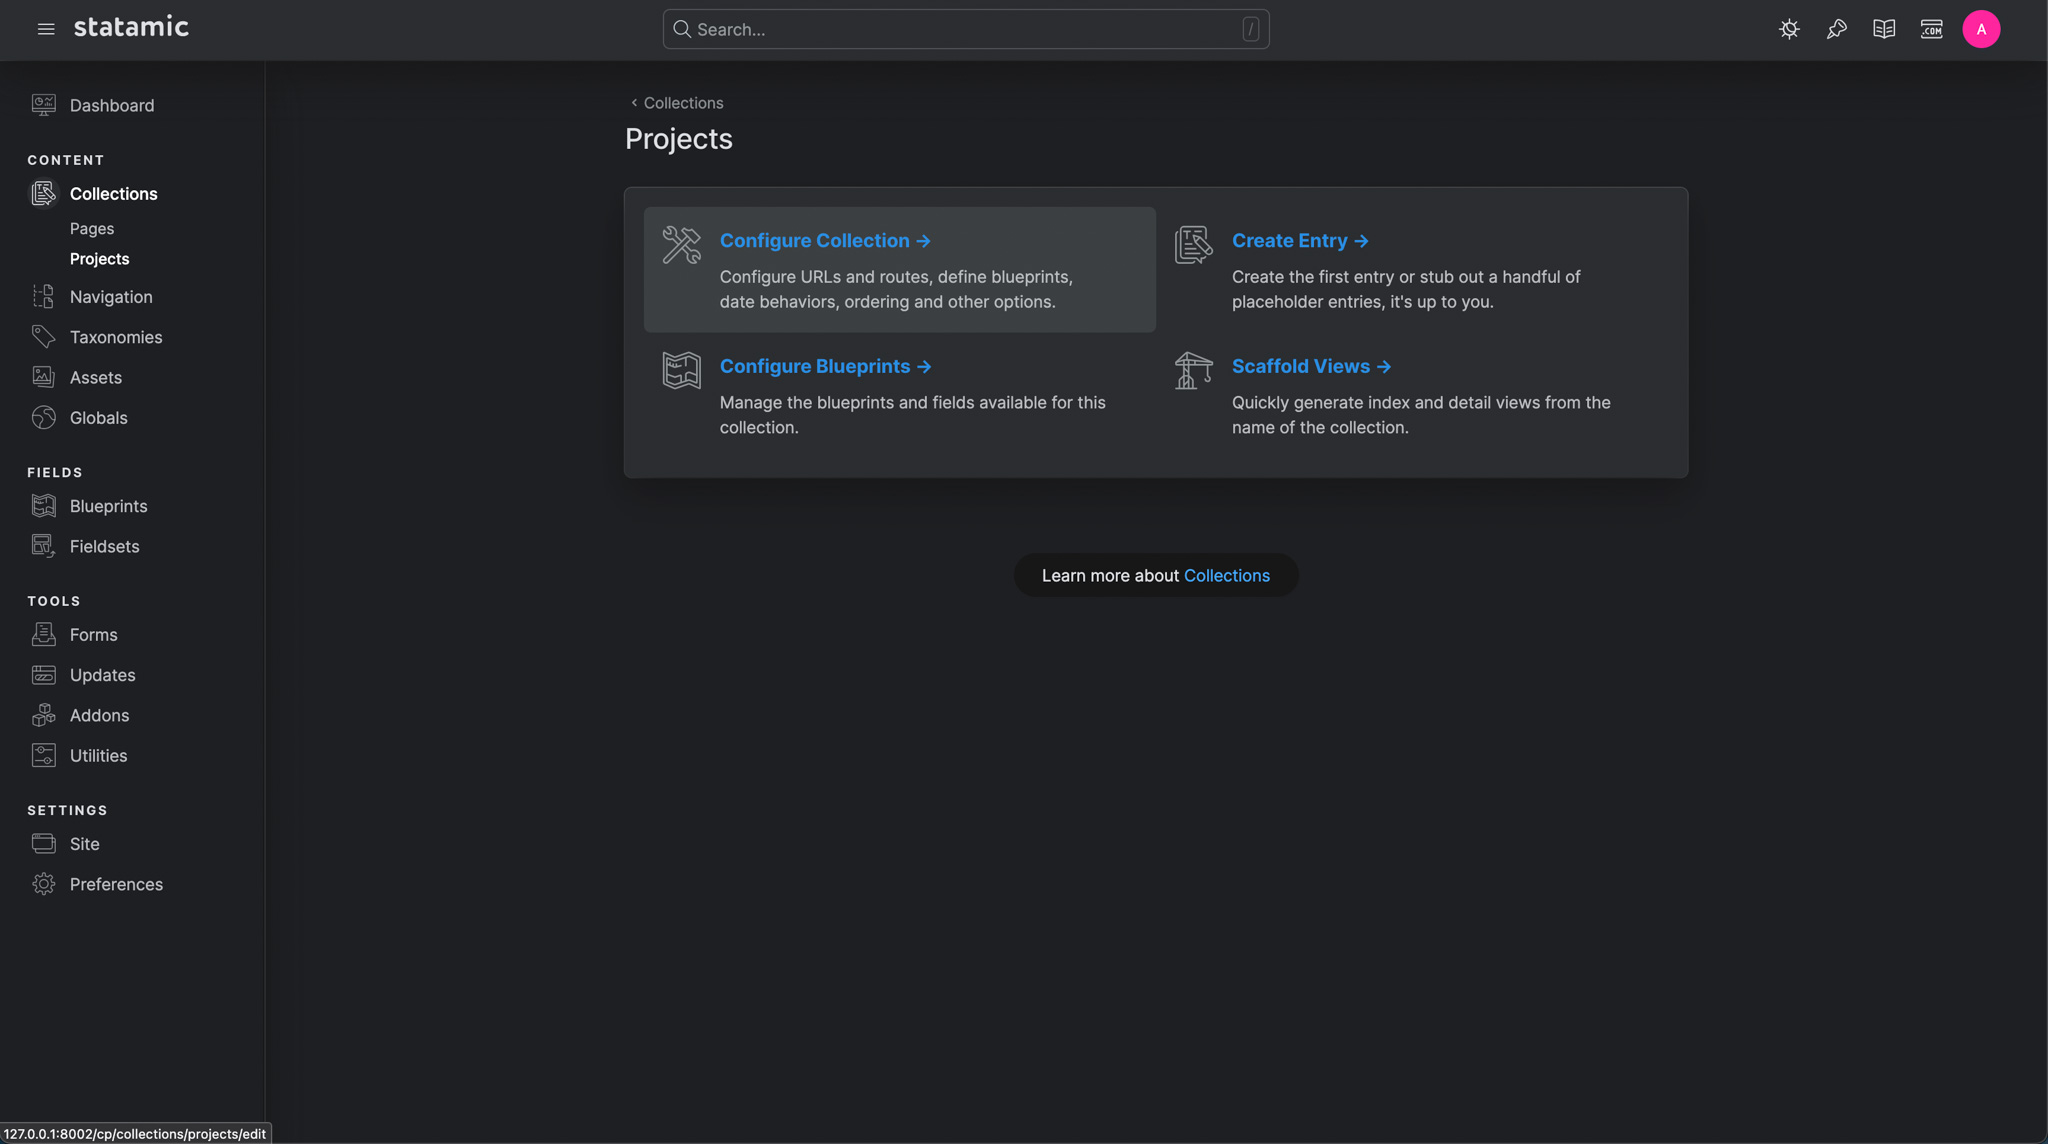
Create a New Collection:
Go back to the Control Panel and click on the Collections link in the sidebar. Then, click the blue Create Collection button and name your new collection Projects.
STEP 4: Scaffold Your Views
To save some time, we’ll use Statamic’s built-in tool to generate the index and show templates for our projects.
Scaffold the Views: Head to the Scaffold Views option in the control panel.
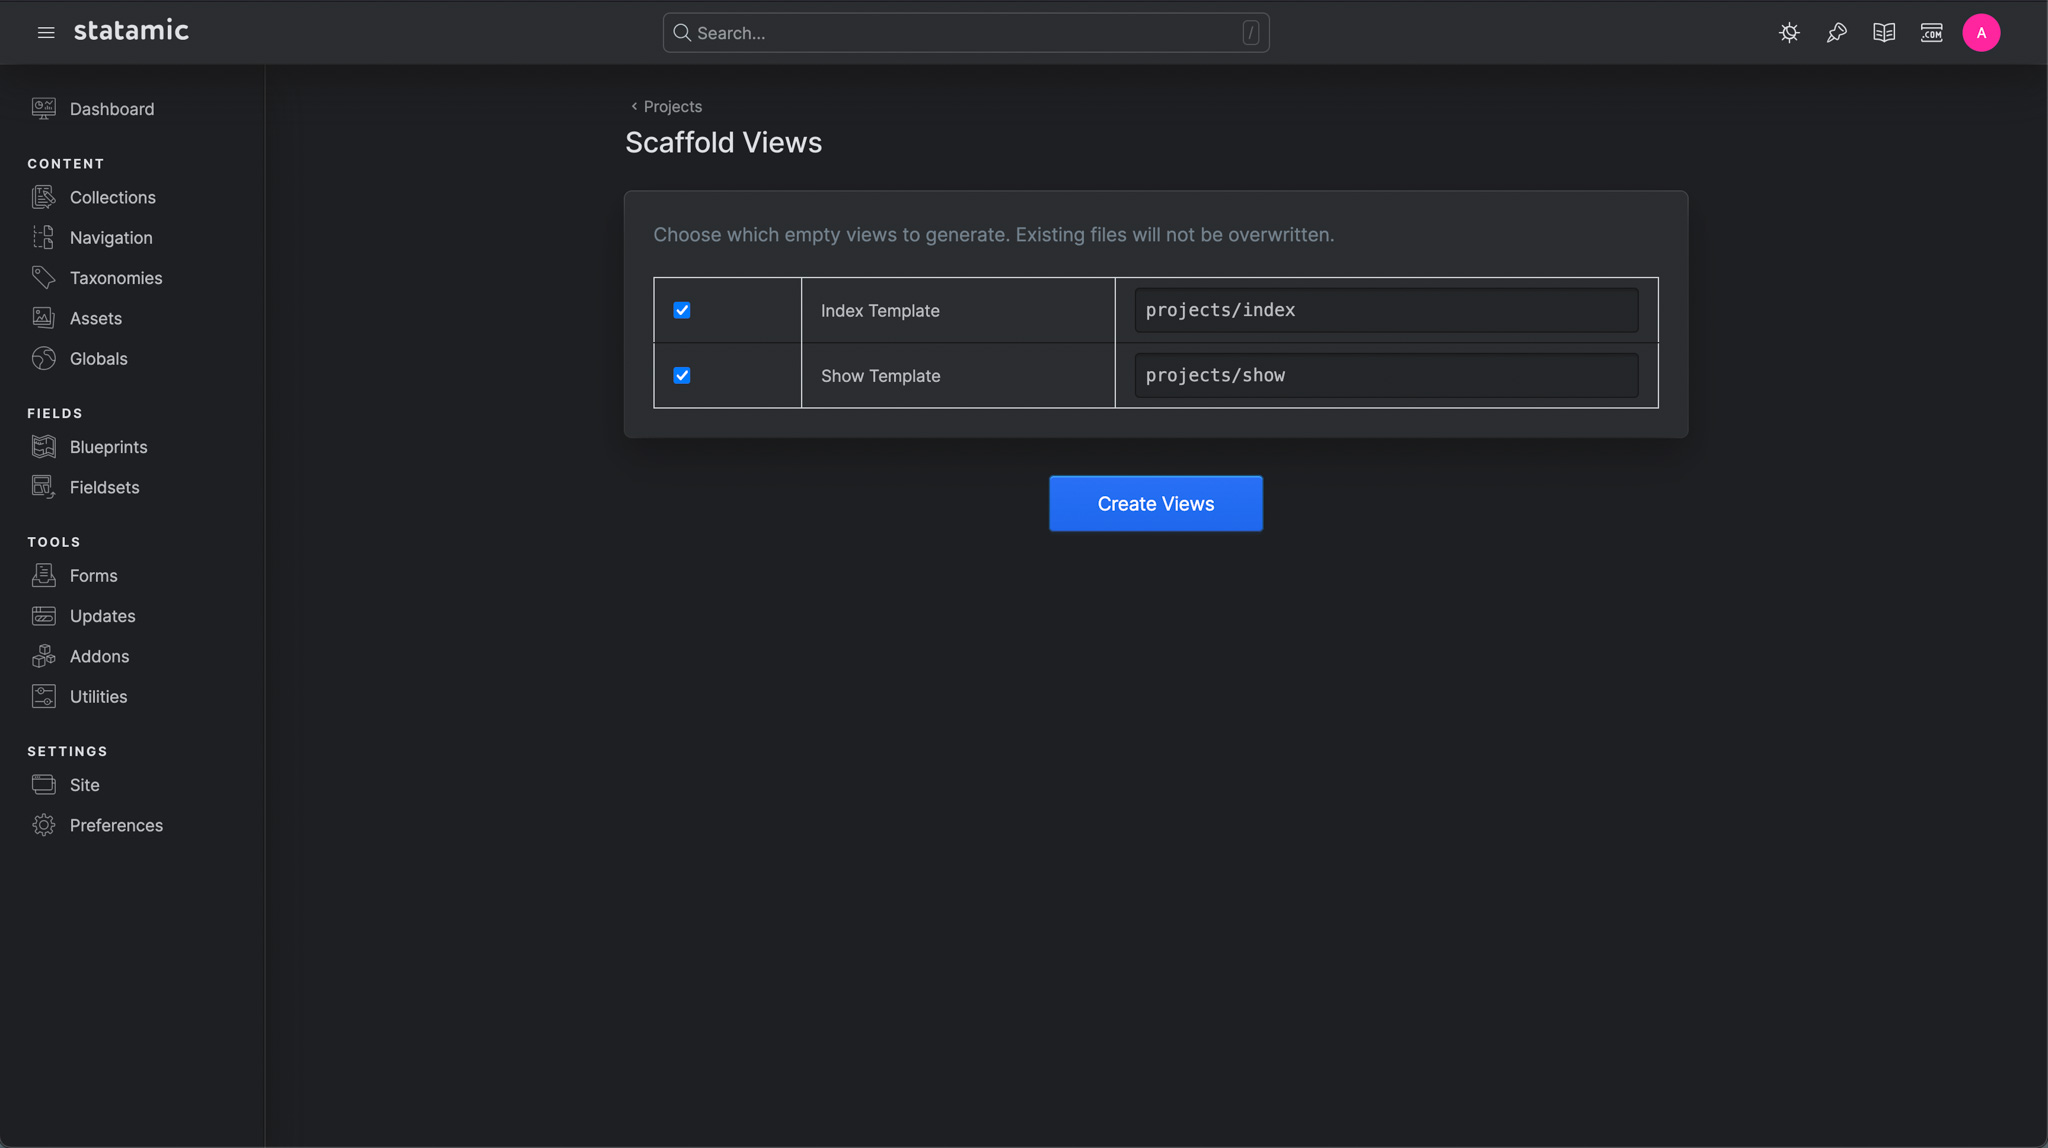
Generate the Views: Click the Create Views button. The default options are perfect, so no further configuration is needed.
After this step, two new files will be created in your project:
resources/views/projects/index.antlers.html- This will be the template for the projects index page.resources/views/projects/show.antlers.html- This will serve as the template for individual project detail pages.
We’ll be editing these files shortly to display the content of our projects.
STEP 5: Configure the Collection
To set up our collection correctly, let’s go through some essential settings.
Access the Collection Settings: Start by navigating to the settings for your Projects collection.
Key Settings to Update: We’ll review some important settings, but we only need to adjust three to configure our portfolio correctly:
- Enable Publish Dates: The default sub-settings are fine.
- Enable Ordering: The default sub-settings are fine.
- Set Your Route Rule for URL patterns
/projects/{slug}.
Explanation of Key Settings: Here's a summary from the Statamic documentation to clarify each setting:
Publish Dates: By enabling Publish Dates, Statamic adds a date field to the entry's available fields (called a Blueprint). This date determines whether an entry should be visible. For example, a blog post with a future date would be considered scheduled and unpublished, while a past date would mean it’s published and visible. This is useful if you plan to release projects or posts on specific dates.
Ordering: This setting allows you to control the order in which entries are displayed, such as arranging projects by creation date or custom order.
Routing & URLs: In the Routing & URLs section, you’ll find the Route setting. Here, you can define the URL pattern for your entries. You can use any fields from the collection as variables in the pattern by surrounding them in single braces, e.g.,
{title}.
Finalizing Settings: When in doubt, keep it simple. Don’t change any settings you’re unsure about. Once you’ve made the necessary adjustments, click Save to apply the changes.
The following should now be displayed in your
/content/collections/projects.yaml:yamltitle: Projects template: projects/show layout: layout revisions: false route: '/projects/{slug}' date: true sort_dir: asc date_behavior: past: public future: private preview_targets: - label: Entry url: '{permalink}' refresh: true structure: root: falseIf thats not the case, no reason to panick you can just edit the settings directly in the yaml, that's the power of Statamic
STEP 6: Creating Your First Entry
To set up our projects with the right fields, let’s add additional fields to the blueprint for our Projects collection.
Default Entry Fields: If we created an entry right now, we’d only see options for Title, Content, Author, and Template. While these are useful, they aren’t enough for showcasing our projects.
Customize the Project Blueprint: Let’s go to the Blueprints section under Fields and select the Project Blueprint.
Just like we did for the Page Blueprint earlier, here we can add custom fields for our projects.
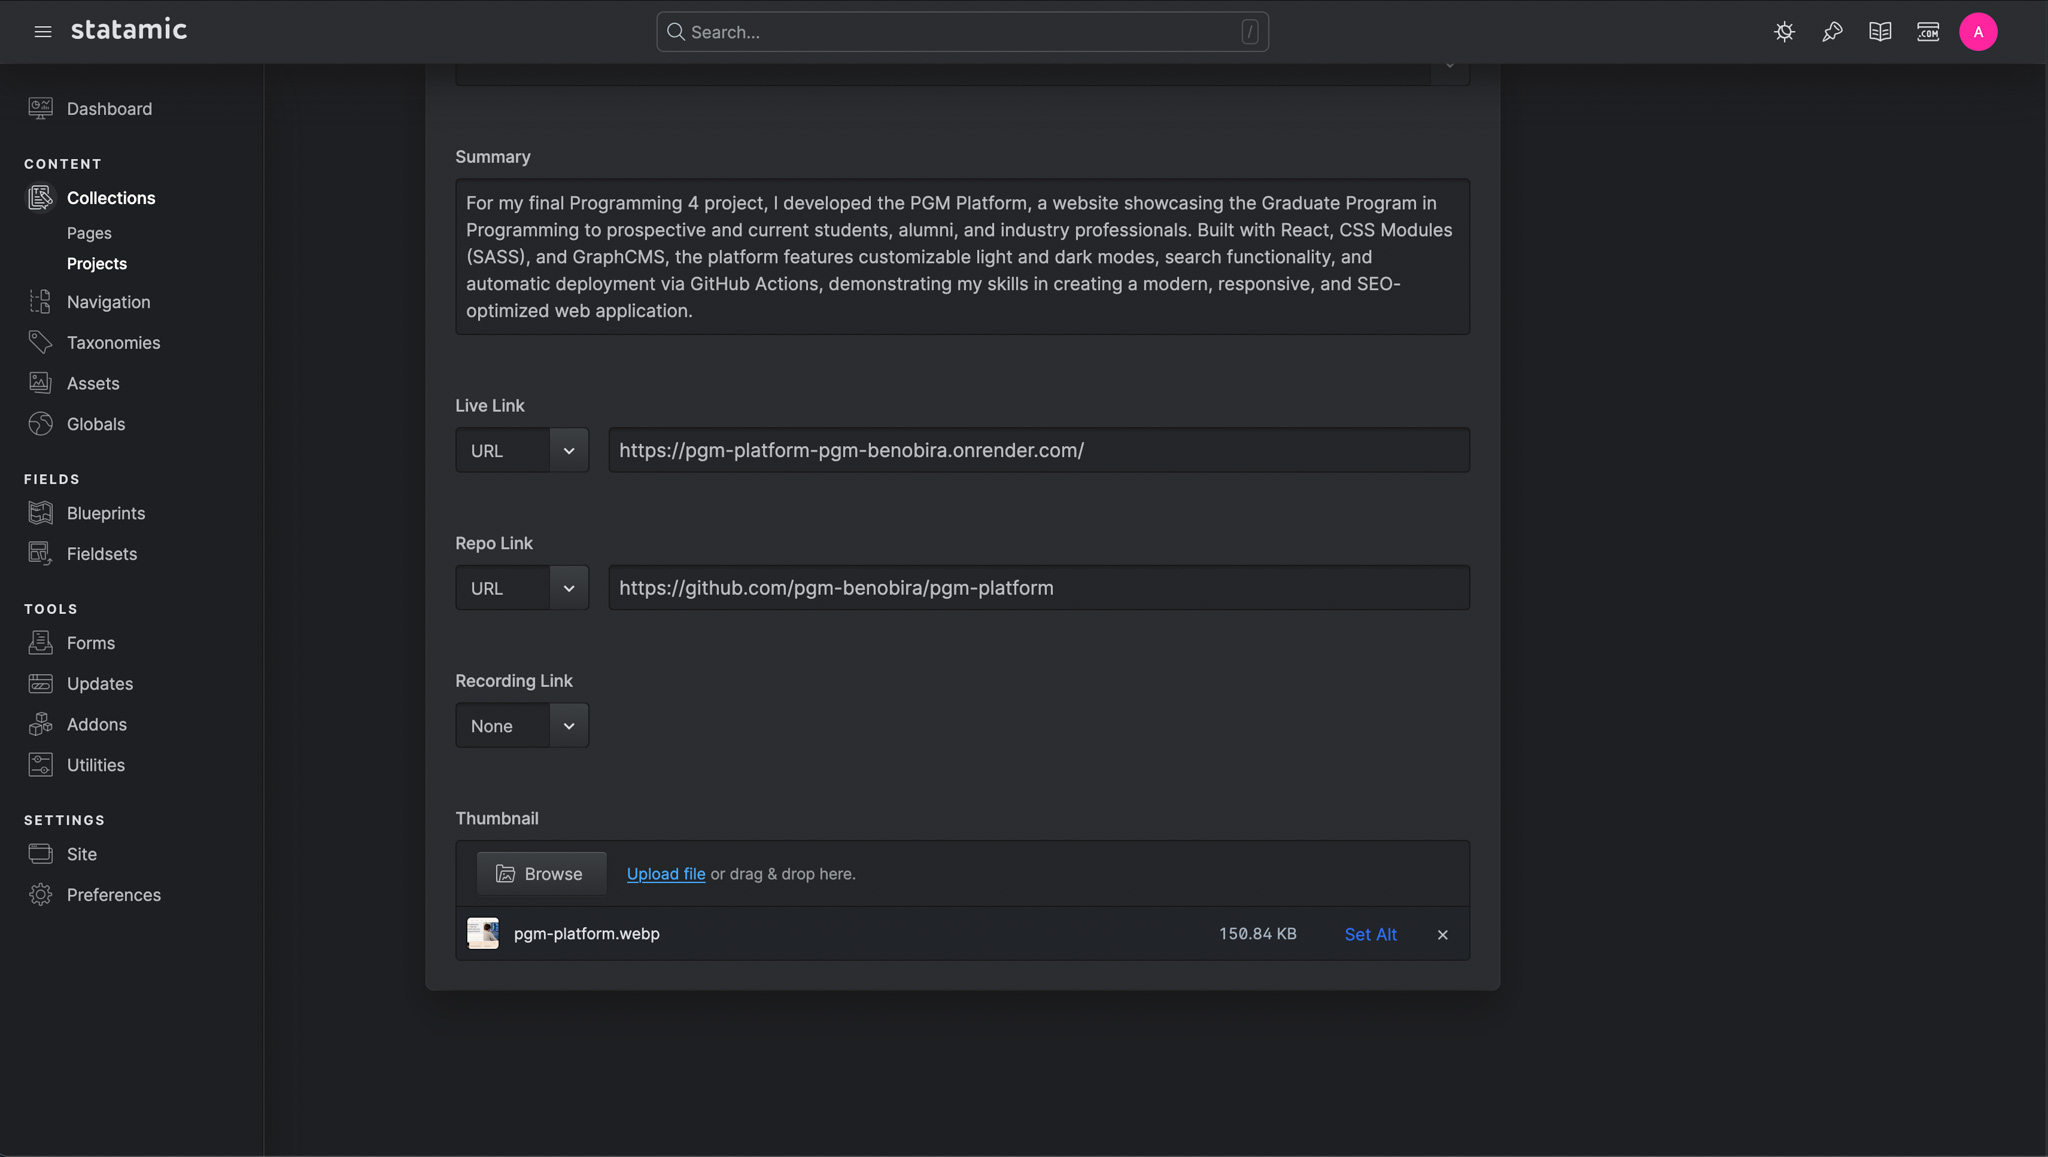
Add Project-Specific Fields: Add the following fields to the Project Blueprint:
- Summary (Text Area): For a brief summary of the project.
- Live Link (Link Type): A link to the live version of the project.
- Repo Link (Link Type): A link to the project’s repository.
- Recording Link (Link Type): A link to any recording of the project in action.
- Thumbnail (Asset): An image thumbnail for the project.

Create Your First Entry: Go back to your Projects Collection screen and click Create Entry to start adding your project content. Here is an example but it can be your own project:
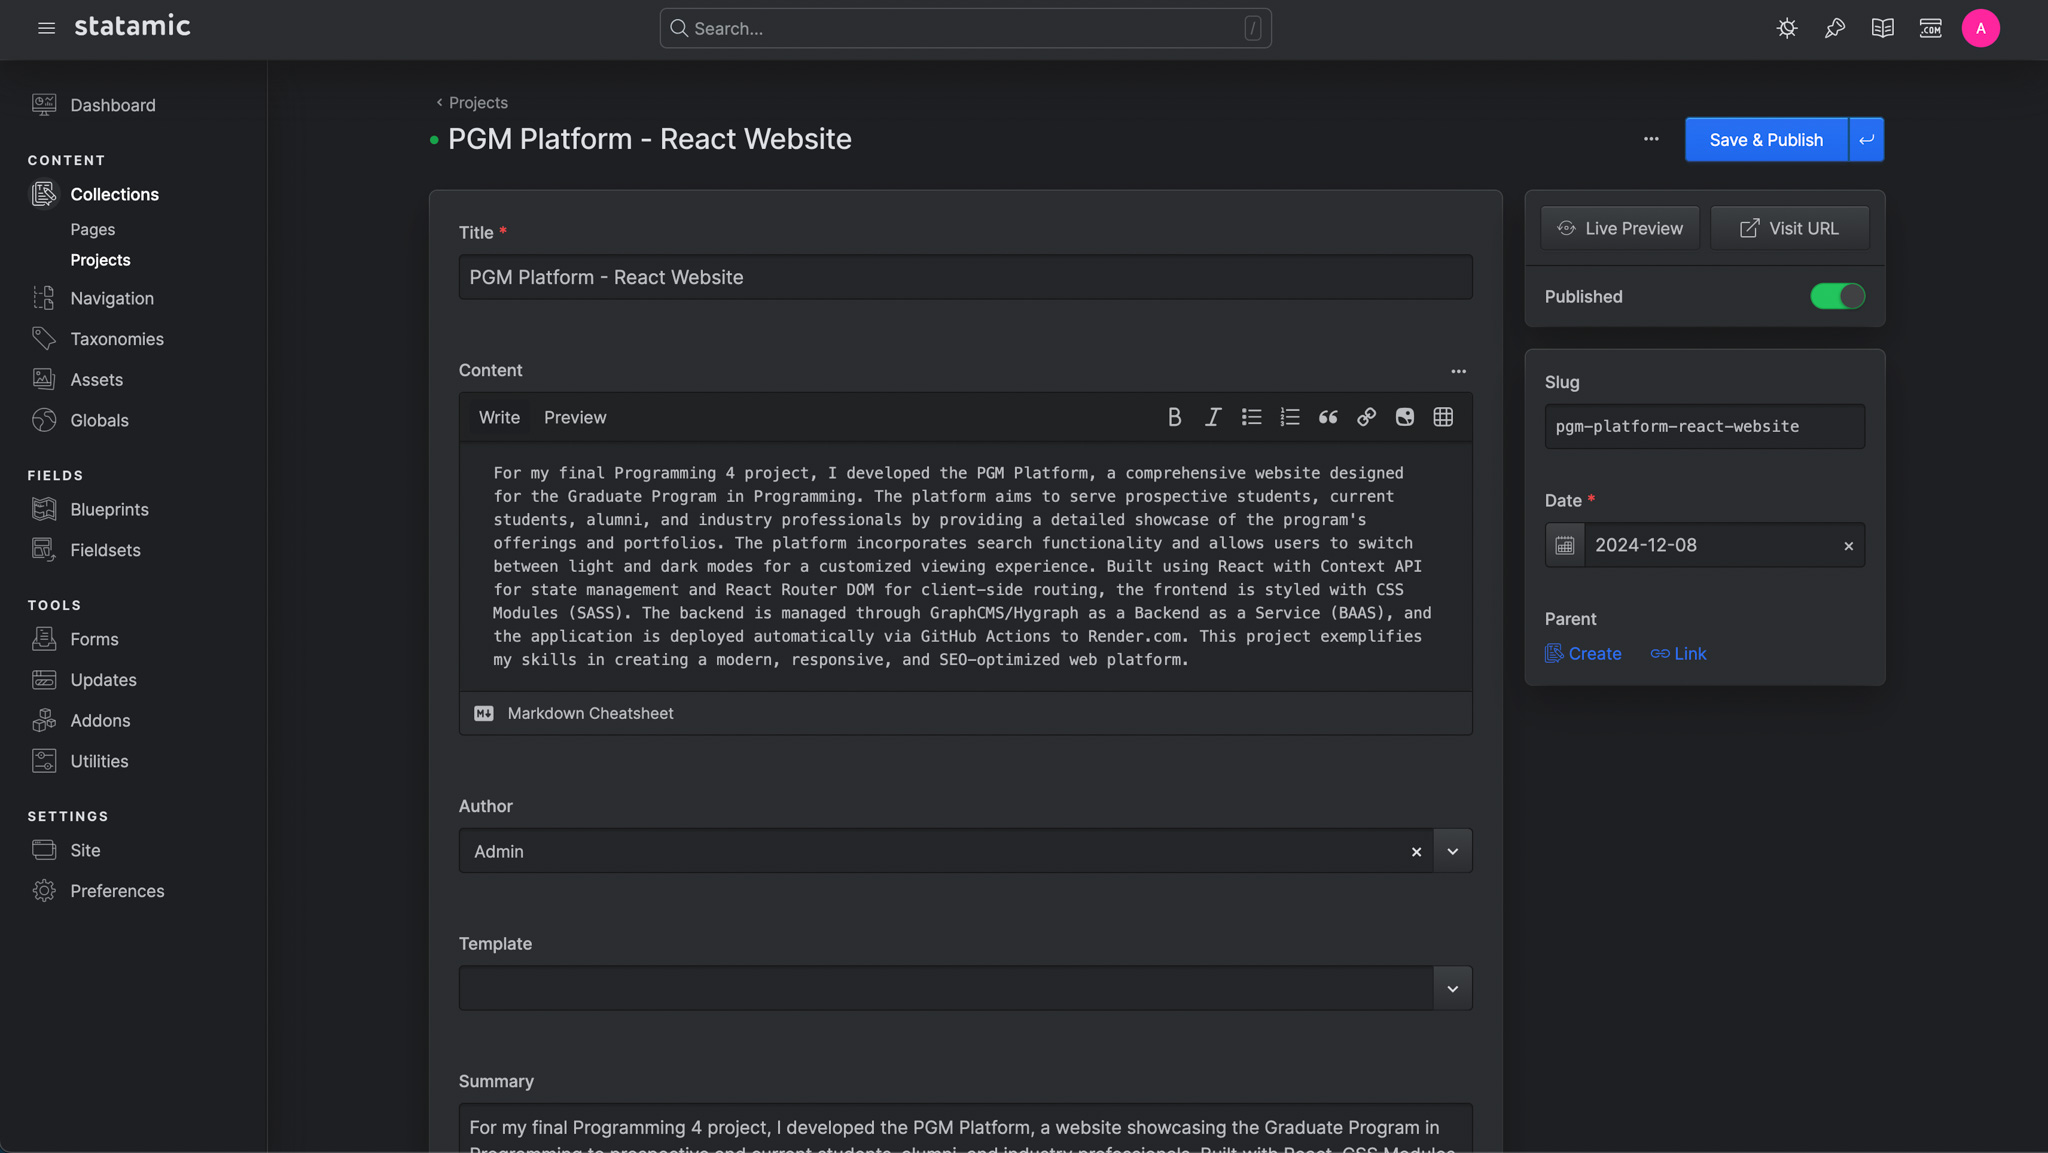
Add Additional Entries: Let’s create a few more projects to showcase in the portfolio so we have some content to work with. Get some variations, add some projects with or without the following: live link (to view the hosted project), repo link (github repository) and link to a YouTube recording of a project of yours (if not hosted or public repo).
STEP 7: Make the Project Page
Now that we’ve created entries for our projects, the question is, where will we display them? Let’s make an overview page for the projects, similar to the one at https://benoitbiraguma.be/web-development-projects.
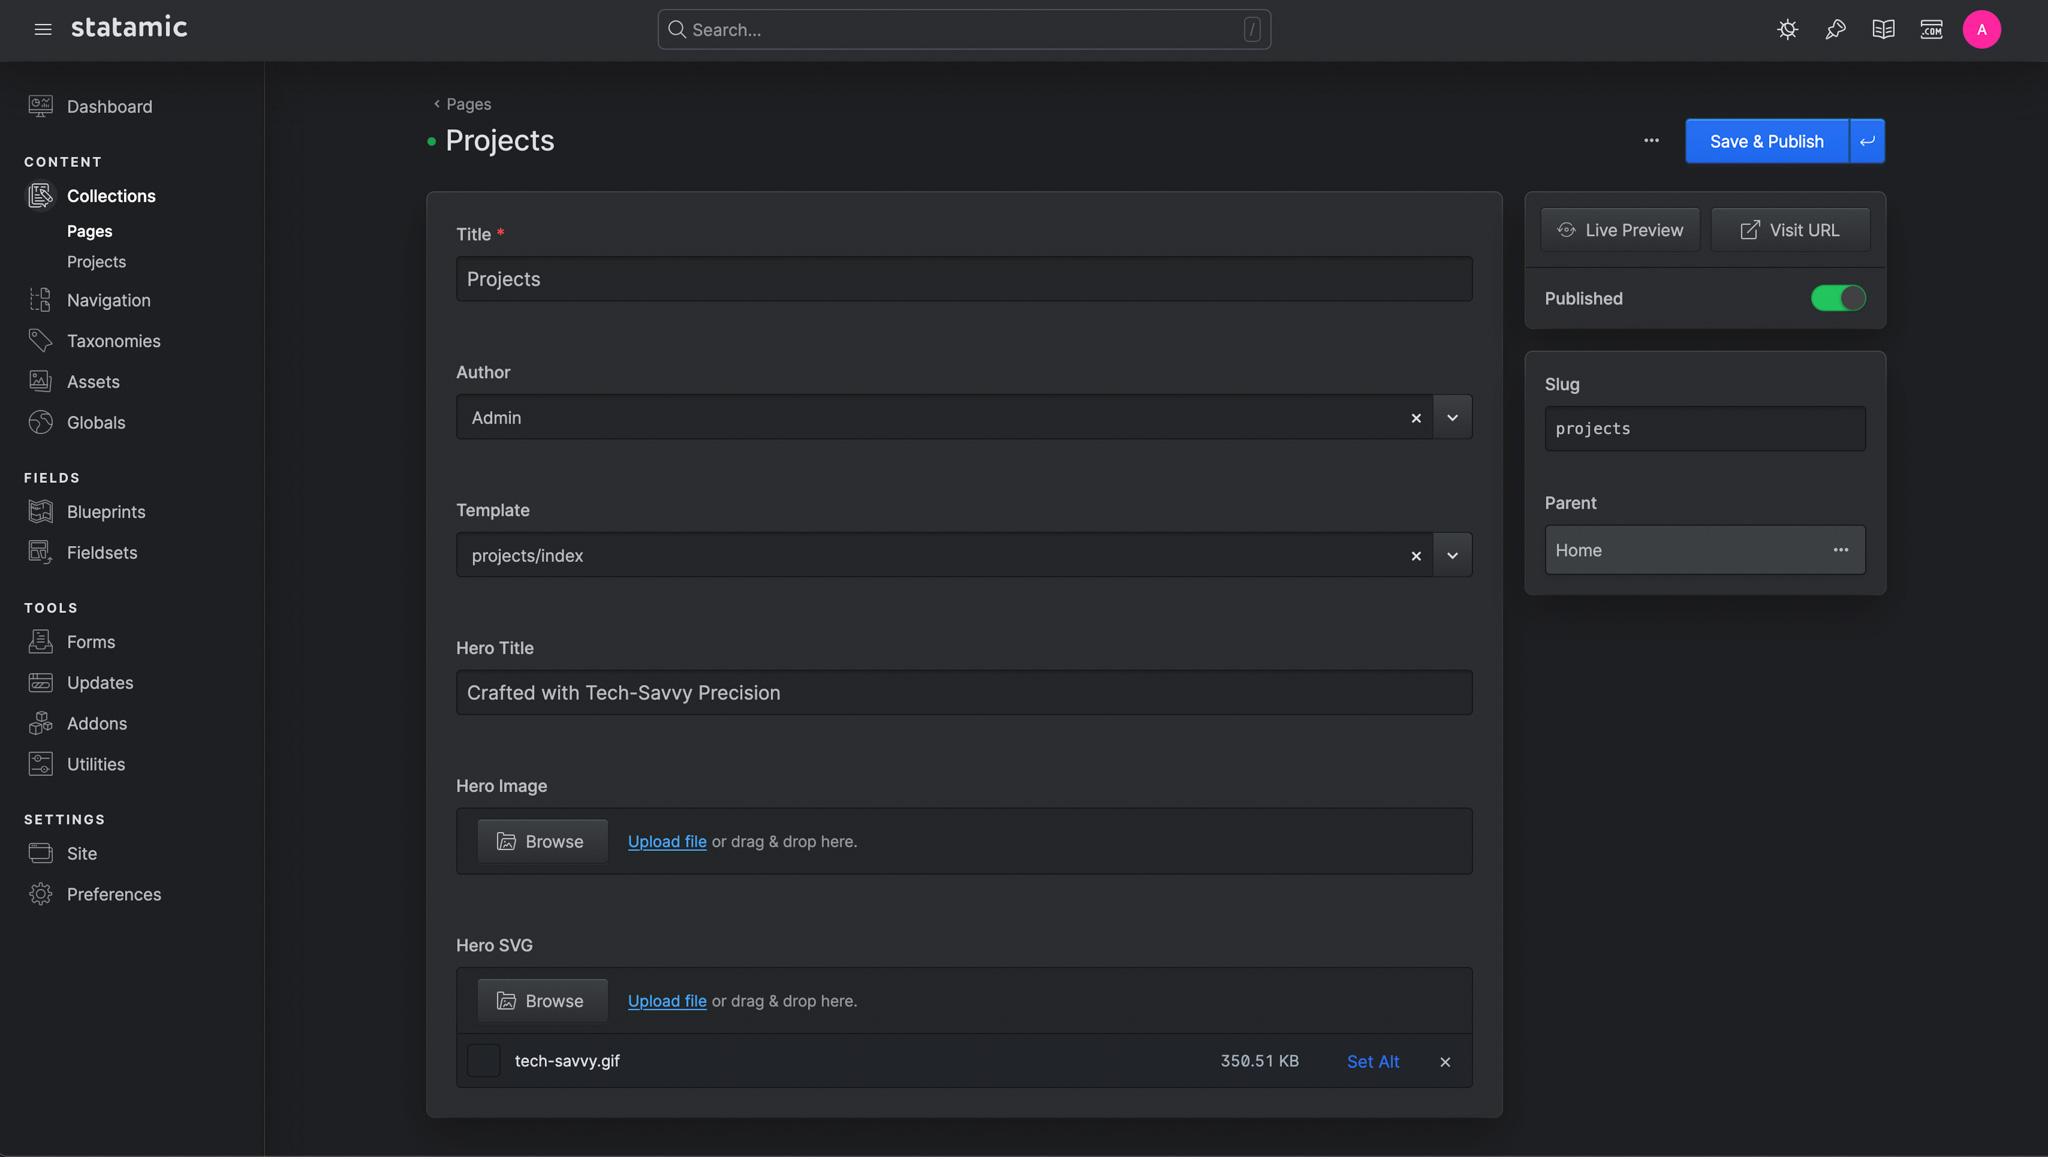
Create a Projects Page in the Page Collection:
- Go to your Pages Collection and create a new page named Projects.
- For the Hero SVG, add the GIF you’d like to use. (here is the one i used)
- Set the Title and Hero Title fields for the page.
- Select the projects/index template.
- Ensure the slug for the page is set to projects.
Test the Projects Page: Now, when you click on the Dev Projects button on the Home page, you won’t get a 404 error. Instead, you’ll see a dark blank page, meaning the URL exists.
Edit the Index Template: Open
resources/views/projects/index.antlers.htmlin your code editor. Remove any existing code and replace it with the following code to set up the hero section:html<header> <nav class="header__inner"> <a href="/">Bénoît Biraguma</a> <a href="/#">About</a> </nav> </header> <main> <div class="main__inner"> <div class="page-header"> <h1 class="page-header__title">{{ hero_title }}</h1> <div class="page-header__right"> <a class="link-hover" href="/"> <span class="link-hover__label">Go back</span> <svg class="link-hover__svg" xmlns="http://www.w3.org/2000/svg" viewBox="0 0 17.858 16.704"><path fill="none" stroke="#3fd9ee" stroke-linecap="round" stroke-linejoin="round" stroke-width="2" d="M1 8.352h15.858M9.92 1.414l6.938 6.938L9.92 15.29" data-name="Icon akar-arrow-up"/></svg> </a> {{ hero_svg }} <img class="page-header__icon" src="{{ url }}" alt="{{ alt }}" class="code"> {{ /hero_svg }} </div> </div> <div class="web-projects"> {# HERE COMES STEP 8 #} </div> </div> </main> <footer> <nav class="footer__inner"> <a href="https://www.linkedin.com/in/beno%C3%AEt-biraguma-48422a194/" target="_blank">Let's connect</a> </nav> </footer>View the Projects Overview Page: You should now have a page with a nicely designed title and a looping GIF on the side.

STEP 8: Get All the Projects on The "Index" Page
Now that we’re setting up our Projects page, we’ll add markup to the index.antlers.html template to display each project entry.
Add Project Collection Markup: In
resources/views/projects/index.antlers.html, add the following code inside the div with classweb-projects(don’t worry, I’ll explain what’s happening in a moment):html{{ collection:projects }} <div class="web-project"> <div class="web-project__thumbnail"> {{ thumbnail }} <img src="{{ url }}" alt="{{ alt }}"> {{ /thumbnail }} </div> <div class="web-project__content"> <div class="web-project__header"> <a href="{{ url }}"> <h2 class="web-project__title">{{ title }}</h2> </a> <div class="web-project__links"> {{ if live_link }} <a class="live-link" href="{{ live_link }}" target="_blank" rel="noopener noreferrer"> <span class="live-link__label">live</span> <svg class="live-link__svg" xmlns="http://www.w3.org/2000/svg" viewBox="0 0 17.858 16.704"><path fill="none" stroke="#3fd9ee" stroke-linecap="round" stroke-linejoin="round" stroke-width="2" d="M1 8.352h15.858M9.92 1.414l6.938 6.938L9.92 15.29" data-name="Icon akar-arrow-up"/></svg> </a> {{ /if }} {{ if recording_link }} <a class="recording-link" href="{{ recording_link }}" target="_blank" rel="noopener noreferrer"> <span class="recording-link__label">recording</span> <svg class="recording-link__svg" xmlns="http://www.w3.org/2000/svg" fill="none" viewBox="0 0 24 24"><path fill="#3fd9ee" fill-rule="evenodd" d="M2 9a4 4 0 0 1 4-4h7a4 4 0 0 1 4 4v.072l3.202-1.84A1.2 1.2 0 0 1 22 8.271v7.477a1.2 1.2 0 0 1-1.694 1.093l-3.32-1.5A4 4 0 0 1 13 19H6a4 4 0 0 1-4-4V9Zm15 4.154 3 1.356V9.654l-3 1.725v1.775ZM15 9a2 2 0 0 0-2-2H6a2 2 0 0 0-2 2v6a2 2 0 0 0 2 2h7a2 2 0 0 0 2-2V9Z" clip-rule="evenodd"/></svg> </a> {{ /if }} {{ if repo_link }} <a class="repo-link" href="{{ repo_link }}" target="_blank" rel="noopener noreferrer"> <span class="repo-link__label">repo</span> <svg class="repo-link__svg" xmlns="http://www.w3.org/2000/svg" viewBox="0 0 21.557 21.025"><path fill="#3fd9ee" d="M10.778 0A10.779 10.779 0 0 0 7.37 21c.539.094.741-.229.741-.512 0-.256-.013-1.1-.013-2.007-2.708.5-3.409-.66-3.624-1.266a3.919 3.919 0 0 0-1.1-1.522c-.377-.2-.916-.7-.013-.714a2.157 2.157 0 0 1 1.657 1.1 2.3 2.3 0 0 0 3.139.889 2.267 2.267 0 0 1 .687-1.442c-2.4-.269-4.9-1.2-4.9-5.322a4.2 4.2 0 0 1 1.1-2.9 3.873 3.873 0 0 1 .103-2.844s.9-.283 2.964 1.1a10.162 10.162 0 0 1 5.389 0c2.061-1.4 2.964-1.1 2.964-1.1a3.873 3.873 0 0 1 .108 2.856 4.17 4.17 0 0 1 1.1 2.9c0 4.136-2.519 5.052-4.918 5.322a2.552 2.552 0 0 1 .728 1.994c0 1.442-.013 2.6-.013 2.964 0 .283.2.62.741.512A10.784 10.784 0 0 0 10.778 0Z" data-name="Icon akar-github-fill"/></svg> </a> {{ /if }} </div> </div> <p class="web-project__description">{{ summary }}</p> <div class="web_project__tags"> {{ projectTags }} <span class="web-project__tag">{{ title }}</span> {{ /projectTags }} </div> </div> </div> {{ /collection:projects }}Understanding the Collection Tag: Here, you can see that we’re telling the Collection Tag to use the Projects collection. Inside this tag pair is a loop that iterates over each entry, giving us access to all the data available through
variables.- URL Pattern: The URL will follow the pattern you set in the route rule, such as
/projects/rfc-doggen. If you click this link, you’ll be taken to a new page that uses theresources/views/projects/show.antlers.htmltemplate.
- URL Pattern: The URL will follow the pattern you set in the route rule, such as
Next Step: Since
show.antlers.htmlis currently empty, there’s not much to see. Let’s edit that template next to create the detail view for each project.
STEP 9: The Projects "Show" Page
Now that we’re on an entry's unique URL, we no longer need the collection:projects tag pair to fetch data. All of the entry's data is available automatically.
Add Detail Page Markup: Here’s a snippet you can drop into
show.antlers.htmlto display the project's data:html<header> <nav class="header__inner"> <a href="/">Bénoît Biraguma</a> <a href="/#">About</a> </nav> </header> <main> <div class="main__inner"> <div class="page-header"> <h1 class="page-header__title">{{ title }}</h1> <div class="page-header__right"> <a class="link-hover" href="/projects"> <span class="link-hover__label">Go back</span> <svg class="link-hover__svg" xmlns="http://www.w3.org/2000/svg" viewBox="0 0 17.858 16.704"><path fill="none" stroke="#3fd9ee" stroke-linecap="round" stroke-linejoin="round" stroke-width="2" d="M1 8.352h15.858M9.92 1.414l6.938 6.938L9.92 15.29" data-name="Icon akar-arrow-up"/></svg> </a> </div> </div> <div class="web-projects"> <div class="web-project__header"> <div class="web-project__links"> {{ if live_link }} <a class="live-link" href="{{ live_link }}" target="_blank" rel="noopener noreferrer"> <span class="live-link__label">live</span> <svg class="live-link__svg" xmlns="http://www.w3.org/2000/svg" viewBox="0 0 17.858 16.704"><path fill="none" stroke="#3fd9ee" stroke-linecap="round" stroke-linejoin="round" stroke-width="2" d="M1 8.352h15.858M9.92 1.414l6.938 6.938L9.92 15.29" data-name="Icon akar-arrow-up"/></svg> </a> {{ /if }} {{ if recording_link }} <a class="recording-link" href="{{ recording_link }}" target="_blank" rel="noopener noreferrer"> <span class="recording-link__label">recording</span> <svg class="recording-link__svg" xmlns="http://www.w3.org/2000/svg" fill="none" viewBox="0 0 24 24"><path fill="#3fd9ee" fill-rule="evenodd" d="M2 9a4 4 0 0 1 4-4h7a4 4 0 0 1 4 4v.072l3.202-1.84A1.2 1.2 0 0 1 22 8.271v7.477a1.2 1.2 0 0 1-1.694 1.093l-3.32-1.5A4 4 0 0 1 13 19H6a4 4 0 0 1-4-4V9Zm15 4.154 3 1.356V9.654l-3 1.725v1.775ZM15 9a2 2 0 0 0-2-2H6a2 2 0 0 0-2 2v6a2 2 0 0 0 2 2h7a2 2 0 0 0 2-2V9Z" clip-rule="evenodd"/></svg> </a> {{ /if }} {{ if repo_link }} <a class="repo-link" href="{{ repo_link }}" target="_blank" rel="noopener noreferrer"> <span class="repo-link__label">repo</span> <svg class="repo-link__svg" xmlns="http://www.w3.org/2000/svg" viewBox="0 0 21.557 21.025"><path fill="#3fd9ee" d="M10.778 0A10.779 10.779 0 0 0 7.37 21c.539.094.741-.229.741-.512 0-.256-.013-1.1-.013-2.007-2.708.5-3.409-.66-3.624-1.266a3.919 3.919 0 0 0-1.1-1.522c-.377-.2-.916-.7-.013-.714a2.157 2.157 0 0 1 1.657 1.1 2.3 2.3 0 0 0 3.139.889 2.267 2.267 0 0 1 .687-1.442c-2.4-.269-4.9-1.2-4.9-5.322a4.2 4.2 0 0 1 1.1-2.9 3.873 3.873 0 0 1 .103-2.844s.9-.283 2.964 1.1a10.162 10.162 0 0 1 5.389 0c2.061-1.4 2.964-1.1 2.964-1.1a3.873 3.873 0 0 1 .108 2.856 4.17 4.17 0 0 1 1.1 2.9c0 4.136-2.519 5.052-4.918 5.322a2.552 2.552 0 0 1 .728 1.994c0 1.442-.013 2.6-.013 2.964 0 .283.2.62.741.512A10.784 10.784 0 0 0 10.778 0Z" data-name="Icon akar-github-fill"/></svg> </a> {{ /if }} </div> </div> <div class="web-project__thumbnail"> {{ thumbnail }} <img src="{{ url }}" alt="{{ alt }}"> {{ /thumbnail }} </div> <div class="web-project__content"> <p class="web-project__description">{{ content }}</p> </div> </div> </div> </main> <footer> <nav class="footer__inner"> <a href="https://www.linkedin.com/in/beno%C3%AEt-biraguma-48422a194/" target="_blank">Let's connect</a> </nav> </footer>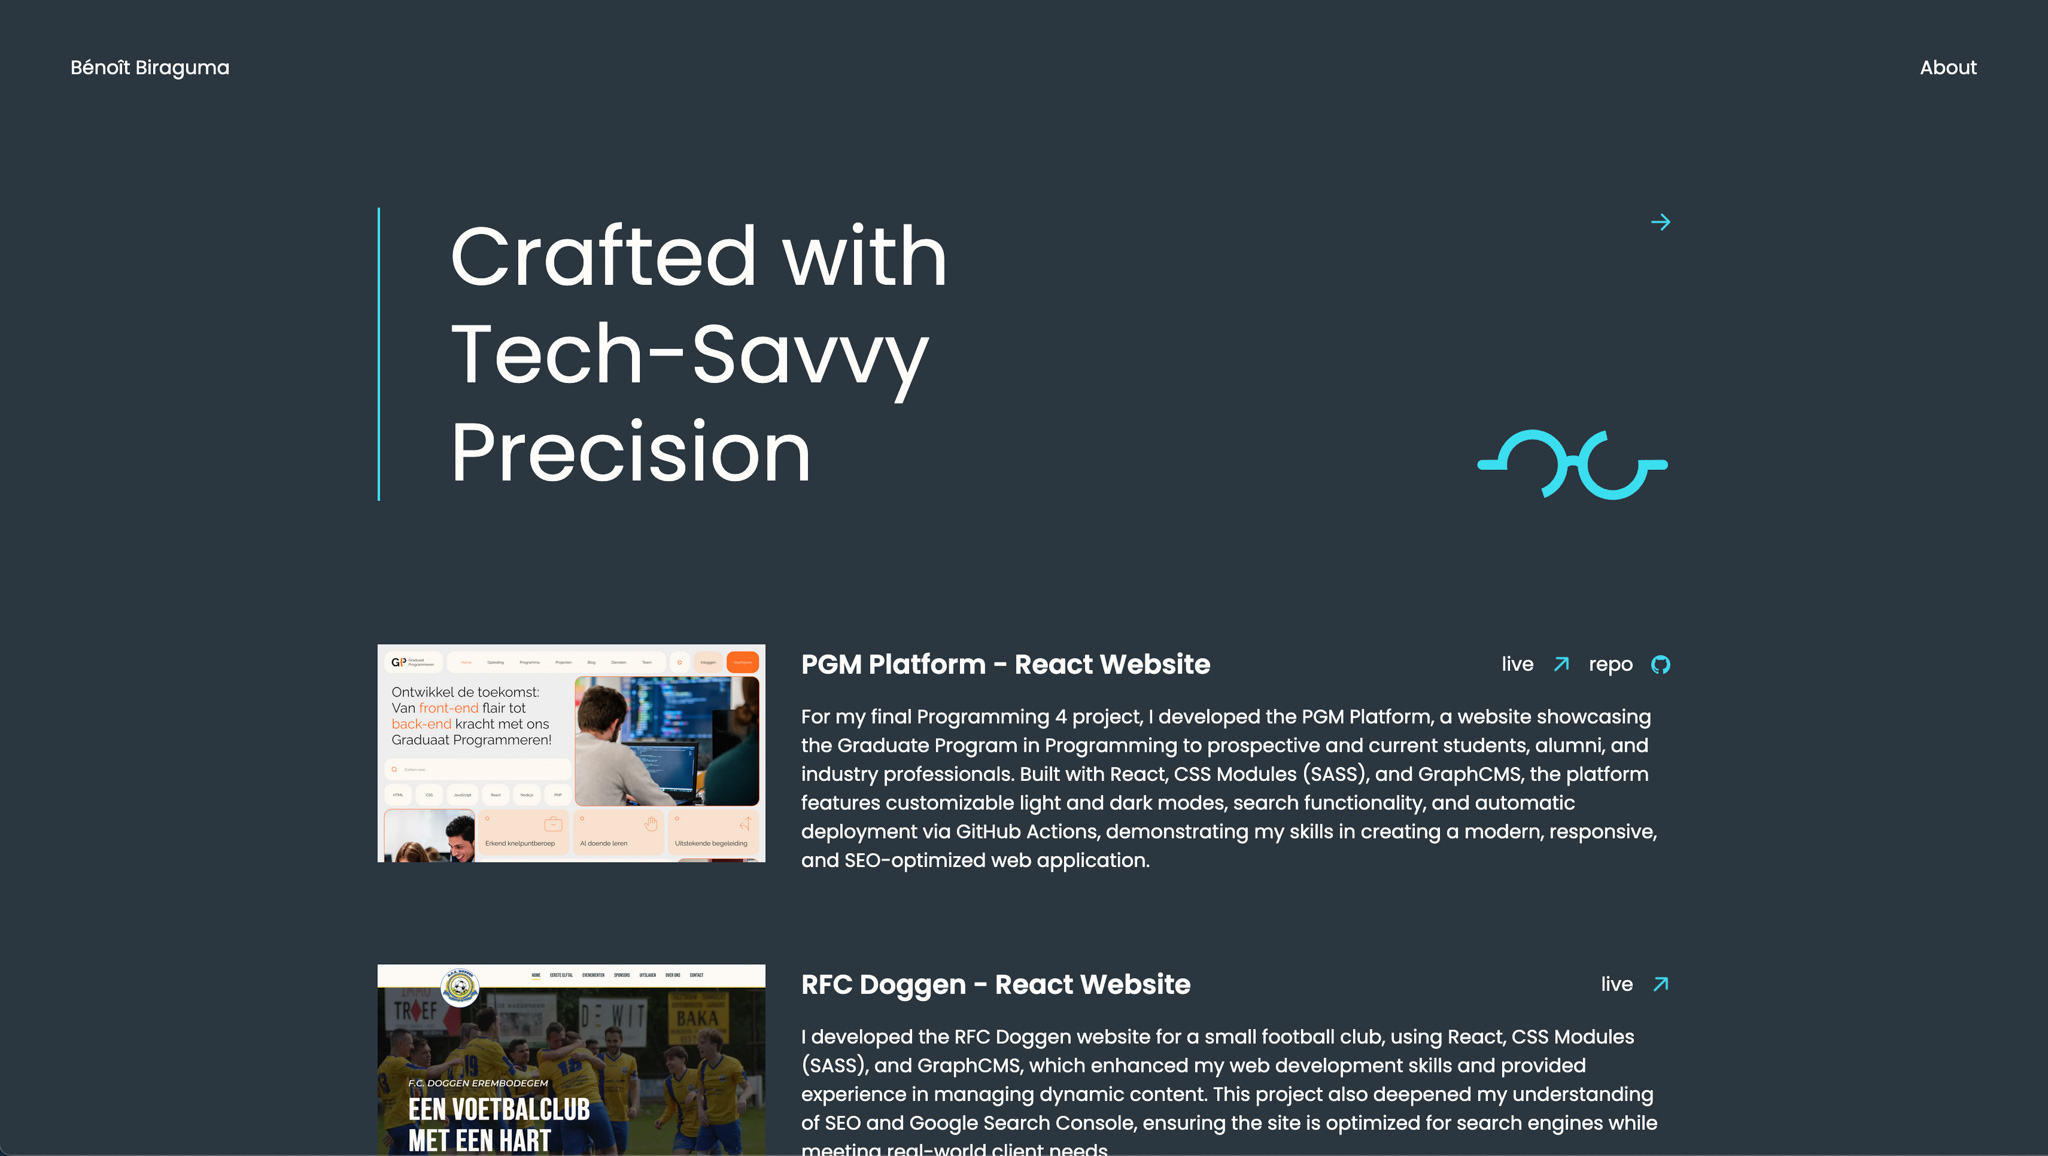
Note on Content Fields:
- The Content field is automatically converted from Markdown to HTML because we’re using a Markdown field.
- If you were to use a generic Textarea field, you’d need to transform the Markdown manually by using a modifier. For example:html
{{ textarea | markdown }}
This will parse the Markdown content correctly for display.
STEP 10: What Now?
Voilà! You’ve just built my portfolio website. It’s not perfect, and there are definitely things you can upgrade if you have the time or want to explore Statamic further. Here are a couple of ideas to enhance your project (or take on a challenge by building the design side of my portfolio—are you up for it?):
Partials: Just like in 11ty, you can create partials for reusable template chunks in Statamic. Try making one for the header and the footer. The convention is to prefix the template with an underscore to indicate that it’s a reusable partial and not a full layout.
The Nav Tag: The nav tags are designed to help users navigate through your hierarchy of navigations and collections. The nav tag works similarly to the collections tag. It loops through the entries and gives you access to all the data inside each. For more details, check out the Statamic documentation.
Advanced: Create a new collection for categories like on my portoflio (https://benoitbiraguma.be/web-development-projects). But add the abbility for the user to filter on a category. So for example when clicking on 'React' I only see projects that also have this category. See Statamic relationships for more information.
For more learning, Statamic offers a screencast series covering the basics and much more advanced topics. Feel free to check that out here. Good luck!
Statamic Addons
Statamic’s ecosystem offers powerful addons that extend its core functionality, allowing you to customize and enhance your website without reinventing the wheel. Addons are like plugins or extensions, but they integrate seamlessly into Statamic’s architecture. Whether you’re looking for advanced features, workflow improvements, or third-party integrations, addons provide endless possibilities for building robust and feature-rich sites.
Key Features of Addons
- Extensibility: Statamic’s addon system allows developers to add custom features using PHP, JavaScript, and Statamic APIs.
- Integration: Addons can connect Statamic to external services like CRMs, payment gateways, analytics, and marketing tools.
- Customization: Create your own custom fields, fieldtypes, or control panel utilities to tailor Statamic to your specific project needs.
Popular Addon Types
SEO Tools
Addons like SEO Pro help optimize your site for search engines, offering metadata management, sitemap generation, and social media previews.E-commerce
Statamic supports e-commerce through addons like Shopify, enabling you to manage products, stock, and customization on the front.Form Builders
Addons like Livewire Forms allow you to create and manage complex forms without writing code. So you can have features like: validation, spam protection, multi-site support...Image Optimization
Tools like Optimize image automatically generate optimized images to improve performance.Custom Fieldtypes
Addons let you add unique fieldtypes beyond Statamic’s default options. For example, map selectors, date pickers, or markdown editors.Third-Party Integrations
Integrate Statamic with platforms like Stripe, Mailchimp, Google Analytics, and more using purpose-built addons.
Installing Addons
Statamic makes it simple to install and manage addons through Composer. For example, you can add an addon by running:
composer require vendor-name/addon-nameOnce installed, Statamic will automatically recognize the addon, and you can configure it through the Control Panel or config files.
Build Your Own Addon
If you can’t find an addon that meets your requirements, Statamic allows you to build your own! The platform provides clear documentation and tools to create custom addons, empowering developers to extend Statamic’s capabilities as needed.
With addons, Statamic becomes a highly extensible and versatile CMS that can adapt to almost any project requirement. Whether you’re building a portfolio, blog, e-commerce site, or custom business solution, addons are the key to unlocking new levels of functionality and creativity.
Future Versions and Updates
Statamic is continuously evolving to provide new features, enhanced performance, and better user experiences. Here’s a glimpse into the future of Statamic with its upcoming v5 release and other planned improvements, along with how these features can enhance your portfolio website.
Statamic Core Roadmap
In Progress: Statamic v5
The next major version of Statamic is in active development, focusing on modernization, performance, and improved usability. Key highlights include:
Laravel 11 Compatibility
Full support for the latest version of Laravel ensures your portfolio stays on a secure and modern framework, benefiting from the latest tools and improvements.Significant Performance Improvements
Faster load times are crucial for portfolio websites to create a smooth user experience and improve SEO rankings. A lightning-fast website ensures potential clients can browse your work without delays.Multi-Site Management in the Control Panel
If you manage multiple portfolio websites (e.g., one for web development and another for design), you’ll be able to control everything from a single Statamic dashboard.Laravel Prompts for CLI Commands
Streamlined development workflows mean you can set up or adjust your portfolio more efficiently using intuitive CLI tools.CLI Commands for First-Party Packages
Quickly install and configure packages like Statamic’s Static Site Generator (SSG) to turn your portfolio into a blazing-fast static site. This is ideal for minimizing hosting costs while maintaining excellent performance.Strategic Breaking Changes
Improvements in the core experience ensure your portfolio remains future-proof, clean, and easy to maintain without unnecessary complexity.Offline License Validation
Deploying your portfolio to restricted environments (e.g., corporate networks or offline demonstrations) becomes easier with secure offline license validation.
Next Planned Features
These upcoming enhancements can further improve the functionality and customization of your portfolio website:
Custom Image Drivers
Swap out Glide with other image transformation drivers for more control over image quality and optimization. This is particularly useful for portfolios where high-quality visuals are a key focus.Passkeys
Add modern, passwordless authentication options to your portfolio’s control panel, ensuring secure and convenient access to manage your site.Improved Stache Warmer
Speed up cache warming, ensuring instant access to your latest projects and updates without slow load times for users or yourself when managing the site.Two-Way Relationships
Simplify how you relate content, like connecting projects to categories or linking specific blog posts to related projects. For example, a project page could automatically display related design categories, and vice versa.Trailing Slash Support
Improve SEO and URL consistency with support for trailing slashes, helping search engines properly index your portfolio pages.
Why This Matters for Your Portfolio Website
The upcoming features in Statamic v5 and beyond will make building and maintaining a portfolio website more efficient, secure, and scalable. Whether you're focusing on performance, improved workflows, or advanced content relationships, Statamic’s roadmap ensures your portfolio stays modern and optimized for both users and search engines.
Keep an eye on the official roadmap and stay updated as these features roll out. Statamic’s continued evolution means your portfolio will always have access to cutting-edge tools to showcase your work beautifully and effectively.
Conclusion and Thoughts
Building this portfolio with Statamic was a smooth and enjoyable experience. The combination of a user-friendly Control Panel and well-organized documentation made the process clear and straightforward.
Statamic provides the perfect balance of flexibility and simplicity. Whether you’re a developer who enjoys working directly with code or someone who prefers a more visual, CMS-powered approach, Statamic caters to both workflows effortlessly. Its blueprint system, powerful templating engine, and the ability to easily extend functionality with addons make it a fantastic tool for creating dynamic, customized websites.
For developers looking for flexibility, modern tools, and a CMS that works with them rather than against them, Statamic is a perfect choice. It empowers you to build unique projects like this portfolio efficiently while maintaining full control over the design and content structure.
Happy building, and enjoy showcasing your work with a CMS that’s designed for developers, by developers.